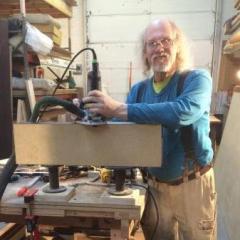
wdwerker Posted March 14, 2014 Author Report Share Posted March 14, 2014 We got both side frames all glued up today. The pictures I posted from the dry run clamp up came in handy. There were so many joints to get clamped up tight and perfectly aligned that already having the clamps ready for each angled joint was needed. While I was waiting for the first half to set up for a couple of hours I tried out my new 3/4" radius Quadracut round over bit. Made a sample of the handrail and rounded the arches . The bit is 2" in diameter and has a max 16000 rpm so I grabbed my variable speed router from my little router table. It cut beautifully with no burns or tearout. Clamped up the second side and couldn't resist clamping the first one to the stairs just to take a look. Even with just a few clamps on it I could tell the railings are going to be quite strong . Quote Link to comment Share on other sites More sharing options...
..Kev Posted March 15, 2014 Report Share Posted March 15, 2014 Looks amazing! Quote Link to comment Share on other sites More sharing options...
Llama Posted March 15, 2014 Report Share Posted March 15, 2014 Wow! Seriously great work here! Even if I could make one of the rails, I'd never be able to make the other one to match! Awesome! Very nice!! 1 Quote Link to comment Share on other sites More sharing options...
wdwerker Posted March 15, 2014 Author Report Share Posted March 15, 2014 Glad you understand the worry I had about them matching ! Cut each part to the exact same length . Marked each one the same and double checked, then triple checked ! Still almost put the lower cross member in backwards, twice ! If it rains tomorrow I think I'm going to go pull the clamps and see how well they match. Quote Link to comment Share on other sites More sharing options...
Llama Posted March 15, 2014 Report Share Posted March 15, 2014 Indeed! That's why I make animals now 1 Quote Link to comment Share on other sites More sharing options...
..Kev Posted March 15, 2014 Report Share Posted March 15, 2014 Judging by your attention to detail Steve, I'm pretty sure they'll come out dead on! Quote Link to comment Share on other sites More sharing options...
Freddie Posted March 15, 2014 Report Share Posted March 15, 2014 Looks awesome Steve! Imagine having a huge horizontal bandsaw. That way, you could build the 2 railings as on in a thick block from start to finish. Then run it through the horizontal bandsaw and slice in half, revealing two identical railings. That would just be too easy though right? Quote Link to comment Share on other sites More sharing options...
wdwerker Posted March 15, 2014 Author Report Share Posted March 15, 2014 I got the whole staircase dry fitted and clamped up today ! Took a few pictures but I need to crop and resize them for posting. Got a hot date tonight so it might be Sunday night until I can post them. Everything came out rock solid. No flex in the handrails . I cautiously climbed to the top and felt very comfortable standing on the platform. Between the relief of getting this assembled and my date tonight I should sleep very well ! 1 Quote Link to comment Share on other sites More sharing options...
Freddie Posted March 15, 2014 Report Share Posted March 15, 2014 Or not sleep at all. 1 Quote Link to comment Share on other sites More sharing options...
wdwerker Posted March 16, 2014 Author Report Share Posted March 16, 2014 Great appetizers and then we went to dinner ! We got home early and I got the pictures edited. Standing on the platform I could almost touch the 16 ft warehouse ceiling. Of course the staircase is sitting on my outfeed/ assembly table. I like the way the arches look with the 3/4" round over . 1 Quote Link to comment Share on other sites More sharing options...
..Kev Posted March 16, 2014 Report Share Posted March 16, 2014 That is awesome! You have much to be proud of Steve! Quote Link to comment Share on other sites More sharing options...
Tom Crawford Posted March 16, 2014 Report Share Posted March 16, 2014 Impressive! How tall is it? maybe you said earlier but I don't remember. Quote Link to comment Share on other sites More sharing options...
wdwerker Posted March 16, 2014 Author Report Share Posted March 16, 2014 It is going to be just under 8 feet tall by 30 inches wide and just over 4 feet long at the base. Quote Link to comment Share on other sites More sharing options...
Janello Posted March 17, 2014 Report Share Posted March 17, 2014 Can't wait to see this with a finish on it. Excellent work Steve! Quote Link to comment Share on other sites More sharing options...
prov163 Posted March 18, 2014 Report Share Posted March 18, 2014 Wow. I've been watching this build from the start and am truly blown away by the project. Amazing work, Steve. Sent from my iPad using Tapatalk Quote Link to comment Share on other sites More sharing options...
wdwerker Posted March 18, 2014 Author Report Share Posted March 18, 2014 Thanks for the kind words! Spent the day yesterday going over the entire piece marking for all the round over work to shape the edges. Handrails and arches are going to get 3/4" radius to be friendly to hands. All the posts just get an 1/8 radius to soften the corners. Then there is the transition between the 2 sizes on each post. That took some testing and careful layout of where to stop. I am going to clamp blocks on either side of the post to stop the bearing. There were a bunch of places that needed to remain square for the final glue joints that bring the 2 side frames, staircase and all the crosspieces together. Those will have to be sanded and routed after the last glue up. Not much to photograph at this stage. Quote Link to comment Share on other sites More sharing options...
wdwerker Posted March 19, 2014 Author Report Share Posted March 19, 2014 Really got the ball rolling today ! I had my girlfriend come by and try out the railings and general fit on the stairs. She is 4'8" tall and the client is about 5'2" so if Sue can be comfortable the client should be too ! While she was there I got a picture of me on the stairs. Quote Link to comment Share on other sites More sharing options...
wdwerker Posted March 19, 2014 Author Report Share Posted March 19, 2014 Took it apart and went to town routing all the railings. You can see the upper part is routed, the lower part has the stop set up ready to be routed. Had to clamp on stop blocks to keep from rounding over too much of the vertical posts. So it was set up, route a short section, move and set up more stops and route again all afternoon. Quote Link to comment Share on other sites More sharing options...
wdwerker Posted March 19, 2014 Author Report Share Posted March 19, 2014 Had to make sure the router was supported to prevent it from tipping and gouging . It takes 4 passes with the router to get the round shape I am after. So after routing each post transition we have to flip the side frame and route the other side with the stop blocks in the exact same position. Side by side with a square stock side frame the effect of all the router work looks pretty good to me ! Quote Link to comment Share on other sites More sharing options...
chrisphr Posted March 19, 2014 Report Share Posted March 19, 2014 Whatever they are paying, your clients get more than their money's worth! Fabulous build and project journal. Quote Link to comment Share on other sites More sharing options...
bikefoolery Posted March 19, 2014 Report Share Posted March 19, 2014 Wow, looking forward to the finish. I like how my eye just follows along the curves up up up the staircase. Quote Link to comment Share on other sites More sharing options...
..Kev Posted March 19, 2014 Report Share Posted March 19, 2014 Stunning attention to detail Steve! Looking forward to the finish! Quote Link to comment Share on other sites More sharing options...
wtnhighlander Posted March 19, 2014 Report Share Posted March 19, 2014 That looks awesome! Quote Link to comment Share on other sites More sharing options...
TRBaker Posted March 19, 2014 Report Share Posted March 19, 2014 Excellent, as always, Steve. Looking forward to seeing the final product. Quote Link to comment Share on other sites More sharing options...
wdwerker Posted March 21, 2014 Author Report Share Posted March 21, 2014 Over 8 hours of sanding ! Had to to be done, wasn't fun. Pulled out every tool, grit and trick I knew and used them all. Blow all the dust off and found a few joints that were less than perfect . I am sure we all have those. Part of the joint slightly open or the edges were slightly chipped ? Time for the filler , but on open grained wood like walnut or mahogany if you are not careful you can end up with a section of smooth filled grain in an expanse of open pores which will stick out like a proverbial " turd in the punch bowl " I tape off the area needing filler. And then use the filler Let it dry for 20 minutes or so before peeling the tape carefully (water based filler) and another 30 to 45 minutes and then it is back to more sanding( oh joy ! ) That's all I got for today guys ! With any luck we should be able to do the final assembly and glue up tomorrow. I was curious how much this project was going to weigh. Brought in the bathroom scale and weighed up all the sanded parts, totaled up the numbers and 128 lbs of casters and mahogany surprised me. I was guessing closer to 300. 1 Quote Link to comment Share on other sites More sharing options...


Recommended Posts
Join the conversation
You can post now and register later. If you have an account, sign in now to post with your account.