wdwerker Posted February 27, 2014 Report Share Posted February 27, 2014 I have seen these Blokkz at the trade shows for a few years but didn't think I really needed them. Then I started my rolling staircase job and started thinking about having multiple angled joints to clamp up on a large complex piece of functional furniture. Shopped around and got a set of 8 Blokkz with the rubber pads and some other accessories for $79 from Klingspor. They sell one pair for about $25 ( which is why I hadn't tried a pair ) Just tried a sample clamp up. Dry fit ,no domino in the joint. No slippage or creep when I cranked down on the Bessey across the joint. I will post an update as the rolling staircase job comes together and the Blokkz get a real world tryout. Quote Link to comment Share on other sites More sharing options...
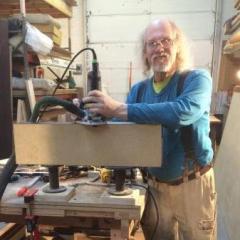
wdwerker Posted March 1, 2014 Author Report Share Posted March 1, 2014 OK I got to use them this afternoon to clamp the first of many angled joints in this staircase project. I did a dry run to figure out what worked. The ad's for Blokkz mostly show narrow parts being clamped. My wider parts and curves posed a challenge. I screwed the aluminum " P " shape to the end grain that will be covered by the next joint. Everything pulled up into a nice tight joint and I couldn't be happier ! 1 Quote Link to comment Share on other sites More sharing options...
Freddie Posted March 1, 2014 Report Share Posted March 1, 2014 Very nice Steve. Never seen this product before, looks very useful in your unique glue ups. Quote Link to comment Share on other sites More sharing options...
TerryMcK Posted March 1, 2014 Report Share Posted March 1, 2014 I've seen them and they look good. The only issue is the price. That's the only thing that put me off. Quote Link to comment Share on other sites More sharing options...
Eric. Posted March 1, 2014 Report Share Posted March 1, 2014 If you can get 'em for less than $10 each that seems totally reasonable. They look very handy...I might get some. The only way I know around those awkward glue-ups is the old fashioned way which can be time consuming and require you to glue on clamping blocks to your nearly finished piece...and that sucks. So it's the grippy stuff on the bottom that allows you to clamp them in weird positions with no other support? That last pic you posted is wild...doesn't seem like that should work but it clearly does. Quote Link to comment Share on other sites More sharing options...
wdwerker Posted March 1, 2014 Author Report Share Posted March 1, 2014 Most of the applications you clamp the Blokkz with the rubber strip to the board sideways and then clamp the joint across them. I had to screw the top one in place so it wouldn't slip when I put the pressure on. The screw hole will be covered by the next joint Quote Link to comment Share on other sites More sharing options...
PaulMarcel Posted March 1, 2014 Report Share Posted March 1, 2014 They are a lot larger than I expected. I have 2. For some small glue-ups, the size can be an issue. For my Angle Madness project, even the size of Miter Stitches (half that of Bloxx) was an issue. Starting at 3:28 of the glue-up episode, I show using the Miter Stitch to know how it works then show doing the same thing on a smaller joint using any scrap. Episode link here. Video starting at 3:28 here: Quote Link to comment Share on other sites More sharing options...
wdwerker Posted March 2, 2014 Author Report Share Posted March 2, 2014 Yes , the size might be a limitation in some cases. And my trick of screwing the Blokkz in place won't work for exposed faces. The videos they have posted show a long mitered joint being clamped with a row of Blokkz on a 3/4" metal rod. The ones on the edges are clamped in place and the rod holds the middle ones. That could be handy for a big mitered case glue up. You can see the screw hole which will be concealed by the next joint . Quote Link to comment Share on other sites More sharing options...


Recommended Posts
Join the conversation
You can post now and register later. If you have an account, sign in now to post with your account.