AstroDave Posted December 19, 2014 Author Report Share Posted December 19, 2014 Eric for me it's familiarity and timing. I agree the RT sounds like the more precise way to do this. However I have never built a jig and have maybe 15m XP on a router table. For now it just seem simpler to slap a backer board on my cut piece and use the bandsaw. After Christmas when I go into full time Beer Tote business I will build the jig Quote Link to comment Share on other sites More sharing options...
Raefco Posted December 19, 2014 Report Share Posted December 19, 2014 I just don't know why you guys would bother doing this on the bandsaw when you could get perfect curves on the router table in a fraction of the time with a fraction of the labor. Of course you'd rough out the shape and hog off most of the meat at the bandsaw first...but then slap that puppy on the RT and be done. Guess it's just me. If all that mattered was time and they were being built strictly for profit, I'd just take some wood and a patten to the local water jet guy and have them cut for a buck a piece. Quote Link to comment Share on other sites More sharing options...
Eric. Posted December 19, 2014 Report Share Posted December 19, 2014 The fact that it would be faster is incidental...the important part is that you'd be able to create a perfectly fair curve with very little effort or skill. It will be a challenge to do that with a bandsaw and sandpaper. Dave, I'm certainly not trying to push you to do something you're not comfortable with...far from it. But building jigs is a big part of woodworking, so there's no better time than now to knock out your first one. And if the jig is built with safety in mind, it really isn't a dangerous operation on the RT. You're not really gonna encounter any tricky grain with the pieces you're working on. As long as you don't try to hog too much meat off and your hands are a safe distance away, it's a pretty basic operation. But you should definitely only do what you're comfortable doing. Quote Link to comment Share on other sites More sharing options...
Coop Posted December 19, 2014 Report Share Posted December 19, 2014 So I finally managed to get back in the shop to get some work done on the beer totes. The biggest challenge I am facing is cutting the curved sides. Ultimately I think I will be cutting them well over-sized and sanding to the find size. Here's a closer shot of the curved side that obviously doesn't work but I will use as a basic template I didn't have anything handy to make a curve and ended up using of my cats toys I make these drawing bows from wood yard sticks by cutting a notch in both ends for the string. When they break, toss em and make a new one. The asymmetric one, I got from LV. Quote Link to comment Share on other sites More sharing options...
AstroDave Posted December 21, 2014 Author Report Share Posted December 21, 2014 Ended up using the bandsaw and slapped a 2x4 on the piece I was cutting with hot glue. I'll grab some pics once I've got the third one glued up. Quote Link to comment Share on other sites More sharing options...
wdwerker Posted December 21, 2014 Report Share Posted December 21, 2014 That CMT jig you linked to looks interesting. Has anyone seen or played with one? Quote Link to comment Share on other sites More sharing options...
AstroDave Posted December 21, 2014 Author Report Share Posted December 21, 2014 OK... I have to admit this stuff is harder than it looks Still not done but almost ready to apply finish. Oh and personally I like the one in the middle with the plugs... the buttons look silly but hey it's my first attempt at a real project. Finish these tonight and I might just be able to get the cutting/serving/bread boards done... Quote Link to comment Share on other sites More sharing options...
..Kev Posted December 21, 2014 Report Share Posted December 21, 2014 Looking good.. I prefer the plugs as well but, that's how you learn. Looks like the handles beat you up a bit but, you did good! Quote Link to comment Share on other sites More sharing options...
Raefco Posted December 21, 2014 Report Share Posted December 21, 2014 I was starting to worry about you, your fingers and your basic well being, (after the "I'll be right back" comment). I'm glad to see piles of parts becoming products, very cool... Quote Link to comment Share on other sites More sharing options...
Eric. Posted December 21, 2014 Report Share Posted December 21, 2014 Good progress, Dave. Middle one is definitely the winner. Quote Link to comment Share on other sites More sharing options...
Tom Cancelleri Posted December 22, 2014 Report Share Posted December 22, 2014 Looking good Dave. You could always pare the buttons off and sand it flush for the plug look. Since it's done though I'd leave it as is. Quote Link to comment Share on other sites More sharing options...
AstroDave Posted December 22, 2014 Author Report Share Posted December 22, 2014 Got the first coat of armor-seal on the beer totes... So that was what you guys meant by "GET ALL THE GLUE OFF BEFORE FINISHING" Just a couple spots...makes it look homemade and that's my attitude and I learned something. Also got the 3 serving/cutting boards glued up... I may get adventurous and cut one on the bandsaw and do a funky strip...maybe the one for my sis...she'll appreciate it the most... Quote Link to comment Share on other sites More sharing options...
wouldwurker Posted December 23, 2014 Report Share Posted December 23, 2014 One coat of arm r seal doesn't mean you can't fix things. You've come this far..scrape that glue off, sand, lather rinse and repeat. 2 Quote Link to comment Share on other sites More sharing options...
Tom Cancelleri Posted December 23, 2014 Report Share Posted December 23, 2014 I think we need cutting board pics Dave. ;-) Quote Link to comment Share on other sites More sharing options...
AstroDave Posted December 23, 2014 Author Report Share Posted December 23, 2014 Incoming... Also a close up of the preferred beer tote Also how long should keep these clamped up before I can cut them up and re-glue up... gonna do something funky with my sisters cutting board. Quote Link to comment Share on other sites More sharing options...
Tom Cancelleri Posted December 23, 2014 Report Share Posted December 23, 2014 As a rule I keep my stuff in clamps for 24 hours. I'm guessing you used tite bond 3, which is 30 minutes minimum in clamps and don't stress the glue joint for 24 hours. Quote Link to comment Share on other sites More sharing options...
..Kev Posted December 23, 2014 Report Share Posted December 23, 2014 Also how long should keep these clamped up before I can cut them up and re-glue up... gonna do something funky with my sisters cutting board. Depends on the temp of your shop.. On days when I'm trying to get a lot accomplished, I'll keep my shop at about 70 degrees and let them cure for about 3 hours (titebond glue) and pull them out of clamps. I'll then run them thru the drum sander and cut/ flip them. Quote Link to comment Share on other sites More sharing options...
Popular Post wdwerker Posted December 23, 2014 Popular Post Report Share Posted December 23, 2014 Even after 40 years I still occasionally find missed glue squeeze out in the first stage of finishing. Sandpaper gums up incredibly fast so I use a sharp card scraper. Card scrapers take some practice to learn how to sharpen but they really are a versitile tool. I think they are a nessasarry basic tool everyone should have. 3 Quote Link to comment Share on other sites More sharing options...
AstroDave Posted December 24, 2014 Author Report Share Posted December 24, 2014 Well they're done...short of signing them... First the totes... Then the cutting boards... My original intent was to have two fishes for my neices and then an larger serving tray for my sister or a bigger fish but due to a router mishap... I will leave it to you to figure out which one had the mishap. Funny thing is I like that one best of all... I definitely need to have more time learning how to use my table...scared the crap out of me how it grabbed the piece... It was a pattern bit... I ended up skipping using it and just bandsawing and sanding to shape. 1 Quote Link to comment Share on other sites More sharing options...
wouldwurker Posted December 24, 2014 Report Share Posted December 24, 2014 Love the beer holders. Put me down for a sixer. Quote Link to comment Share on other sites More sharing options...
AstroDave Posted December 24, 2014 Author Report Share Posted December 24, 2014 Next year it's 12-pack holders... We drink a lot during the holidays Quote Link to comment Share on other sites More sharing options...
..Kev Posted December 24, 2014 Report Share Posted December 24, 2014 Great pieces Dave! Much to be proud of there! Quote Link to comment Share on other sites More sharing options...
Tom Cancelleri Posted December 24, 2014 Report Share Posted December 24, 2014 Impressive! For your first projects they came out really good. I love the fish design, especially the one that scared you with router bites. Quote Link to comment Share on other sites More sharing options...
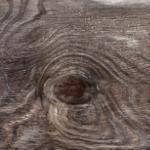
Eric. Posted December 24, 2014 Report Share Posted December 24, 2014 I agree, once again the middle one takes first place. It's that piece of cherry with all the color in it that makes it. ...scared the crap out of me how it grabbed the piece... It was a pattern bit... I ended up skipping using it and just bandsawing and sanding to shape. You were routing uphill. I learned that one the hard way, too. And poop fell out of me when it happened. A pattern bit with top and bottom bearings is a convenient thing to have...just flip the whole thing over when you start approaching uphill grain and rout in the other direction. Or chuck up a flush trim in the table and a pattern bit in a handheld...or vise versa...or keep swapping out bits on the table. Whatever it takes to avoid that scenario. It never ends well. Quote Link to comment Share on other sites More sharing options...
wtnhighlander Posted December 24, 2014 Report Share Posted December 24, 2014 Very nice! I have to agree, fish #2 has the coolest look, both in color AND shape. Sometimes mistakes are for the better! Quote Link to comment Share on other sites More sharing options...


Recommended Posts
Join the conversation
You can post now and register later. If you have an account, sign in now to post with your account.