kevinmallick Posted June 19, 2015 Author Report Share Posted June 19, 2015 Alright, so I'll warn everyone. I love photography and take a lot of photos. I almost always wish a project had more photos, so I will do my best to show more rather than not enough. I figure I might as well show everyone what is going on! I also switched from using my iPhone to my nice camera. I usually don't bring it in the shop due to all the dust, but what the hell... Plus this box is going to be a wedding gift and I think they will enjoy some documentation as well. On to the build. I sat in my garage looking around tonight and thought for a bit, when I got all creative (usually not a good thing for me). I really needed a fence for this operation to keep things nice and straight, and aside from some clamping makeshift fences down, the table saw was the best things I had. Now I can see all of you cringing as you read this... don't worry. I cringed as I thought it. I really don't like using the table on my saw for anything. But I ultimately decided that if I was extremely careful and took my time, that this could work. I set it up a few times with scrap lumber and even ran a "dry run" with no power to the router just to see how everything felt. "Houston! It's a GO!" First, I made sure everything squared up before labeling each board so I could keep them straight. This was mostly to make sure the joints that I spent time fitting went back in to the same place. And another look at the joint after being cleaned up with chisels. OK, so I measured the distance from the straight edge on my router base to the widest point of my bit. I think this was just a hair over 2.5", if I remember correctly. So after making sure the edge of my table was perpendicular to my fence (I was surprised at how exact it really was), I used it as a reference point for each piece as I clamped them to the table. Then I got the router up and made sure it looked ok and that the workpiece wasn't moving. Then got the depth stop set on the router... I started with the tenon pieces because they are the ones that get the through dado. I was able to work past the midway point of each workpiece, then would add a clamp to the side I just routed before removing the other clamp to prevent movement. Here are the finished tenon sides. Not bad for a handheld, routed, dado using clamps, the table saw top and fence! (-: Next, the stopped dados for the front and back. Here, I just made a nice thick pencil line to make sure I knew where to stop routing. I actually was too careful here and didn't go far enough. That means more chisel work to clean up the dado. And as we recall, my fingers and chisels don't get along. (-: Quote Link to comment Share on other sites More sharing options...
kevinmallick Posted June 19, 2015 Author Report Share Posted June 19, 2015 Ok, so they lined up really well! No problems here. Time to cut the 1/4" ply for the bottom. I would probably chose 1/8" ply normally, but I had 1/4" in the shop already and we have already established that I am... ahem, frugal. Yeah, lets go with frugal. (-: Honestly, it works better anyway, b/c the only 2 router bits I have are 1/4" and 1/2" anyway. Plus, after getting it in there, the 1/4 really makes it feel solid. I'm very glad it worked out this way. OK, it's in! But wait... It turns out that on the first stopped dado I stopped too soon. The ply was a tad too big for the dado when it was assembled. Not a bad problem to have. Better than too small! So I grabbed my 1/4" chisel and cleaned up the ends. It was still JUST A TAD too big. It fit, but the finger joints wouldn't sit properly with the ply in. So I just very slightly trimmed the plywood and it went in much better. Here she is. No glue yet. Just a dry fit. So far I am extremely happy and can't wait to move on to the top! Still undecided on what will line the bottom. My wife thinks red velvet and I can't argue that I think that would look awesome. I will contemplate that aspect while I spend the next few days adding the chamfers and sanding. I will likely get into town to pick up the lining that we decide on this weekend. Maybe I will have time to start on the top soon too! Thank you everyone for all of the suggestions and all the help! It's kind of odd, but I know most of you from reading here so often. Its about time I stop lurking and contribute to society! Haha. Thanks again! Quote Link to comment Share on other sites More sharing options...
wtnhighlander Posted June 19, 2015 Report Share Posted June 19, 2015 Nice work! And very well documented, too! Quote Link to comment Share on other sites More sharing options...
Tim Kohl Posted June 19, 2015 Report Share Posted June 19, 2015 nice using the TS fence as a straight edge for router Quote Link to comment Share on other sites More sharing options...
shaneymack Posted June 19, 2015 Report Share Posted June 19, 2015 Nice pics man! Keep em coming! Quote Link to comment Share on other sites More sharing options...
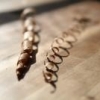
Coop Posted June 19, 2015 Report Share Posted June 19, 2015 Here is the one I made a while ago. H mahogany w ebony accents. Good start and keep it up. You do know those are wire nuts and not to be used in woodworking, right? Quote Link to comment Share on other sites More sharing options...
Brendon_t Posted June 19, 2015 Report Share Posted June 19, 2015 Wire nuts, loose tenons, same difference Quote Link to comment Share on other sites More sharing options...
kevinmallick Posted June 23, 2015 Author Report Share Posted June 23, 2015 Happy Monday everyone! I got very little shop time this weekend, but managed to do a little bit of work. I started by adding the chamfer to the front, back, and sides so that I can assemble that soon. After adding the chamfer, I went ahead and sanded the front, back, and sides to 220 grit. Using the chisel was definitely difficult and I learned that my chisels need to be sharpened. Add another thing to my list of projects and tools to buy. I used some mineral spirits after sanding to clean it off and get a glimpse at what the wood will look like. Here is a shot of the joint together with the finger chamfers after sanding. Just to be sure it all fit. Here I realized that the fingers required some cleaning up. My chisel work was not up to par and I went back to clean it up. OK, now what I did to work around not having a router table is not safe. I know that. Please don't replicate this. I was extremely careful and still didn't like it. Looking back at this decision, it was not ok and being cheap is not worth the injury that could have happened. I should have put this project on hold and addressed the shortcomings in my tool lineup. But I didn't. Here is what I came up with as a makeshift router table. This was the only way I could think to get the grooves cut for the breadboard ends. I didn't like this enough that I decided that after my panel glue up for the top, I will be using integral tenons rather than repeat this process for loose tenons. Again, I'm sorry. :-/ Here was my result. It worked. I'll leave it at that. I couldn't come up with stops so I just used pencil to mark the bit location and the places to stop on the workpiece. This was all that I got done on Saturday. I did some more work on the top today and my frugality continues to get in the way of this project. I will have some more photos and an update tonight probably. Quote Link to comment Share on other sites More sharing options...
kevinmallick Posted June 23, 2015 Author Report Share Posted June 23, 2015 Here is a look at the breadboard ends cut to length and sitting on the dry assembled box. Next, I rough cut 3 pieces from the original walnut board to 13 inches, and repeated the milling process. Jointing 2 sides, then using the bandsaw set at 5/8" with the intention of jointing the cut side down a bit. Definitely not perfect, but it worked well enough for the front, back, and sides. Just another look at the dry fit box with the breadboards sitting "in place". Here are the halfway milled boards sitting where they will be after milling is complete. You can see the extra length that I will leave there for the integral tenons. I will likely use a dado blade on the table saw and trim to size. Hopefully all goes well. I grabbed those 3 boards and ripped them down to 4" each. Giving the 12" top panel. Then came one of the most frustrating glue ups ever. Broke cheap clamps in the process, after already starting the glue up. Then didn't have enough clamps. It was already a bad process b/c each board was a different thickness, even if only a little bit. I tried to use 2 jointed boards as cauls and the thought was to make sure there was a clamp on each board to keep them aligned on the one edge. Easier said than done. The glue up seems strong and there was good squeeze out, but I am sure I will have plenty of card scraping and sanding to get this panel looking good. Oh well. I'm likely to be busy with work until the weekend. I'll have more then! Thanks! Quote Link to comment Share on other sites More sharing options...
wtnhighlander Posted June 23, 2015 Report Share Posted June 23, 2015 That's a lot accomplished for "not getting much time in the shop"! Looking good, too. Quote Link to comment Share on other sites More sharing options...
kevinmallick Posted June 26, 2015 Author Report Share Posted June 26, 2015 Happy Friday everyone! So the glue up went... ok. It's a nice tight, strong bond. But as expected, the thickness of each piece was different and made flattening the panel an issue. As I don't have the router table and didn't like the idea of setting up my router as I did before, I decided to cut the panel a little wide and use integral tenons that would extend into the breadboard ends. Here, you see the panel trimmed to length (12 1/2") with pencil identifying high spots that need to be knocked down to make the panel "flat". The second photo shows the extra length left for the tenons. Not sure if this was the best approach, but it was the only logical way that I could think of to get the panel more flat. I just kept eyeballing each edge and then penciled the high spots and knocked them down. This process was slow. Just used 80Grit sanding pads on my random orbital sander, trying to be very even and careful not to be too aggressive. It was definitely not perfect, but I think the out of focus area in this photo makes it seem more curved than it was. It was relatively straight and flat on every edge. One effect of "flattening" and getting rid of some of the curves was thickness being inconsistent. Hopefully I will soon have better tools to remedy this, but for now, sanding it is... Here you can see that the panel didn't quite line up. My plan is to center it when gluing up the breadboard and then again carefully sand to get "flatness". Now it's time to put in the wobble dado and cut the integral tenons. Not a huge fan of the wobble dado, but it works for now. I used the breadboard groves from the router to set the depth of cut for the tenon. I chose to err on the side of thickness so I could "creep up" on the fit if needed. One thing to remember when using a wobble dado, is that your fence measurement becomes useless. Now I am in the habit of setting my fence initially by the table measurement and then verifying with a ruler. It has saved me a few times even though my table is pretty accurate. I definitely measure twice and cut once almost every time. In this case, I spin the wobble dado so that the right-most leaning tooth is up, and measure to the fence from there. In this case, since I want my showing panel to be 12", the fence is set to 12 1/4" as I will flip the board and have another 1/4" tenon on the other side. If you don't remember to measure from that tooth as mentioned above, your cut will be way off as shown in the second photo below. OK, here we go! Looks good! The fit was just a wee bit snug, so I then went to the table saw, VERY slightly raised the blade (remember that because you are going from each side, the changes is multiplied by 2!). Quote Link to comment Share on other sites More sharing options...
kevinmallick Posted June 26, 2015 Author Report Share Posted June 26, 2015 The integral tenon that we cut on the panel extends all the way to each end, which obviously will not fit in our stopped groove on the breadboard end. So I decided to VERY carefully remove the end material with the bandsaw. OK, now it looks good! Lets fit it! Here is the initial look with the top on the box. I eventually decided that the reverse side was the best to show up and the thickness looked better from the front when it was flipped as well. I will just have to pay special attention when I finally decide to put the hinges in. Now, before the glue up, I need to "spring" the breadboard ends. I simply used my card scraper (which badly needs to be sharpened), followed by some 120 grit sandpaper. Here you can see some light coming through, and then closing up when a lot of pressure was added. Then I added glue and clamped it up! 1 Quote Link to comment Share on other sites More sharing options...
wtnhighlander Posted June 27, 2015 Report Share Posted June 27, 2015 Looking good, and I like the thorough documentation! Quote Link to comment Share on other sites More sharing options...
kevinmallick Posted June 27, 2015 Author Report Share Posted June 27, 2015 I may have said somewhere in this thread already, but I decided to use some dark red velvet for the bottom. My wife found quite a bit in a roll on Craigslist nearby. Took a few days to get, but got a great deal and it looks awesome! Wiped off the ply with mineral spirits and cleaned it up as much as possible. Laid out the bottom over a swatch of pre-cut velvet. Used a razor to cut close, but not too close to the edge of the wood. I wanted to leave enough to glue down the side a little so it wouldn't look bunched or pop up when assembling the box. Here she is dry fitted with the velvet bottom all done up. 2 Quote Link to comment Share on other sites More sharing options...
..Kev Posted June 27, 2015 Report Share Posted June 27, 2015 Sweet! Quote Link to comment Share on other sites More sharing options...
bushwacked Posted June 27, 2015 Report Share Posted June 27, 2015 Oh wow that looks great!!! Quote Link to comment Share on other sites More sharing options...
wtnhighlander Posted June 27, 2015 Report Share Posted June 27, 2015 Red velvet looks great against the wood color. What adhesive did you use for the velvet? Quote Link to comment Share on other sites More sharing options...
kevinmallick Posted June 27, 2015 Author Report Share Posted June 27, 2015 Red velvet looks great against the wood color. What adhesive did you use for the velvet? I used 3M spray adhesive. I also used a touch of CA glue on the sides where needed to help keep it down while assembling. 1 Quote Link to comment Share on other sites More sharing options...
Brendon_t Posted June 27, 2015 Report Share Posted June 27, 2015 Be careful using CA glue under fabric. If it soaks through at all, it will leave a hard white crust on the show side. It's nice for pinning the underside but shouldn't be used where the fabric shows Quote Link to comment Share on other sites More sharing options...
kevinmallick Posted June 27, 2015 Author Report Share Posted June 27, 2015 Be careful using CA glue under fabric. If it soaks through at all, it will leave a hard white crust on the show side. It's nice for pinning the underside but shouldn't be used where the fabric shows Thanks for the heads up! Luckily I only used the CA on non-showing areas to keep it down. I got a bunch of the fabric so I'll have to remember for future projects. Quote Link to comment Share on other sites More sharing options...
Brendon_t Posted June 27, 2015 Report Share Posted June 27, 2015 Thanks for the heads up! Luckily I only used the CA on non-showing areas to keep it down. I got a bunch of the fabric so I'll have to remember for future projects. I use red velvet type fabric wrapped bottoms for most of the boxes I build. I ruined the first one. Fit a wrapped second bottom on top of it so it was ok but wish I had known beforehand Quote Link to comment Share on other sites More sharing options...
wouldwurker Posted June 29, 2015 Report Share Posted June 29, 2015 I may have said somewhere in this thread already, but I decided to use some dark red velvet for the bottom. My wife found quite a bit in a roll on Craigslist nearby. Took a few days to get, but got a great deal and it looks awesome! ] I hope you had those sheets dry cleaned first. Box looking great Quote Link to comment Share on other sites More sharing options...
wouldwurker Posted June 29, 2015 Report Share Posted June 29, 2015 Also, unless I missed it in a previous post...if you can swing it, definitely spend the extra couple bucks for the Brusso hinges...and have a clamping strategy for chiseling the hinges mortises . It's too late to sand out blood! Quote Link to comment Share on other sites More sharing options...
kevinmallick Posted June 29, 2015 Author Report Share Posted June 29, 2015 Also, unless I missed it in a previous post...if you can swing it, definitely spend the extra couple bucks for the Brusso hinges...and have a clamping strategy for chiseling the hinges mortises . It's too late to sand out blood! Thanks! I thought about the Brusso hinges, but couldn't swing it this time. I will be making another of these later this year and will probably do it then. I will definitely have to come up with a clamping strategy. I will figure something out for sure. Quote Link to comment Share on other sites More sharing options...
kevinmallick Posted June 30, 2015 Author Report Share Posted June 30, 2015 Got the box glued up over the weekend. It definitely was a process. Made sure it all stayed square. Then, on Sunday I got my little man (3 yrs old) to help me get the dowels in. I used the same bamboo skewers that they seems to use in the video. All said and done, this was one of the easiest parts of the box. My son loved it too. I did realize that I didn't have a flush trim saw, so got creative once again. I ended up chiseling a few that were pretty close and used some wire cutters on a few to get them really close for sanding. Then I sanded them flush with 220. Didn't get many process pics there as I was messing with the little man and preventing loss of any little fingers in the shop. I have actually finished the entire "box" minus the handle. I have more photos on the way. Maybe later tonight, possibly tomorrow. Thanks for looking! 1 Quote Link to comment Share on other sites More sharing options...


Recommended Posts
Join the conversation
You can post now and register later. If you have an account, sign in now to post with your account.