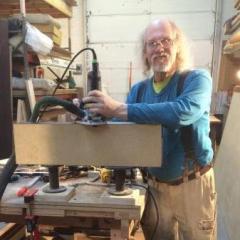
Popular Post wdwerker Posted January 22, 2016 Popular Post Report Share Posted January 22, 2016 I needed a new smaller outfeed table behind my sliding table crosscut saw. I have (6) 3' X 8' walnut hollow core doors that are taking up space in my plywood rack so why not use them ! Crosscut them with the tracksaw. Had to check for metal inside. They use those corrugated fasteners to hold the frame together when they build them. Very old doors so thicker veneer and stiff & flat too. I had to remove some of the interior spacers to make room for plugging the hole. They used 1/2" thick homasote (recycled newspaper ) it's the stuff they make bulletin boards out of. Chisel and scrape off the glue. Glued and clamped. After I got the rest of the slabs clamped up I went to surf WoodTalk for a couple of hours. hey Tom that's my vacuum pump and vacuum clamping set up under the table. Started assembling the table with 3 1/2" screws. Had to plan carefully to hit the solid sections around the hollow core. Had to cut a big notch in the shelf to clear the magnetic starter box on the back of the UniSaw. Inset back is 3/4 pine ply . It's going to face the saw and the shelves will be full of wood scraps so it's never going to get seen. Clamp, align, drill pilot, screw, repeated as nessasary...... The overhang on the left will let us clamp jigs and such to the table. The back and right side will face the saw and the sliding table rails. You can see the saw and the sliding crosscut table in the background. Next to the rt side vertical clamp is one of the adjustable legs. 6 legs will let me level it so nothing snags when sliding off the saw. I will get a better picture of the saw as I finish up the table. Solid 5/4 X 2 3/4 walnut will be wrapped around the top with a strip under the top to back it up. That should be stiff enough to brace a 66 1/2" span for clamping during assemblies. Again it was leftovers from a job that's been sitting around. I couldn't throw away a couple of 6' pieces of walnut ! Looks like this whole project is getting built from material I have & scraps . 7 Quote Link to comment Share on other sites More sharing options...
Llama Posted January 22, 2016 Report Share Posted January 22, 2016 Looks awesome! Great use of material just laying around. I just tossed out some doors not long ago. Quote Link to comment Share on other sites More sharing options...
wnaziri Posted January 22, 2016 Report Share Posted January 22, 2016 Love it. Great use of material that may otherwise sit there and collect dust. Or worse yet, possible get thrown out. Here is the question: Now that you have a Walnut outfeed table, are you going to build a mahogany or maybe bocote sanding station? If you do, be sure to post pics. Quote Link to comment Share on other sites More sharing options...
..Kev Posted January 23, 2016 Report Share Posted January 23, 2016 Sign it and date it Steve 2 Quote Link to comment Share on other sites More sharing options...
wdwerker Posted January 23, 2016 Author Report Share Posted January 23, 2016 I'll do that. Should have known that would circle around........ 2 Quote Link to comment Share on other sites More sharing options...
Popular Post wdwerker Posted January 26, 2016 Author Popular Post Report Share Posted January 26, 2016 I got enough done to put it in place. Top trim can go on after I get a big table done for a client. Back side had to clear the electrical box and the angle iron for the fence. Fit was pretty snug in one spot but it slid right into place. Took about 15 minutes to level the saw and outfeed table. I love those big plastic leveling legs. Tomorrow I have to readjust the sliding table to be parallel & level . Then the hard part is going to be leveling my big 4'x 10' outfeed table to match up with the crosscut saw. At least now I have my large accurate crosscut capacity back ! It takes up 11' wide X 8' deep so it's eating up some space. But it's well worth it to be able to make accurate repeatable cuts the same sizes. 3 Quote Link to comment Share on other sites More sharing options...
wtnhighlander Posted January 26, 2016 Report Share Posted January 26, 2016 Steve, you said clear the angle iron for the fence. Does the biesmeyer fence use a rail on the back of the saw??? I thought those used only the front rail? Quote Link to comment Share on other sites More sharing options...
wdwerker Posted January 26, 2016 Author Report Share Posted January 26, 2016 Rear angle iron supports the extension table . The fence doesn't need the rear angle . Plus I added a cast iron router wing at the far end. Tomorrow I am building a new leg for the far end with leveling legs. Eventually I need to replace the laminate covered extension table section. It came with the worn damaged section. 1 Quote Link to comment Share on other sites More sharing options...


Recommended Posts
Join the conversation
You can post now and register later. If you have an account, sign in now to post with your account.