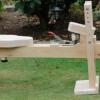
Popular Post ..Kev Posted April 28, 2016 Popular Post Report Share Posted April 28, 2016 Being on the road for too long, it's been a good long while since I've done a journal. It was time! For those starting out, let me just say that you'll do this a bunch of times before you get your shop exactly the way you want it! Everyone loves a miter station build so, here it goes! Here's what my miter station looked like before I got started.. It was originally built around a Dewalt 12 miter saw. Things I liked: · The fences. They are long and adjustable and accepted stop blocks as needed. · Storage. There was lots of it but, was misappropriated. · Dust collection. A dedicated CT as well as a port to the big system did well. · Counter Space. At one time, there was a lot of it! · T-Tracks. These work awesome and will be added to the new top as well. · Cabinets. They come from Lowes and are the unfinished cabinets. They work awesome and are consistent in height. Things I didn't like: · Storage. As you can see, I've accumulated some FT gear that needs a home. Also, there's crap in the cabinets that doesn't belong in there. · Top. There was a split in the right side of the top that wouldn't sit even with the other one. · Dust Collection Box. It was designed for the Dewalt and wasn't working with the Kapex. · Space. The old main dust collector has a 4" hose run behind the bench. This chews up valuable space. · Charging station. There simply isn't a dedicated charging station, Just a place where the chargers are. The Plan: Pretty much start over! I won't give it all away but, I pretty much plan on fixing those items that I didn't like. The bulk of it will come pretty quickly as I need my shop up and running. There's some other items that will take a little longer as I haven't finalized all the details yet. Example would be the main DC for this station. Once I'm 100% confident with my work flow, a new CV system will be ordered and installed. So, here's what it looks like after the bulk of demo. I had to leave some there to make the new stuff a bit easier to work on. Stay tuned.. I hope to have it serviceable by the end of the weekend.. 6 Quote Link to comment Share on other sites More sharing options...
Chet Posted April 28, 2016 Report Share Posted April 28, 2016 I am going to be real interested in this Kev. I am on my second generation miter station but need to get the third generation going. It was pretty good with the Porter Cable saw that I had, but with the new 12" Bosch Glide I am not happy at all. 1 Quote Link to comment Share on other sites More sharing options...
..Kev Posted April 28, 2016 Author Report Share Posted April 28, 2016 1 minute ago, Chet K. said: I am going to be real interested in this Kev. I am on my second generation miter station but need to get the third generation going. It was pretty good with the Porter Cable saw that I had, but with the new 12" Bosch Glide I am not happy at all. If I miss any details along the way that you want to see, chime in and I'll grab some pics and get them posted.. Quote Link to comment Share on other sites More sharing options...
Da Hammer Posted April 28, 2016 Report Share Posted April 28, 2016 This is interesting to me also. I have finished the redesign on my shop and am about to begin outfitting the inside which will include a miter station. Since I am new to woodworking I love looking at what others have found to work as I go along. Thanks for sharing look forward to watching! Quote Link to comment Share on other sites More sharing options...
-MattK- Posted April 28, 2016 Report Share Posted April 28, 2016 Well timed!! Finishing up my out feed table and starting on miter station next! Quote Link to comment Share on other sites More sharing options...
gee-dub Posted April 28, 2016 Report Share Posted April 28, 2016 Bueno! This will be great. Without the explanation one would have thought the "before" pic looked pretty cool. I find hearing about other people's uses and experiences with their shop setups highly valuable. I rarely watch a rebuild or a reorg where I don't pick up something that I can apply to my own space. thanks for taking the time to document your rebuild. Quote Link to comment Share on other sites More sharing options...
shaneymack Posted April 28, 2016 Report Share Posted April 28, 2016 Woo hoo ! It's been forever you have done a journal, or atleast it feels that way !! I'm pumped. This will take you like three days, what's next !! Sent from my SM-N910W8 using Tapatalk Quote Link to comment Share on other sites More sharing options...
..Kev Posted April 28, 2016 Author Report Share Posted April 28, 2016 3 hours ago, shaneymack said: Woo hoo ! It's been forever you have done a journal, or atleast it feels that way !! I'm pumped. This will take you like three days, what's next !! Sent from my SM-N910W8 using Tapatalk Probably cranking out the Christmas gifts for this year.. I'll also be taking measurements and getting the CV ordered. 1 Quote Link to comment Share on other sites More sharing options...
Chet Posted April 28, 2016 Report Share Posted April 28, 2016 3 hours ago, shaneymack said: Woo hoo ! It's been forever you have done a journal Yea Shane, I think Kev's last journal was when he taught you how to make the Maloof Rocker. LOL 1 Quote Link to comment Share on other sites More sharing options...
shaneymack Posted April 28, 2016 Report Share Posted April 28, 2016 Woo hoo ! It's been forever you have done a journal Yea Shane, I think Kev's last journal was when he taught you how to make the Maloof Rocker. LOL Haha! Thats true and now I'll know how to build a mitre station !! Yesssss!!! Sent from my SM-N910W8 using Tapatalk 1 Quote Link to comment Share on other sites More sharing options...
Janello Posted April 28, 2016 Report Share Posted April 28, 2016 I've managed to convince myself I don't need a nice miter station and use a dewalt stand. By the time this is done, I will want cabinets a kapex saw and new dust collection. Damn you Orgo man! 1 Quote Link to comment Share on other sites More sharing options...
..Kev Posted April 29, 2016 Author Report Share Posted April 29, 2016 Got a bit of a late start this morning, decided to sleep in! First order of business is to replace the 2 cabinets in the corner that were ultimately a catch all for a bunch of stuff that can/will live someplace else in the shop. I decided to replace it with 1 large (3 bay) Festool cabinet. Some creative clamping got it square. Dadoes for the center dividers. Next up, I cut and installed the vertical dividers for the 3 bays. Then located and installed the individual pull outs for all the FT gear. I'll trim this out in place. Now I'm ready to demo the rest of the old bench and start building everything back up. Finished up the demo and set the cabinet in place. The top of the center bay will be a couple drawers for router bits and accessories since it's right next to the router table. Kind of slow going but, it's a PITA to have the shop cluttered up and so many things not in their home.. Spending more time looking for X than using it! Also, the plan is purely in my head so, some details get overlooked until you run into them! Been a long day and the Draft is on so, will hit it again tomorrow and get the station up and running. 2 Quote Link to comment Share on other sites More sharing options...
pkinneb Posted April 29, 2016 Report Share Posted April 29, 2016 Coming along nicely! Quote Link to comment Share on other sites More sharing options...
trialbyfire Posted April 29, 2016 Report Share Posted April 29, 2016 I'm taking two weeks off here a couple of weeks... Aside from from cleaning and some small projects I may do something similar. Quote Link to comment Share on other sites More sharing options...
shaneymack Posted April 29, 2016 Report Share Posted April 29, 2016 Looking good Kev. Did you put finish on it? In the last picture it looks like there is a sheen on it. And is is glued and screwed? Sent from my SM-N910W8 using Tapatalk 1 Quote Link to comment Share on other sites More sharing options...
Just Bob Posted April 29, 2016 Report Share Posted April 29, 2016 That looks great. Quote Link to comment Share on other sites More sharing options...
gee-dub Posted April 29, 2016 Report Share Posted April 29, 2016 Looking good. I actually enjoy building some things by the seat of my pants. I seem to get more creative ;-) I will toss out that full extension (or even over-travel) hardware is a blessing for shop cabinets. 1 Quote Link to comment Share on other sites More sharing options...
..Kev Posted April 29, 2016 Author Report Share Posted April 29, 2016 3 hours ago, shaneymack said: Looking good Kev. Did you put finish on it? In the last picture it looks like there is a sheen on it. And is is glued and screwed? The Birch ply has a pre finish on it. Comes that way from my dealer. Yes, glued and screwed. No reason to get fancy as none of it will be seen. 1 hour ago, gee-dub said: Looking good. I actually enjoy building some things by the seat of my pants. I seem to get more creative ;-) I will toss out that full extension (or even over-travel) hardware is a blessing for shop cabinets. All the pull outs are on full extension glides and the drawers will be as well. Quote Link to comment Share on other sites More sharing options...
wdwerker Posted April 29, 2016 Report Share Posted April 29, 2016 The import prefinished birch is fine for shop cabinets and other utility uses but the quality of the face veneers can contain flaws. It's also not always the flattest ply so prepare to deal with some cupping and twisting. Domestic prefinished (if you can find it or order it )costs more but has very nice faces and stays flat. I like to build cabinets with it and then you only have to finish the exterior. Quote Link to comment Share on other sites More sharing options...
bushwacked Posted April 29, 2016 Report Share Posted April 29, 2016 awesome! A Kev Journal!!! I really liked your old miter stand, but cant wait for the new one ... 1 Quote Link to comment Share on other sites More sharing options...
..Kev Posted April 29, 2016 Author Report Share Posted April 29, 2016 1 hour ago, wdwerker said: The import prefinished birch is fine for shop cabinets and other utility uses but the quality of the face veneers can contain flaws. It's also not always the flattest ply so prepare to deal with some cupping and twisting. Domestic prefinished (if you can find it or order it )costs more but has very nice faces and stays flat. I like to build cabinets with it and then you only have to finish the exterior. Thanks Steve.. There's a lot of support for the top so, I'm not expecting any issues there. It is expensive stuff but, I also find that I pay a little higher price for lumber here than most of the rest of you do. Quote Link to comment Share on other sites More sharing options...
Llama Posted April 29, 2016 Report Share Posted April 29, 2016 Coming along nicely!!! Although I thought you'd be done by now Quote Link to comment Share on other sites More sharing options...
..Kev Posted April 29, 2016 Author Report Share Posted April 29, 2016 1 hour ago, Llama said: Coming along nicely!!! Although I thought you'd be done by now I'll post an update a bit later but, nowhere near done yet.. Quote Link to comment Share on other sites More sharing options...
Popular Post ..Kev Posted April 30, 2016 Author Popular Post Report Share Posted April 30, 2016 Top on and the T-track / fences installed. Took quite a while to get everything level and true. Got the saw installed and set up properly as well. Yes, the walnut ply is definitely overkill for the zero clearance fence but, it was the only 1/2" ply I had in the shop.. At least I didn't put finish on it Found some of the floor by reinstalling the drawers and tossing the sandpaper rack back up. Up next will be building the drawers for the new cabinet and deciding what I want to do for a charging station. 3 Quote Link to comment Share on other sites More sharing options...
Popular Post JosephThomas Posted April 30, 2016 Popular Post Report Share Posted April 30, 2016 In the last 24 hours: you made 2 updates and rebuilt more shop furniture than I've done in months. During that time I was able to move my project out of the way so my wife could open the dryer. That is all. 3 Quote Link to comment Share on other sites More sharing options...


Recommended Posts
Join the conversation
You can post now and register later. If you have an account, sign in now to post with your account.