


Jerry_in_SD
-
Posts
344 -
Joined
-
Last visited
Recent Profile Visitors
2,762 profile views


Jerry_in_SD's Achievements
Journeyman Poster (2/3)
39
Reputation
-
I don't have a tail vice. I put mine on 6" spacing. Then I decided to use those Veritas Bench Puppies. Unfortunately, the reach of the puppies needs holes on 4" centers. Thus, I loose a lot of utility from my dog holes.
-
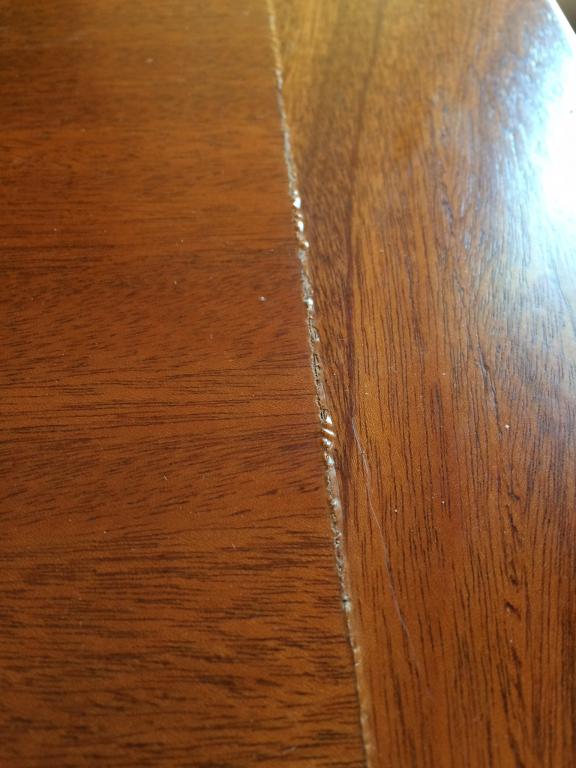
about a year ago I posted a question regarding what happens to a breadboard end when a film finish is applied and the core inevitably expands and shrinks with the weather. WelI got my answer. I've attached a picture of the core / breadboard joint out toward the ends of the breadboard where only screws are holding the breadboard and where the core has the maximum movement ( center 4" was glued so no issue). I 'm trying to figure out a fix. This was a thick finish of 5 coats of sprayed EnduroVAR. I'm thinking about sanding down about 2 coats and re-spraying a think coat of EnduroVAR. Any other suggestions? What could prevent this in the future?
-
Thanks all for your response. I will take your advice and use spar varnish on the exterior. I will use EV for the interior. i was favoring the EV as I can spray it and complete 3 coats in one day. Very user friendly finish. I've used EV on our kitchen table top and holds up against water and heavy use quite well.
-
I am building a new entry door (slab) out of African Mahogany. Typically entry doors have a exterior grade SPAR varnish for the exterior to deal with the elements. I live in Southern California and my entry way is recessed in such a way that neither sun nor rain hits my door. I did a sample with EnduroVAR and like the look. Has almost a oil like look given the amber tone they give EnduroVAR. Can anyone suggest why using EnduroVAR for my Entry door is a bad idea? If this door had to deal with the re is no question I would go with spar varnish. Thanks.
-
When to bevel stile on lockset side of door slab
Jerry_in_SD replied to Jerry_in_SD's topic in General Woodworking Talk
Thanks. I'll start easy... Sent from my iPhone using Tapatalk -
When to bevel stile on lockset side of door slab
Jerry_in_SD replied to Jerry_in_SD's topic in General Woodworking Talk
Thanks all. I'm going to use a circular saw with edge guide it cut the bevel after glue up. The inexpensive Lockart drilling guides align to the door face not edge so bevel is no factor. I'll make a mortising guide that is aligned to the face as well for the latch and deadbolt trim plates Thanks for the suggestions. Sent from my iPhone using Tapatalk -
I'm building a new entry door for the house. Using construction method used by Norm in a NYW episode. I'm building a new slab versus pre- hung. Figure since I have the existing door as a template it would be easiest. Anyway, Norm does not bevel the edge of the lockset (or latch) stile but my existing door has about a 2 degree bevel. Most entry door builds I've seen include the bevel since the door is 1 3/4 thick. I was wondering if anyone had door building experience and could comment on the best time to add the bevel. Seems like it would be easiest to run the stile through the table saw prior to glue up. I would create shims to aid in clamping to offset the bevel at glue up. I'm wondering how much grief I would give myself when trying to mortise the lockset whenever it's time. Instructions for installing slabs on line say to use a portable planer or handplane to trim bevel on finished door. I would use a handplane in this case. Anyone with door building experience I would appreciate your advice. Final milling, mortising, and glue up next weekend. Thanks. PS. Would kill for a Domino XL for this project.
-
Wrapping a hardwood panel in hardwood
Jerry_in_SD replied to Jerry_in_SD's topic in General Woodworking Talk
Thanks, I missed the YouTube comment. Still a bit of a mystery to me. The joints looked pretty tight for not being glued all the way. I would expect the joint to gap at some point. Guess that is why they make the big bucks and I hack in my garage.... -
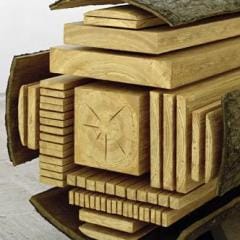
I was watching a Doucette and Wolfe video where they wrap the solid wood top of this chest with a mitered hardwood frame. I was wondering how they deal with wood movement doing that. I always understood that wrapping a hardwood panel in hardwood was a no no and would subject that panel to split. Even though they only wrap three sides, I would think that the glued on frame could still cause the panel to split. Is there something I don't understand here? http://youtu.be/ZzXwmqxMbxs
-
I was cleaning out a cabinet and found a finishing sander that takes maybe 1/4 sheets. Has no provisions for dust collection. I must have had this for 25 years. My finishing schedule includes using a ROS to 180 or 220 but my last step is always hand sand at final grit. Just wondering if anyone uses a finishing sander? I guess I should sell this.
-
Having built two kitchens in the last 3 years, here are my observations. - building cabinets is probably on the easy side as far as woodworking is concerned. Building boxes is straightforward and face frames are easy using pocket hole jig. Go frameless and you can even skip this step. - spend time in planning. Draw up your plans carefully by hand or use a tool like sketchup. Have it built in your head first before buying or cutting material. - saving money depends on what you do. If you are duplicating what you could buy from a Home Depot or IKEA, you probably will cost about the same but you will probably end up with higher quality doing it yourself using better materials. If you are building very unique cabinets then you can save a bundle as a high end cabinet shop will be pricy. My first kitchen was in Greene & Greene style ( look for Greene & Greene kitchen in the Project Showcase section). My second was basic (shaker stile frame and panel doors). - have a finishing plan. Use prefinished ply for the boxes so you don't have to deal with that part. There is a lot of wiping for doors and drawers so consider a spray system. Or outsource to a finisher. - if you go with stone countertop and tile backsplash, that could be expensive, not counting if you buy all new appliances. - do a lot,of reading and research. There are lots of ways to construct boxes. Some are overkill IMHO. - consider installation. It can be a bit tricky with uneven floors and out of square and out of plumb walls (kind of a given). Hire out for installation if your not comfortable. - don't demo existing kitchen until all cabinetry is done and your ready for install. Takes pressure off the fabrication phase. Bottom line. Go for it. Take your time and have flexible schedule. It is fun and you'll learn a boatload.
-
No one mentioned Steve Jobs. Seems that he was as concerned about what was unseen as what was seen. I agree with many of the posts in that the statement is too broad to be applied universally. It depends on the situation. Finishing the back of a heirloom piece is one thing, finishing the back of a kitchen cabinet is another. Both can be be done with master craftsmanship. Professionalism is more how you approach things rather then the execution.
-
Your going to love that jig. I have used it a lot. Since I can't afford or justify a Domino, this is the next best thing, IMHO. Look around for a smaller countersink bit. Mine fit fine.
-
I agree. Just looked again at my BLUM documentation on H vs non H series. Nothing to do with face frame or frameless. H series seems to be made a little heavier duty and can be used with 3/4" thick drawers.
-
My wife still refers to my saw as a stop saw! I've stopped correcting her...as it was her that encouraged me to get one in the first place.

