
wtnhighlander
-
Posts
15,391 -
Joined
-
Last visited
-
Days Won
153


.png.099f87eaf40da3cd70f5ede4335c3c4a.png)


wtnhighlander's Achievements

-
Pretty sweet design, Dave!
-
Nice work on those curves! Have you considered stringing through the miters? The one pictured might be fine with a sawdust & glue fill,but weren't you going to string between the inner field and the border, anyway?
-
Welcome @dave07!
-
I'm thinking that 15 amps (at 120v?) is kinda small for a grill. Be sure to check the specs for cook time.
-
 I can see removing the drywall allowing the cantelever arms to be attached to the sides of the studs, rather than into holes in the studs. That potentially allows a far sturdier arm attachment without special hardware, or reducing the stud strength with a large lag screw hole. Otherwise, it sounds like a lot of work, and difficult to reverse.
 -
1. Dust 2. Dust 3. Dust 4. Running out of clamps in the middle of a glue-up.
-
Nice organizers, @gee-dub. Hard to judge the size accurately, are they suitable to lift and carry away from the shelf? Maybe they are too heavy, bit I was wondering if a tray-style hand-hold cut into each end would have any benefit.
-
A hand pump like this, a contractor-duty trash bag, and some duct tape can get you started onto vacuum bag veneering for peanuts. Clear plastic sheet is better than a trash bag, though. Example:
-
@h3nry, you are rising to the challenge! That top will look amazing when the surface is clean and finished.
-
How to preserve rainbow Poplar colors?
wtnhighlander replied to bradleyheathhays's topic in Off-Topic
I can't say about the 'rainbow' aspect in particular, but my experience is that poplar darkens and mellows over time, gradually rducing in contrast. The colors and patterns remain, but grow less vivid. -
Try a 5/8" arbor nut from an angle grinder, maybe? My guess is that one of the shafts is lefty, though. You want the inertia of the wheel to always tighten the nut, so the opposing ends of the shat probably thread opposite directions.
-
Stickly / Shaker hybrid display cabinet
wtnhighlander replied to wtnhighlander's topic in Project Journals
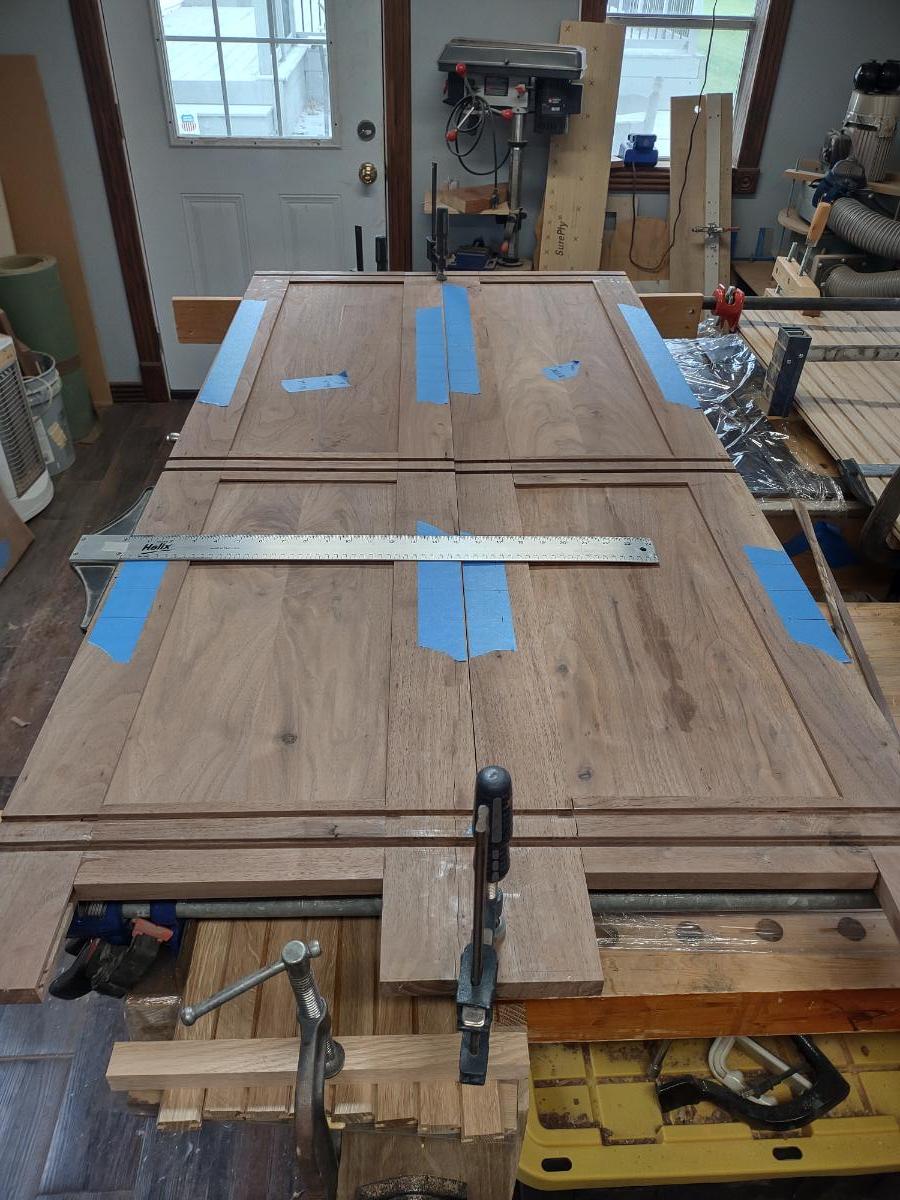
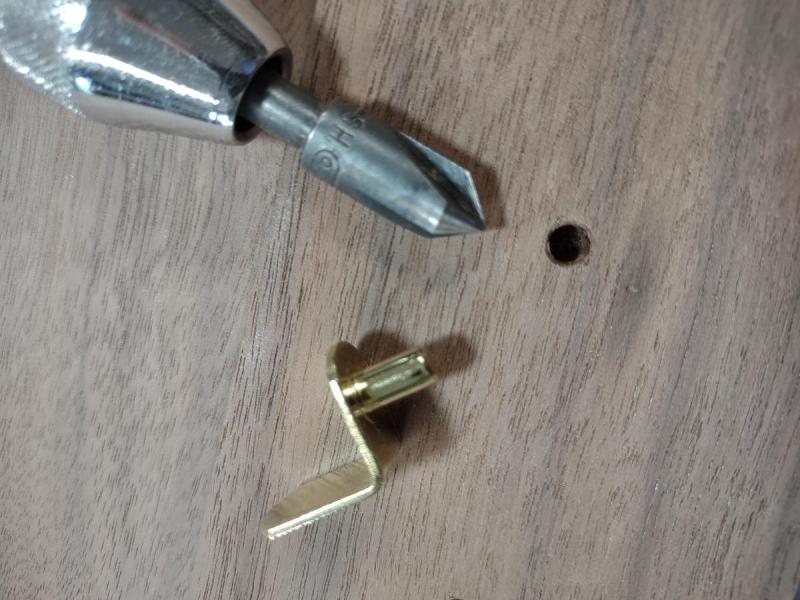
Spring yard work got rained out, so I spent a little time in the shop. After adding the last couple of slats to the back panel, I broke nown the carcase to prep and pre-finish the interior before final assembly. One last step before sanding was to add shelf pin holes. Arranging the side panels like a book match ensures the holes are aligned properly. I used the T-square and a couple of setup blocks to mark them at 2" spacing, 1.5" from the edges. I just put a couple of holes above and below center of each cabinet space, to allow minor adjustment of a floating shelf in each compartment. Blue tape, a brad-point bit, and a scrap block to set the Hole depth and keep it straight. All contribute to a clean hole. Final touch is to lightly chamfer the edge of the hole. This counter-sink is intended for metal work. Mounted in an un-attached drill chuck, I just give it a couple turns by hand. Too much can make the shelf pin wobbly.

-
I take it the photos are an undamaged sample? If you share pics of the damage, someone here might have good advice on repairs that won't require entire new doors. Maybe.
-
Go for it, @h3nry!
-
@Coop, you could preheat a small cast iron pan while prepping the ingredients, then use it in place of the brick to cook in half the time!