minorhero
-
Posts
810 -
Joined
-
Last visited
minorhero's Achievements
Journeyman Poster (2/3)
228
Reputation
-
Restoring Stanley #7.... how far to go?
minorhero replied to Jfitz's topic in Vintage Tools's Topics
On this one its original. I usually go original unless one or both of the pieces are broken. When I restore I never bother trying to preserve the original japanning. I use electrolysis to remove EVERYTHING. Then from that clean point I tape it up and apply paint. I find glossy engine paint to be a good choice and I lay down a REALLY thick coat. Way thicker then you are "supposed" to. This gives the closest finish to the original japanning I have found. I give it 2 days to dry then remove the tape. I usually need to use a razor a bit to clean up the edges. The paint tends to stick in patches to the tape and want to come off. Spray lacquer is what I use for the wood pieces after sanding off any original finish. A wire wheel on a bench grinder cleans up the hardware pieces. -
Restoring Stanley #7.... how far to go?
minorhero replied to Jfitz's topic in Vintage Tools's Topics
I have done more then my fair share of handplane and power tool restoration. I say how far you go depends entirely on what you enjoy doing. I actually enjoy taking a piece of equipment completely apart and restoring every nut and bolt to new or better then new standards. To that end the hand planes I buy tend to be in rough shape. This is the before and after of my number 7 I would advise getting a new (good) blade. The old blades are just not up to modern metallurgy standards. -
The video only showed robots using a chop saw and a Roomba cutting what looked like foam. Then a person is seen putting in dowels. No video of a robot making mortises or drilling dowels. I can't help but feel that is the more significant work. Still I am not surprised. With cnc machines taking on the tasks they do it's only a matter of time before robots are incorporated into more parts of the craft. I for one wouldn't mind a robot taking over the milling operation. Etc
-
Lifting gear and slabs to above-garage shop
minorhero replied to s1nglemalt's topic in General Woodworking Talk
Google search. Barn hoist. There are a bunch of options both manual and electric. This kind of thing has been done for hundreds of years but it will cost you. Especially if you need to modify your building after it's built. -
Ya took about 3 months spending a few hours every few days. It can be done easier by buying the outside pre-milled instead of building it by scratch.
-
Looking at the SawStop website they just appear to be regular high quality router tables. No safety features being advertised.
-
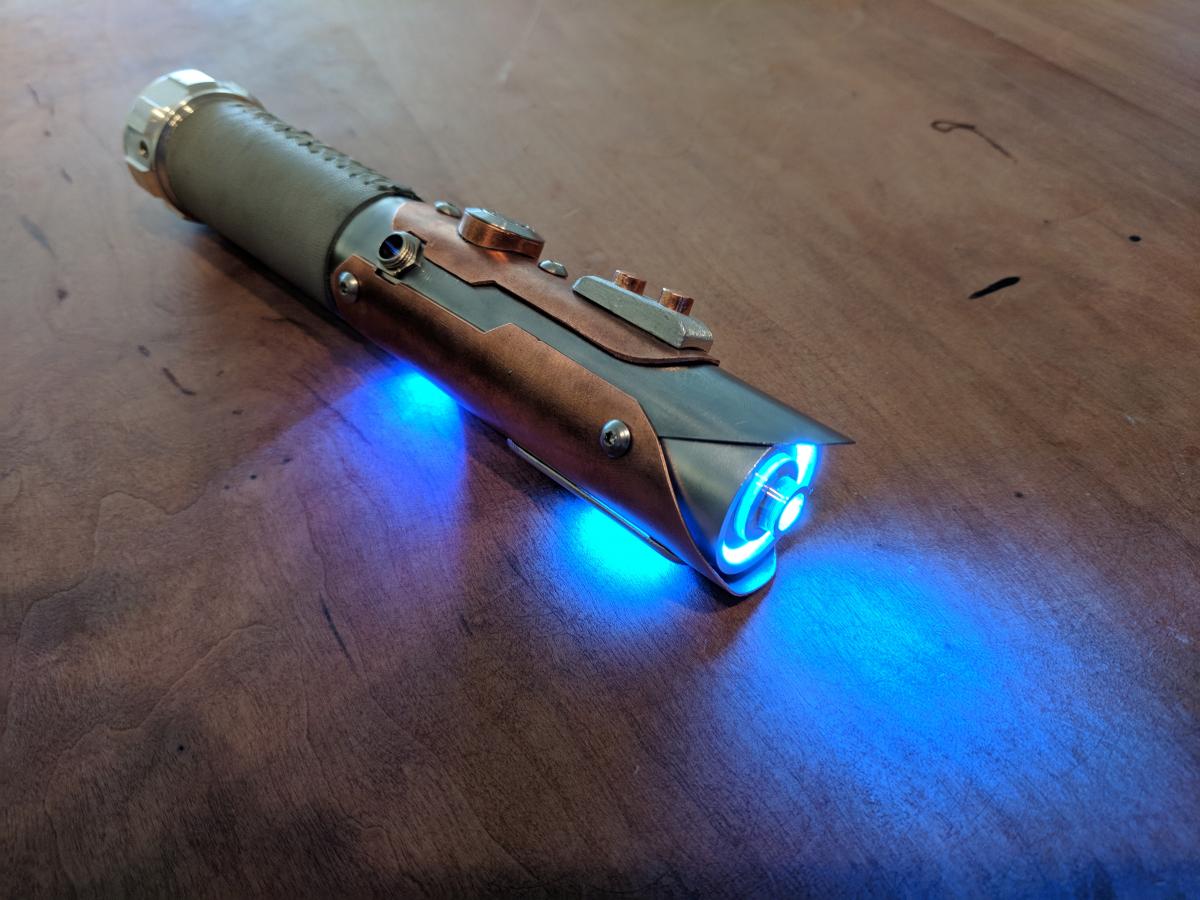
So at least one person requested a mini-journal on this. Its not woodworking though, so of course mods please move it if deemed inappropriate. A year ago while searching for Christmas presents I came across a whole other hobby of folks who build lightsabers. There are subsets of this hobby with folks dueling with lightsabers etc, but I am only interested in the building part of it. This is properly called "Saber Smithing." No, I am not making this up. There are many different ways to build a lightsaber but the basics involve using some kind of light source, a poly carbonate "blade" and most use a sound card as well. There are several makers of the sound cards but they pretty much all use an accelerometer to tell when the blade is moving or when it hits something and then they play a sound. Many sound cards also support adding one or more accent LEDs to make your lightsaber look all spiffy and futuristic. I have to date made 2 lightsabers. The first one actually did involve some wood. Infact I used walnut rings I turned down on the lathe to cap either end of my leather wrap. My second lightsaber used no wood and instead has copper as an accent. Both lightsabers use rechargeable lithium 18650 batteries to power the LEDs. The design I chose to go with is just a trio of very powerful LEDs at the base of the poly-carbonate tube. Here are some pictures of me making my second lightsaber: The basic body of the lightsaber is steel tube originally designed to be used a bicycle seat post. Using a dremel with a cut-off wheel and some hand files I shaped one end. Also using the dremel and a vise I bent some 1" copper tubing so that it formed shrouds for my main body. This is what that looked like: I wanted to have a window into the inside of my lightsaber where a bright light could shine out. I used some more pipe fittings and JB weld to create an indent into my shroud. In that indent I mounted a peephole from a door: Using a similar process I created a bezel for my switch that would activate the lightsaber I knew I wanted something on top of my lightsaber to give it more character. I expiremented with lots of things that would make it look more futuristic. Bits and pieces that don't actually do anything but make a lightsaber look cool are called "greebies." No idea why. Here is one option: I eventually settled on this one: The bottom of the lightsaber went through a similar process: As I progressed I added some more of the functionality needed to make the saber actually work. Here you can see the recharge port installed, this is how the batteries are maintained. https://i.imgur.com/ttBXc8l.jpg/img] And a brass blade screw. This tightens against the polycarbonate blade and keeps it from falling out. For the bottom of the saber I settled on an idea of cutting out a section to make a window. The idea is that since the light source is further inside the hilt the window would be lit. Unfortunately since I am doing this all by hand I made the window a little too big: I then added some screws to actually hold the copper bits in place (before they were just resting there or taped on for design purposes), and I also added a leather wrap with artificial senew thread (you can buy this stuff at a craft store). I decided on using a piece of aluminum tubing I cut apart and shaped to cover up the window a little bit. Still will get some shine through but less then the original: At this point the saber is done on the outside but the inside still needs to be wired. I had essentially no history of soldering or doing any kind of electrical work prior to building my first saber. And while the instructions on building these things are not as easy as say putting together a lego or some such, it is possible to figure it out by watching some videos and reading up on forums. This gives you an idea what it looks like to solder one of these together: The blade for the lightsaber is 1" poly-carbonate tube filled with "blade diffuser" material which is just clear plastic gift wrap from the store. This stuff redirects the light from the LEDs in the base to the sides instead of all just shooting straight up. Here is a picture of the lightsaber without the blade but with a "Blade Plug" which is basically just some greeby stuck in there to block most of the light (each of the 3 LEDs puts out aruond 300-400 lumens so staring at the light directly is a bad idea) but look like it could be a real lightsaber: And here is a quick video so you get an idea as to the sounds and lights involved: In case folks are interested here are some links that may prove useful (not affiliated with these of course): The Custom Saber Shop Store http://www.thecustomsabershop.com/ The Custom Saber Shop Forum http://forums.thecustomsabershop.com/forum.php FX Sabers Forum https://www.fx-sabers.com/forum/
-
I have been following this guy on a wooden boat forum. He is doing some pretty amazing stuff. But yea, I always get tired just watching him and I'm only 35!
-
I built everything you see from scratch with the exception of the pommel which came from an online store that does nothing but sell parts for lightsabers. Yep that's a thing. And yes the sound changes as you move it around and changes again if you hit something. Also if you hit something another led goes off in the blade that changes the color of the blade. The blade is made of polycarbonate and strong enough to duel with. It's pretty spiffy
-
I don't weld in my woodshop but I do grind and drill metal all the time. You get metal dust on things but it's not a big deal.
-
I finished my second lightsaber today. Sounds and lights all work. Blade not pictured.

-
I think the doctor is talking just about the building of the house being 500k. From context it sounds like she already owns the land. A decent 17 acre lot in Maryland would go for about 300k-500k just by itself depending on quality and location. Possibly a lot more if it's in a really desirable location. You can put up a heck of a house if you knock out a few middle men for 500k.... But it ain't gonna be like that chateau.
-
I have smoke detectors installed everywhere except the kitchen. I am sure that is a bad idea for fire safety but I actually cook all the time and having them go off every time I burn something or a pan with some oil gets overcooked just drives me nuts. Good thing is that with modern detectors you can buy them with 10 year batteries so you can install them everywhere just by putting a few screws in.
-
That chateau looks like it's what.. 15,000 square feet? (My random ball park estimate) Seems crazy to think you can get that for 500k. I assume site prep is currently non existent? As someone actively looking at real estate for my next home in Maryland I feel safe in saying that excluding real estate you can build a hell of a home for 500k. But you are not going to have anything like that chateau.