h3nry
-
Posts
497 -
Joined
-
Last visited
-
Days Won
37
h3nry's Achievements
Journeyman Poster (2/3)
925
Reputation
-
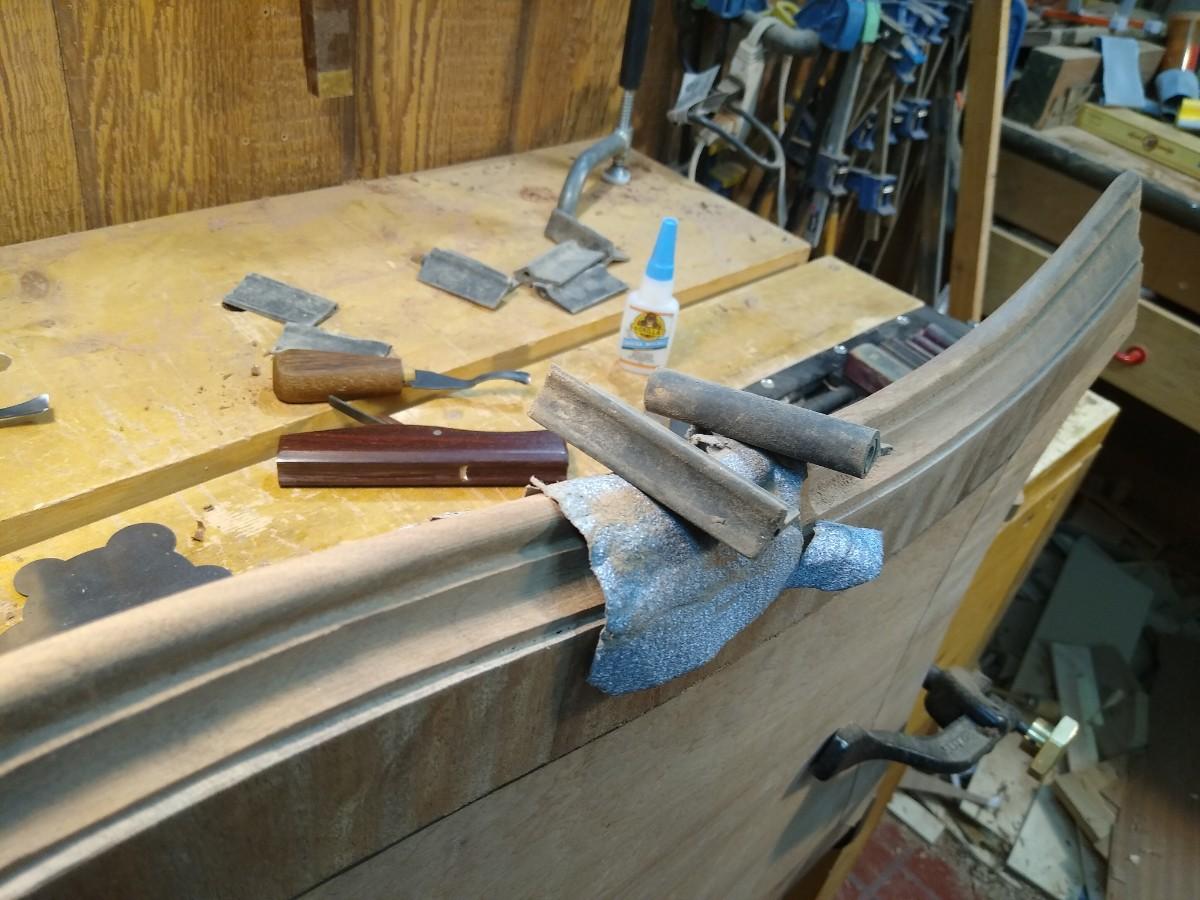
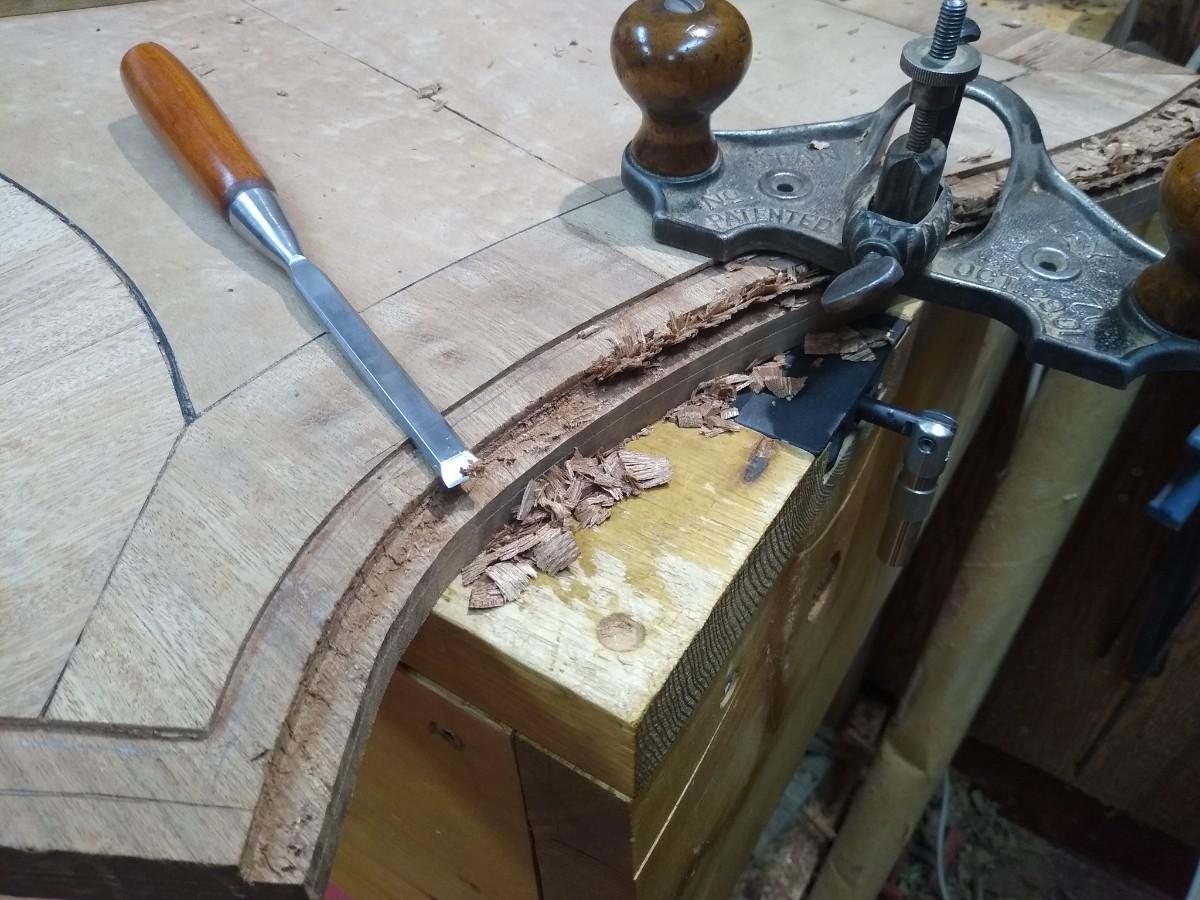
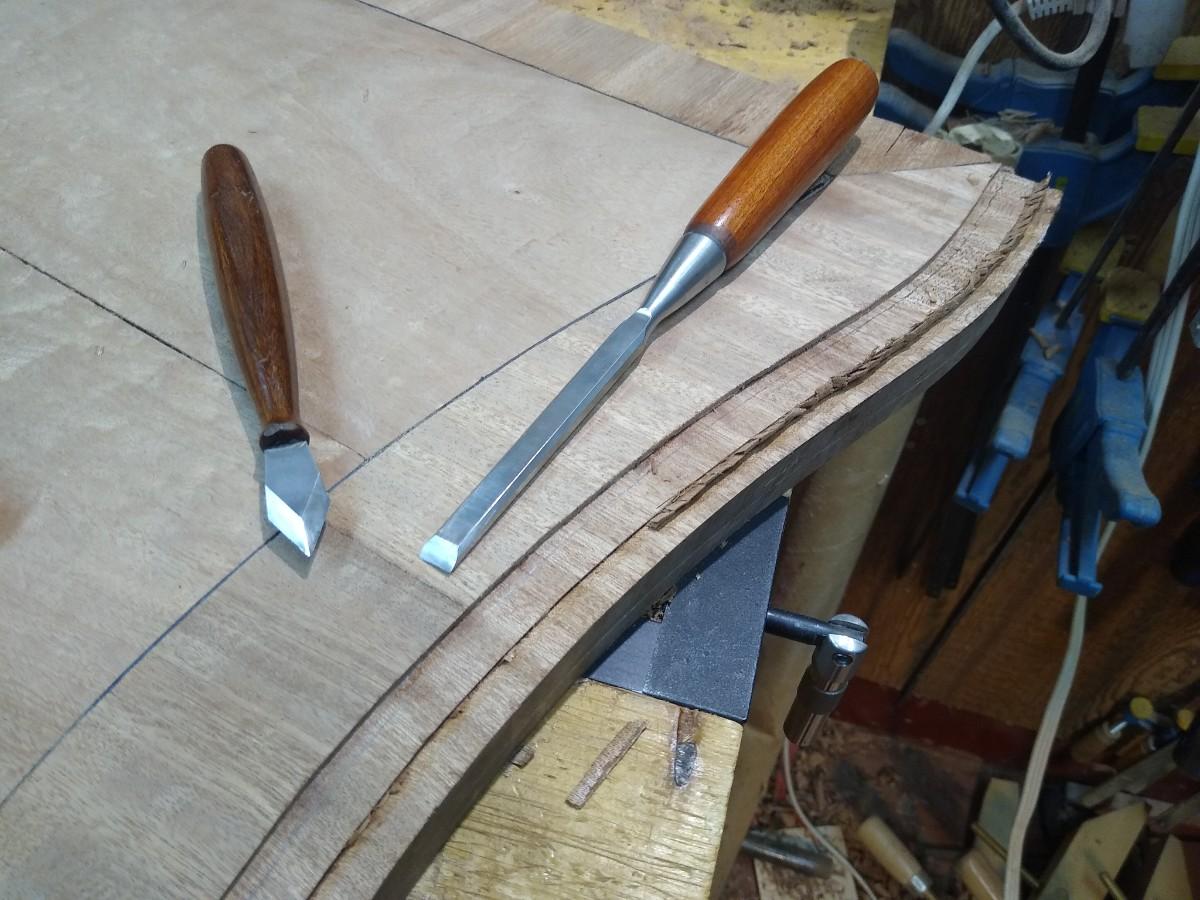
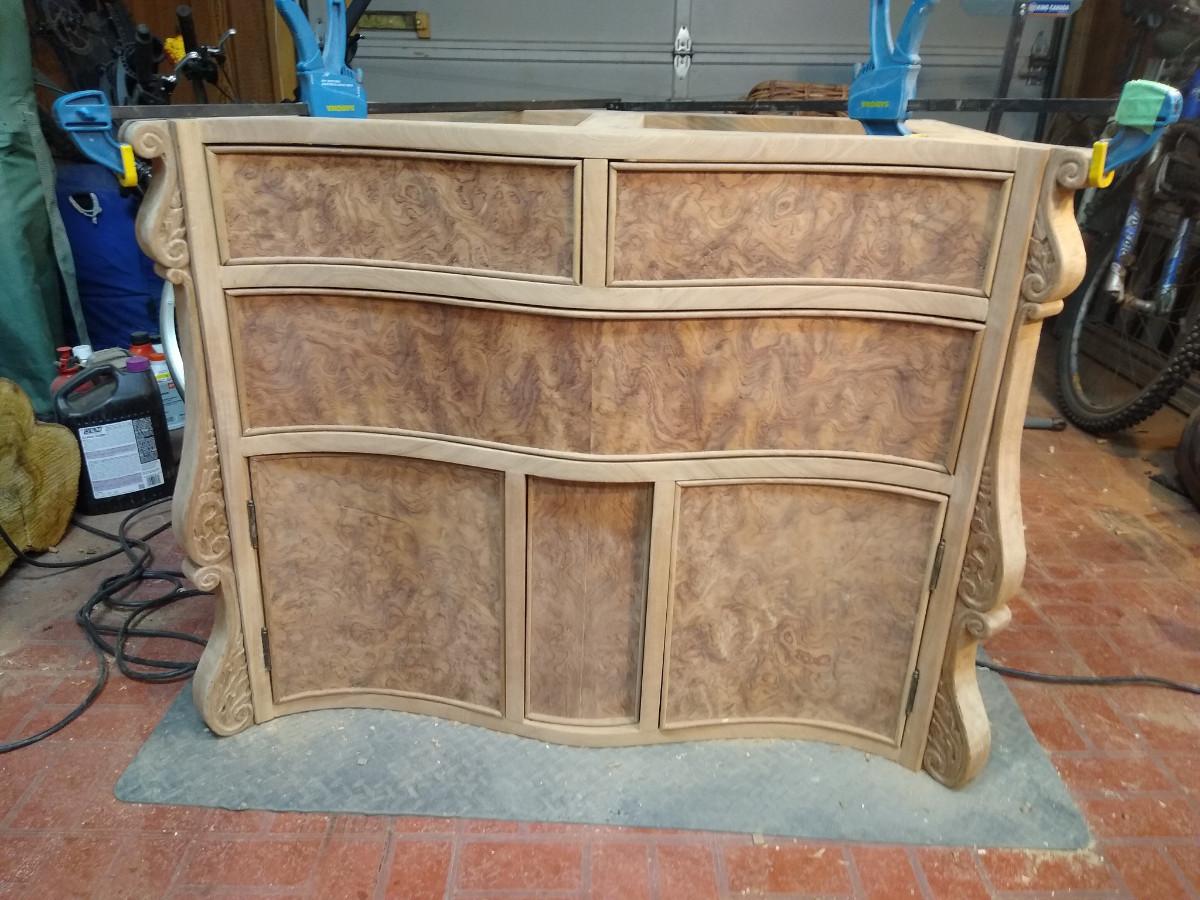
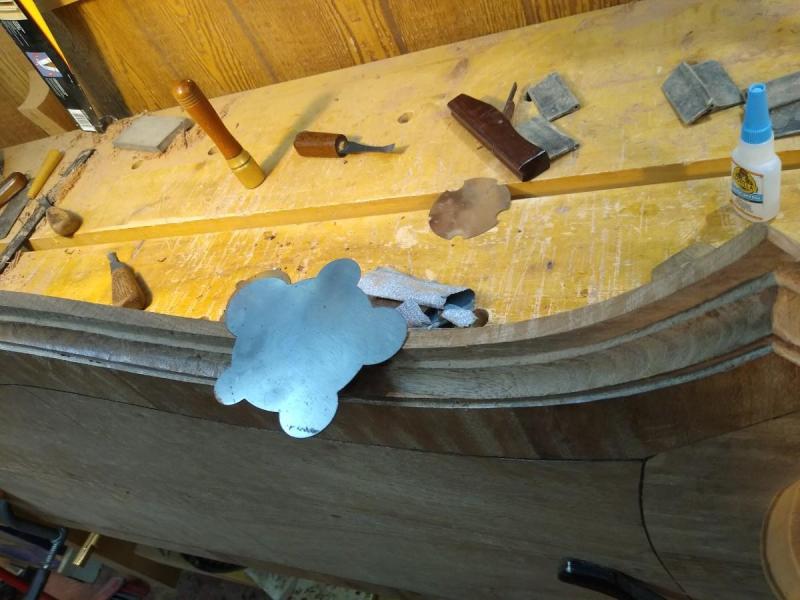
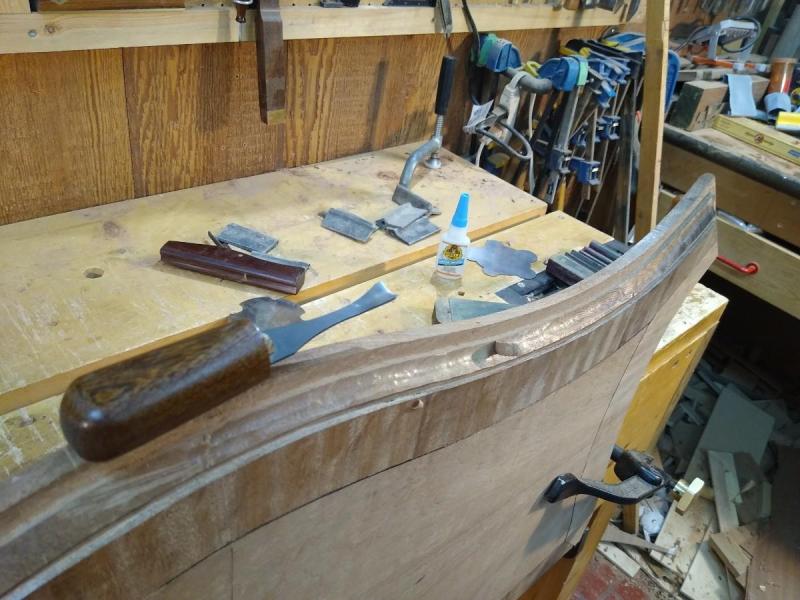
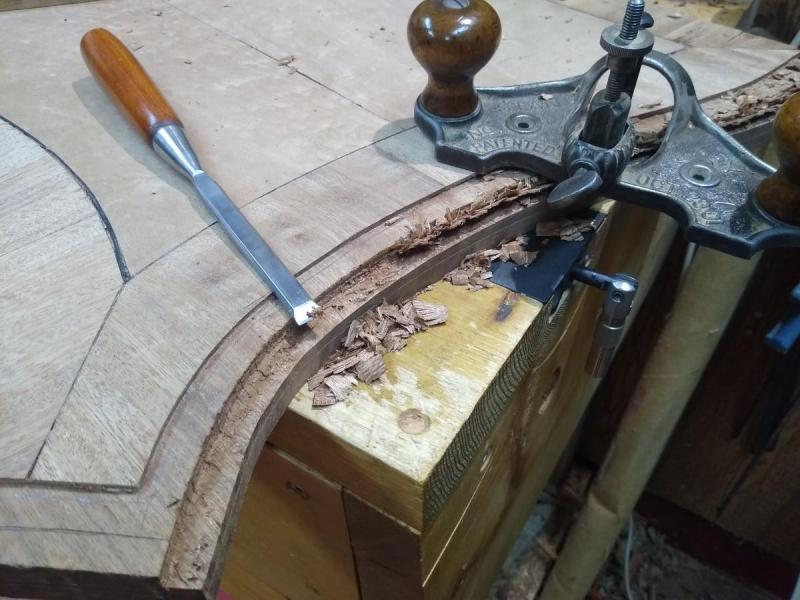
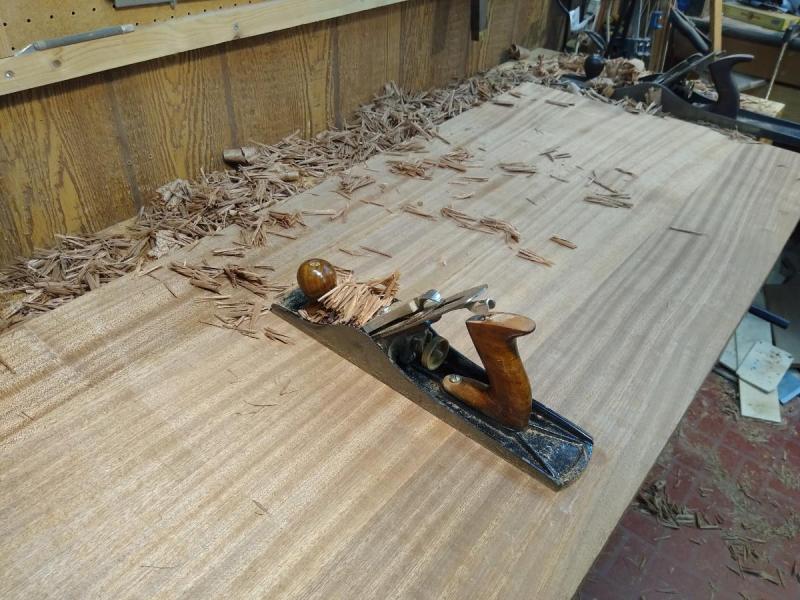
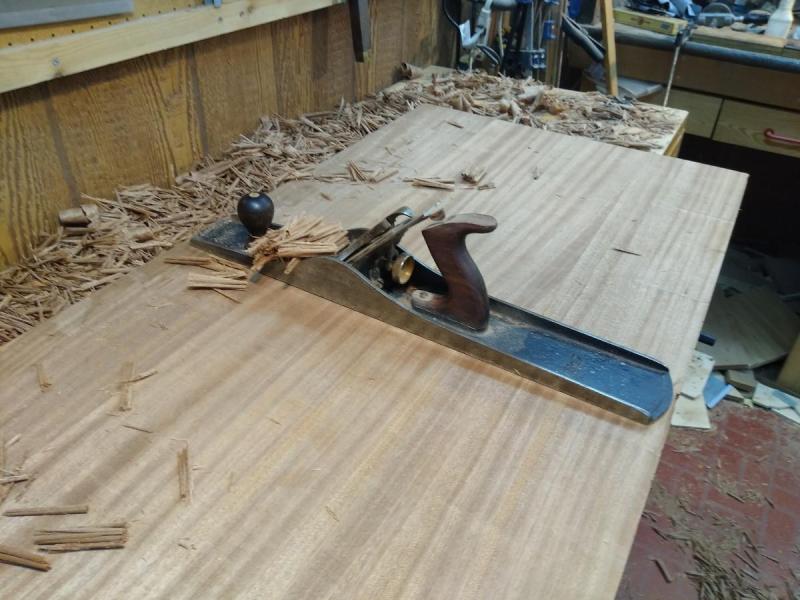
so, I scraped down the top, and one way or another it will end up "good enough". But while I think about that, I had to put the profile round the edge ... I'm sure there are router bits that would get all this done in 30 seconds ... but we're doing it the slow way here ... Curved moulding profiles are always slow. The profile needs two rabbets ... the first is 1/8 at the edge of the veneer, and with these thick veneers, after trimming the veneer I was almost there, just a quick pass with the router plane. The second rabbet is about 1/2 deep. First using the knife and a chisel to get a "wall" along the curve. That gives me something for the #71 to register against, so then repeated cuts with this, occasionally stopping to clear out the waste with a chisel until I'm down to the line. Once I have my rabbets, I need to make a bevel where the cove will go ... doing this with a chisel until I'm down to the line in both sides. Then I can cut the cove, first with a carving gouge, and then a scraper. The bead is done the same way, with a gouge and scraper. Then it's all cleaned up with sandpaper. And the top has a profile. It's only sanded to 60 grit at the moment, before I give it a final sanding, I have to decide what I'm doing with the ugly corners of the veneer edge banding.


-
A vacuum bag would probably solve a lot of my veneer problems ... but as you may have noticed, my woodworking doesn't always make it to the twentieth century ... This is a learning experience at least. Wer'll see whether the end result is that I need a new technique, or just need more practise.
-
Well ... I have cooked the pudding and tasted it ... and it tastes like sour haggis
-
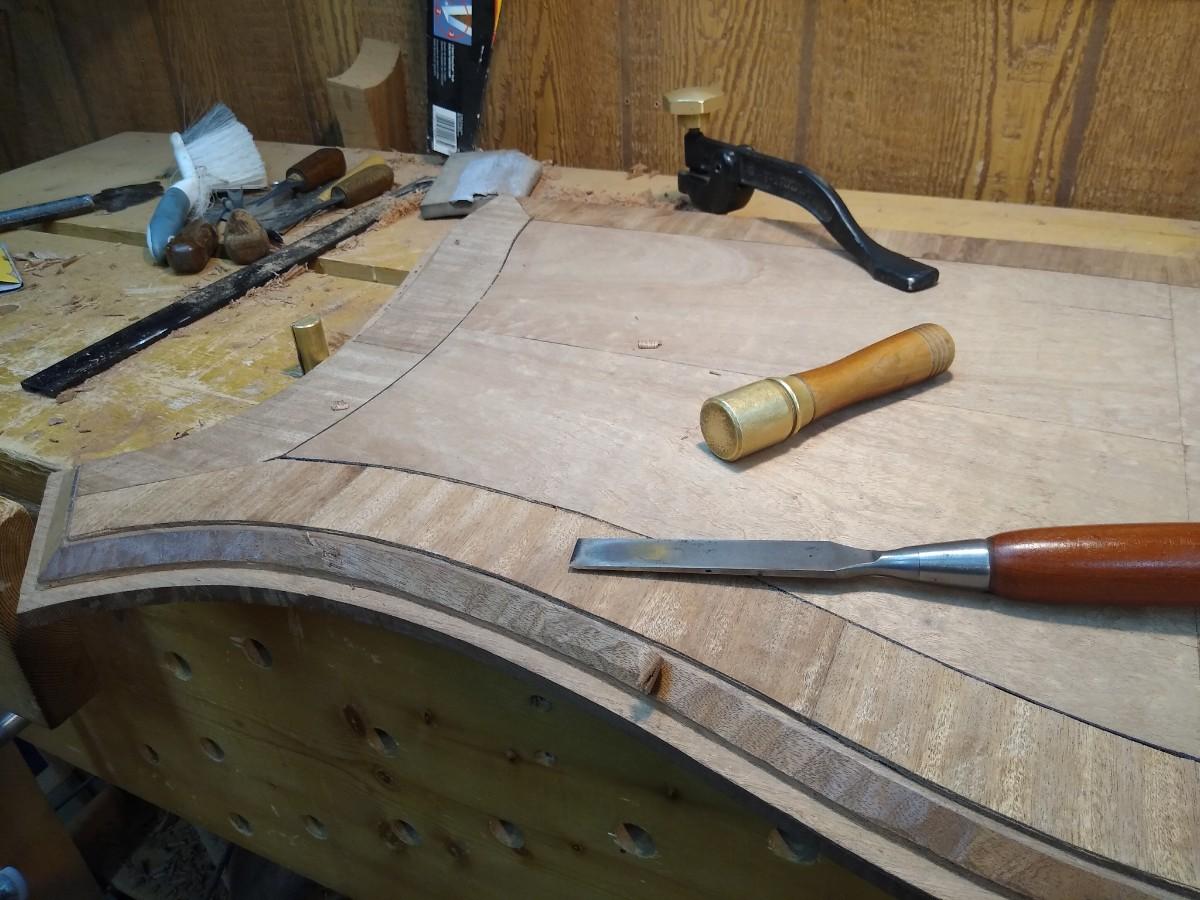
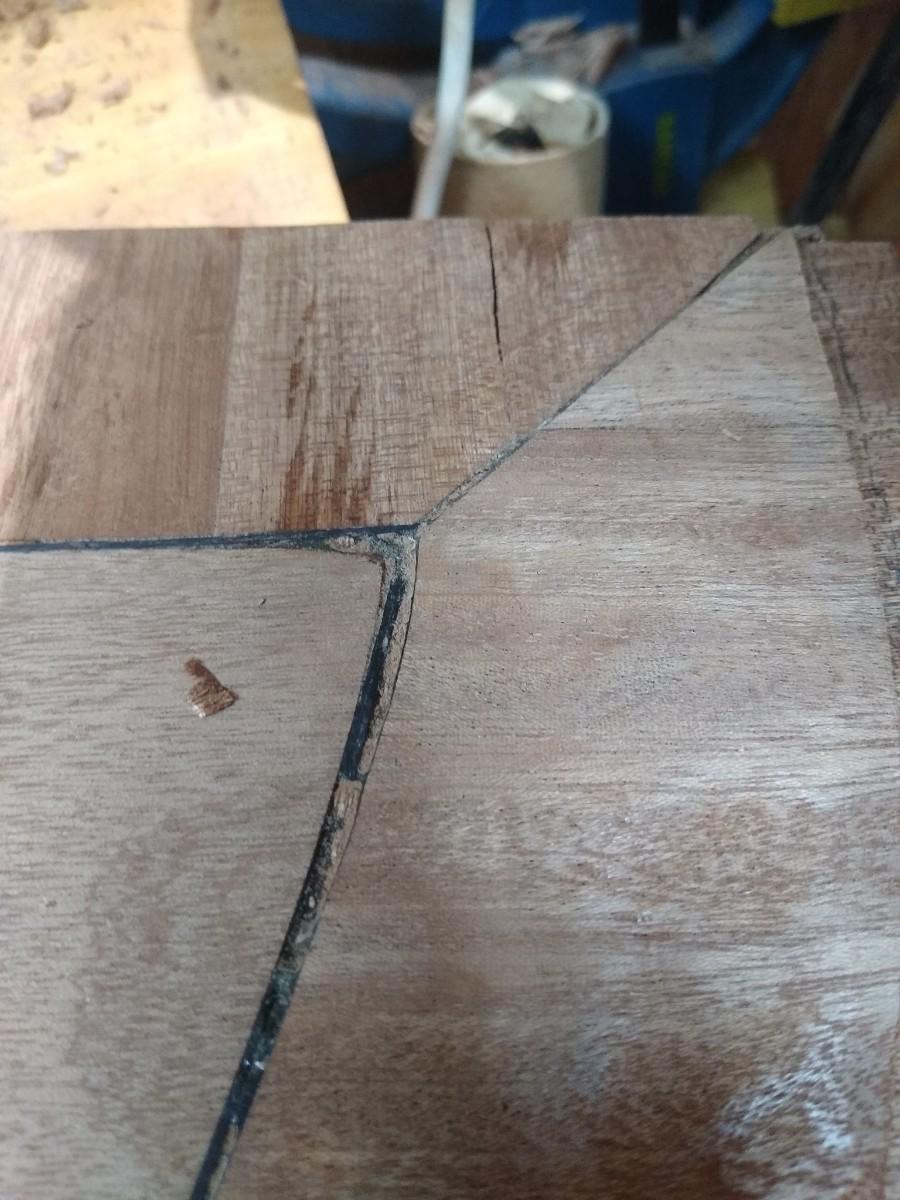
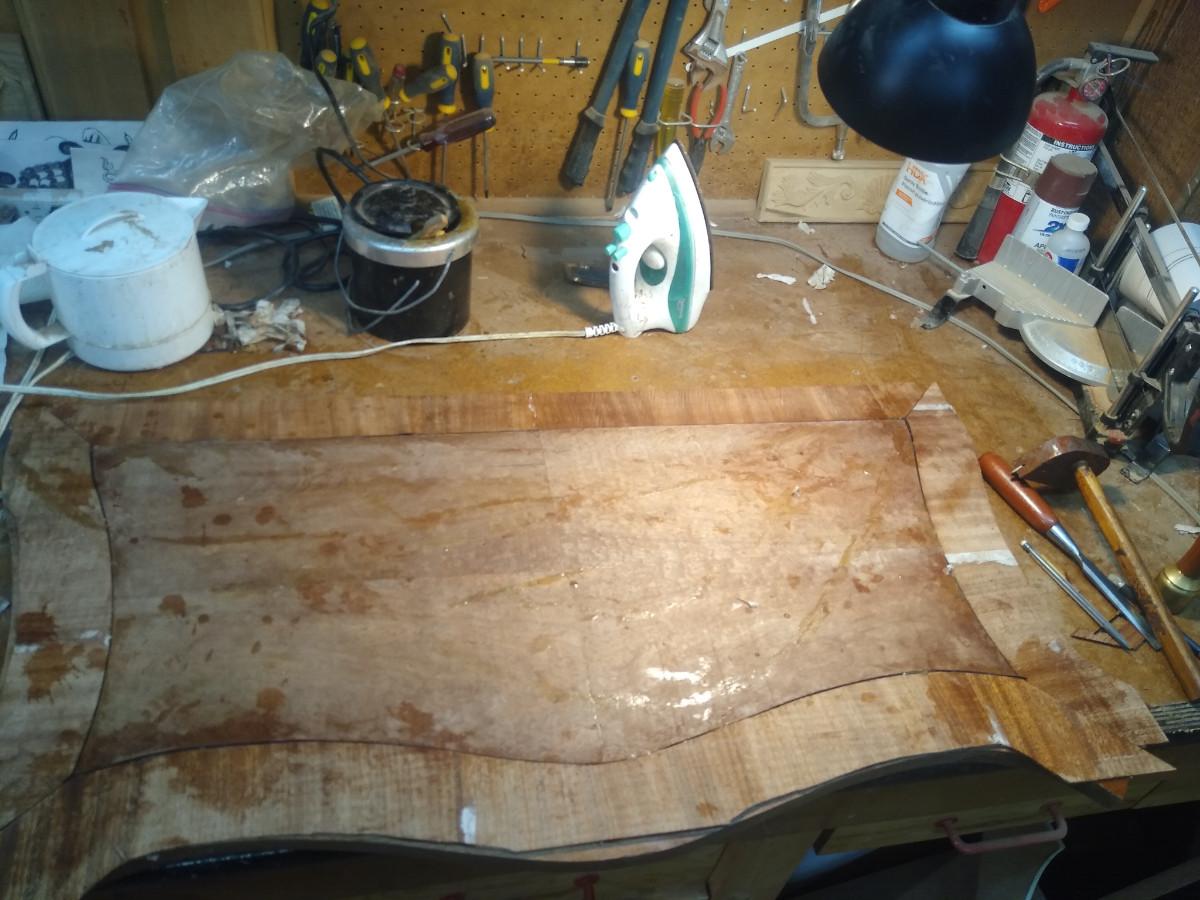
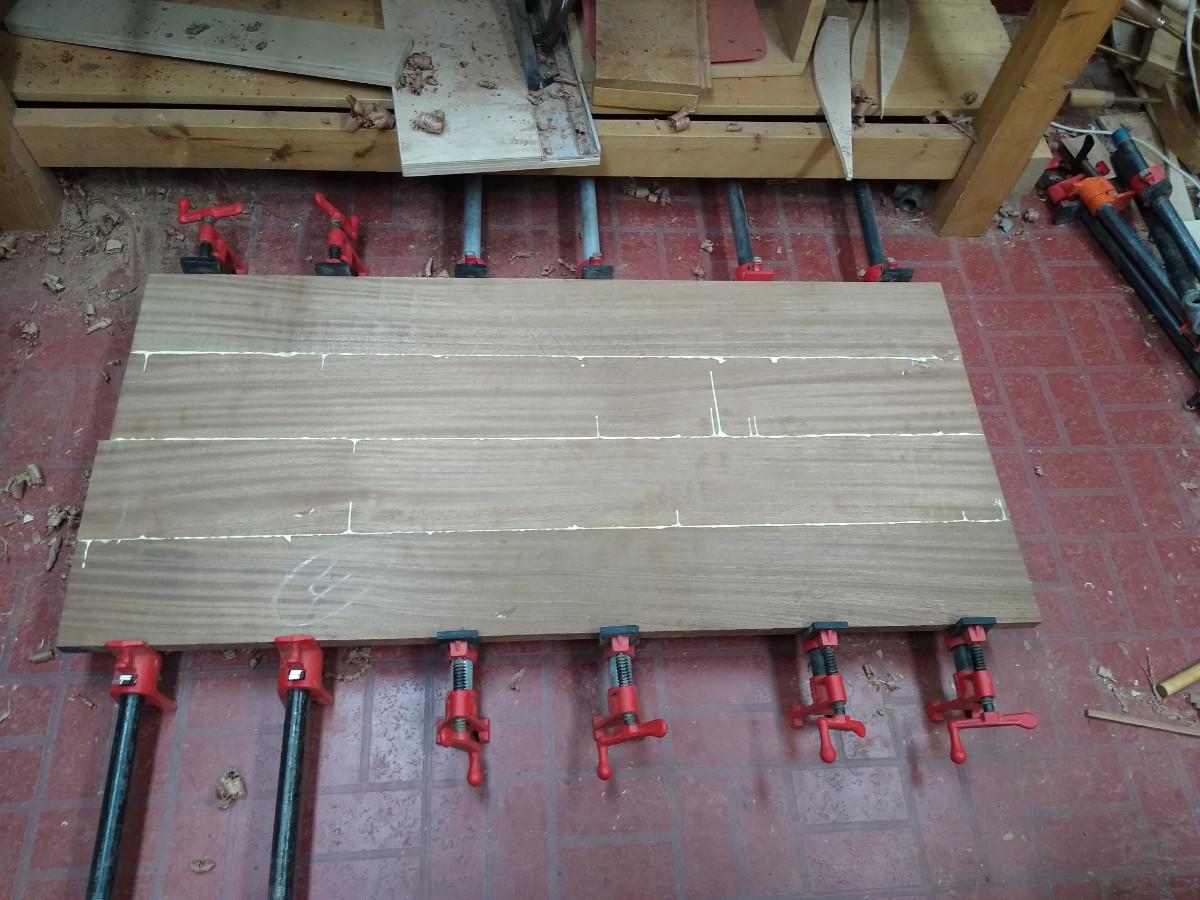
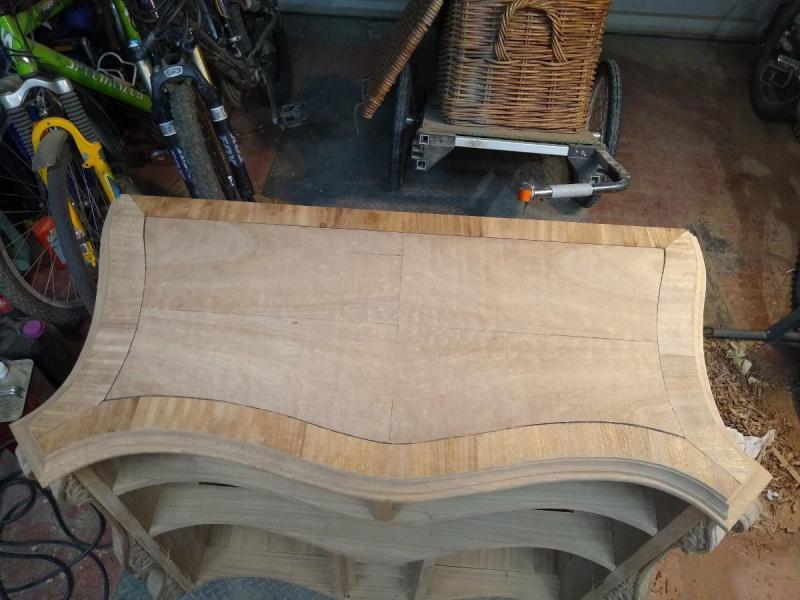
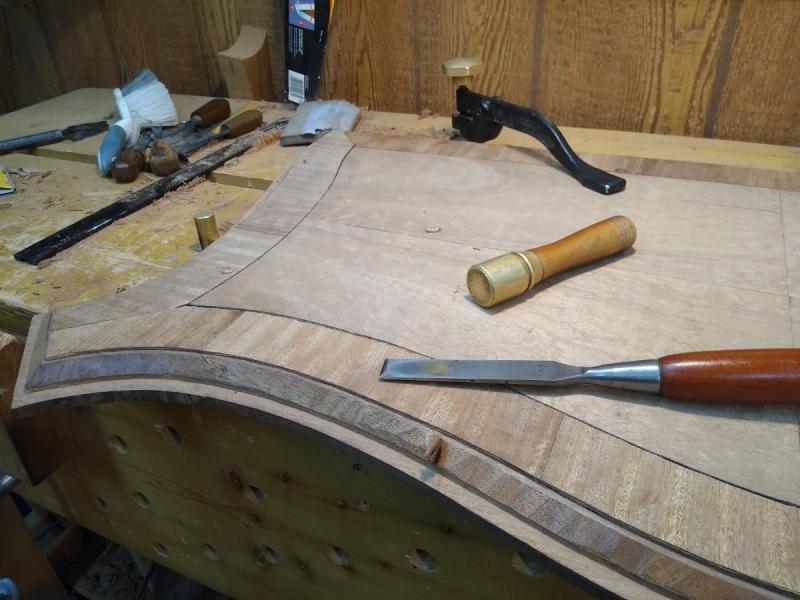
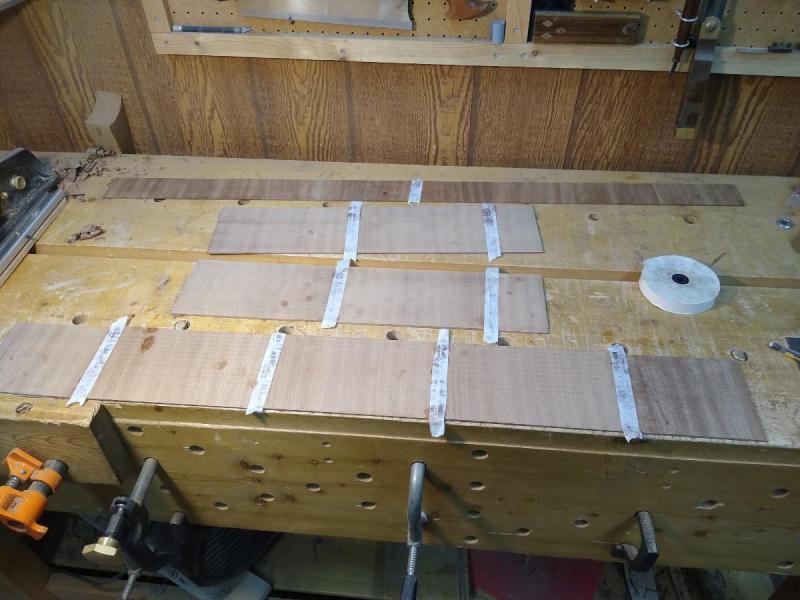
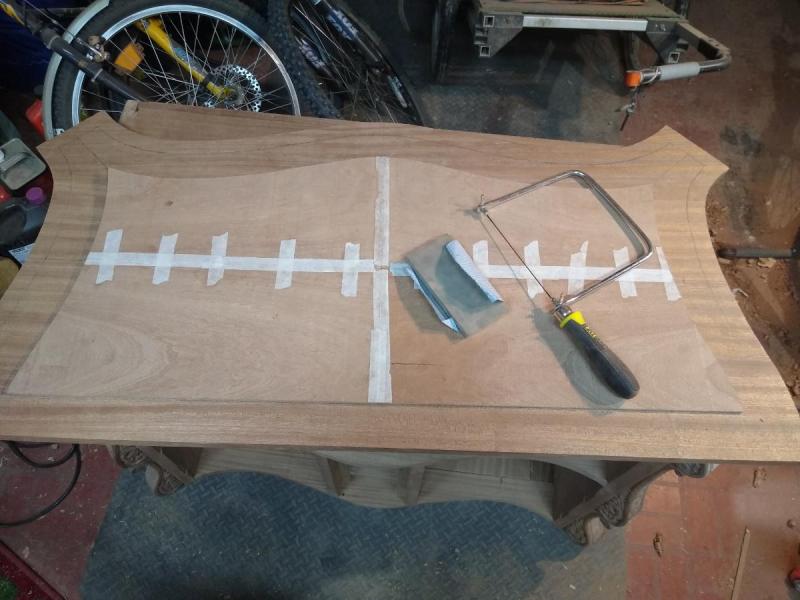
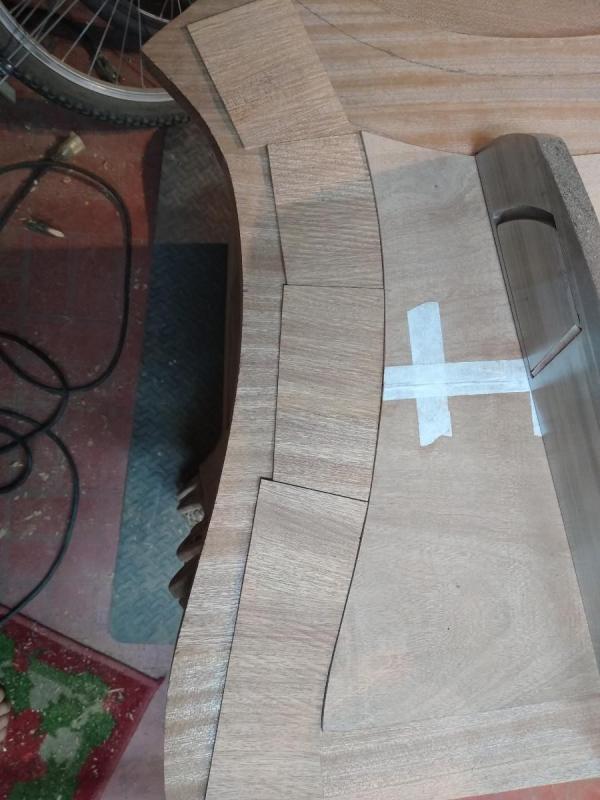
I cut four slices off the board, and managed to get an acceptable match (I think). The veneers are quite thick, I was going for a generous 1/16, but it's almost a thin 1/8. I taped up the sheets, and then added CA glue along the joins to keep everything aligned, and cut out the shape. For the cross grain edge, I started out cutting segments to keep the grain perpendicular to the edge. I was a bit concerned that the joins would end up too visible ... then after looking at pictures on line ... I realised that all of them kept the cross-grain at right angles to itself. So I cut some more cross-grain veneer a bit wider, and glued up continuous pieces for the edges. WIth careful cutting and filing to get a good match, I have edges that fit perfectly with the central face. I left the mitres uncut thinking that It would be easier to cut them after partial gluing. The thick veneers still cause me problems gluing them down, but eventually the central panel stuck down ok. The edges were more of a problem, because of the wet nature of the hide glue, the shape of the veneers changed slightly, and my tight fitting joints were no longer very tight fitting. SInce the joints were now going to be very visible, I added a piece of black stringing, so that they were at least deliberately visible. For the corner mitres, I found it easiest to cut the top sheet of veneer before gluing, then overlap it with the lower sheet, and cut the lower sheet with a couple of taps with a chisel. Well, it looks ugly as heck at the moment. Hopefully it will pass as good enoigh once it is cleaned up ... but the join between the face and edge banding is irregular, the mitres aren't all that good, I'm still having trouble keeping the edges of the veneers stuck down and not curling up ... These homemade thick sawn veneers are very much harder to work with than thin commercially sliced veneers.


-
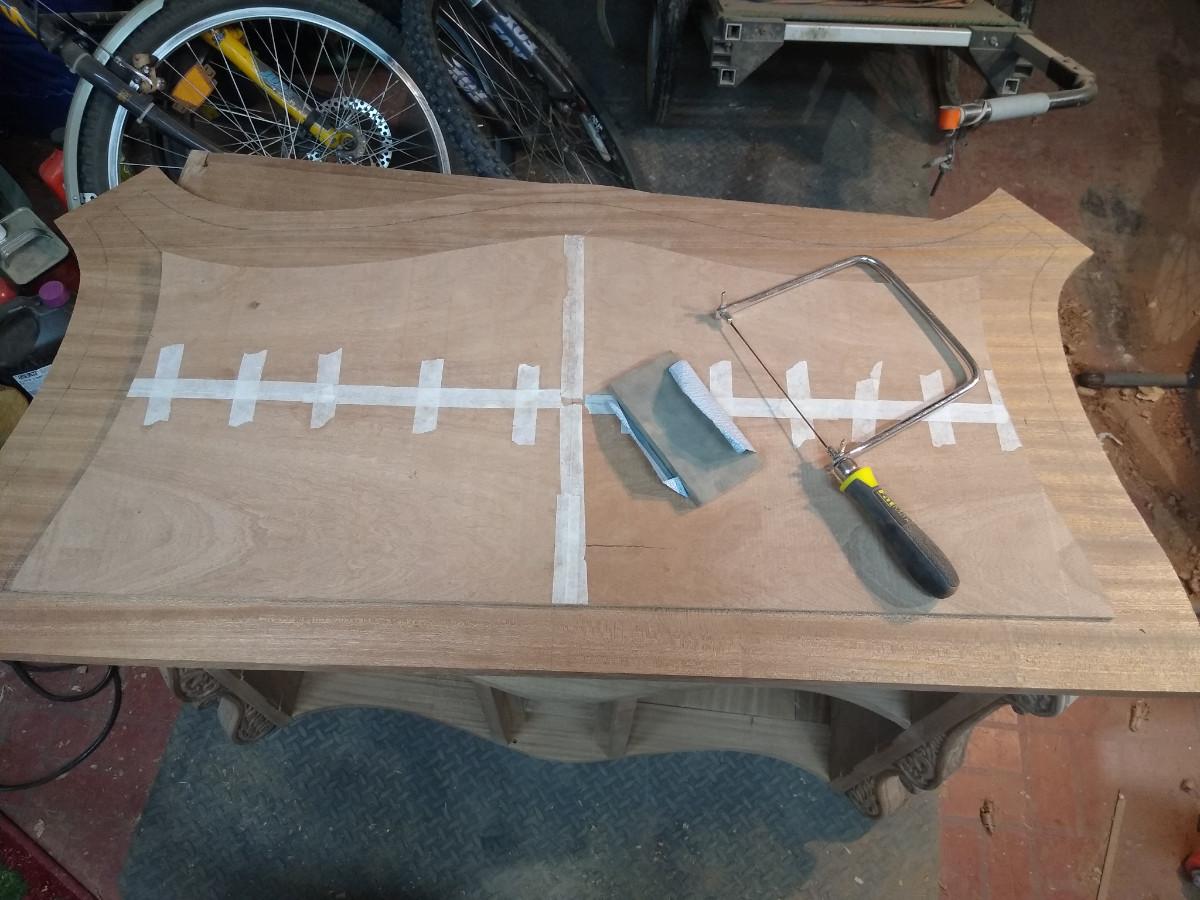
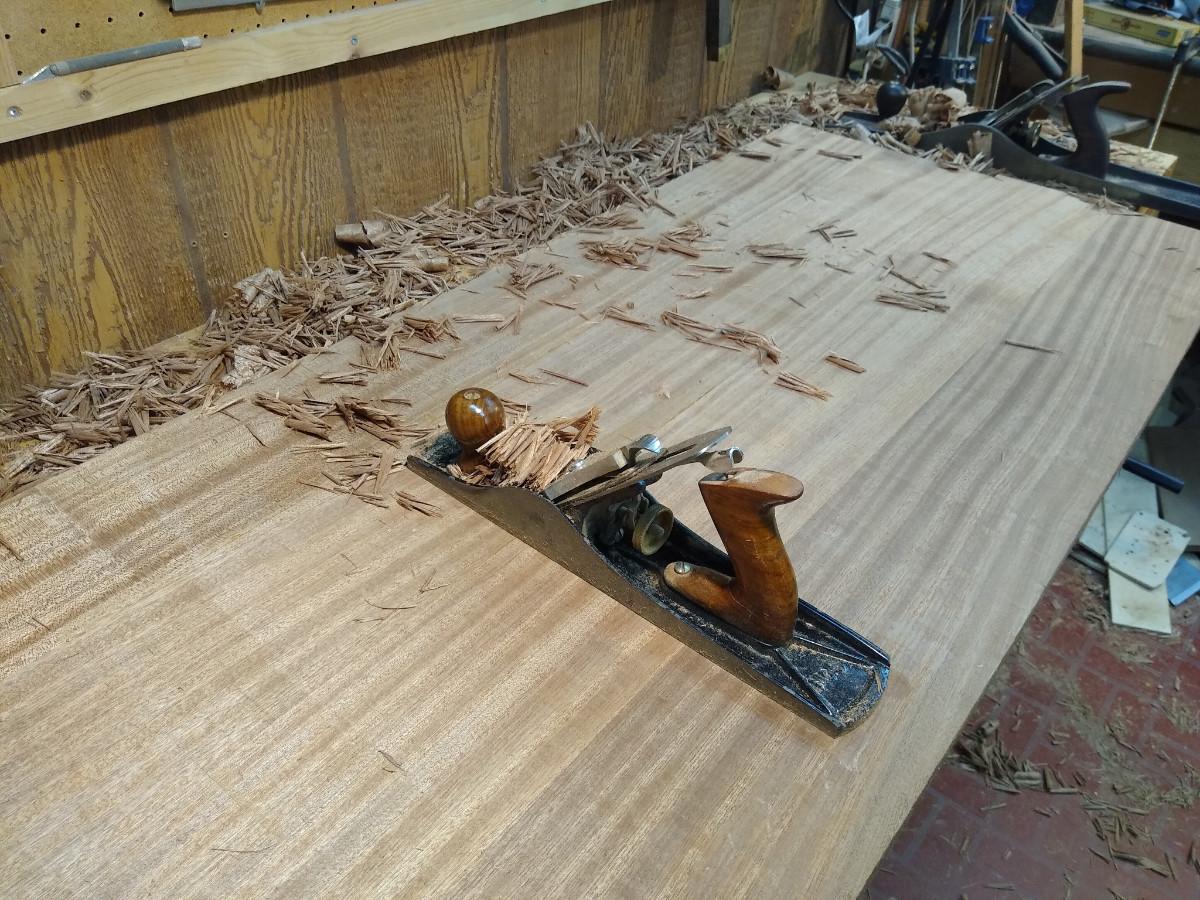
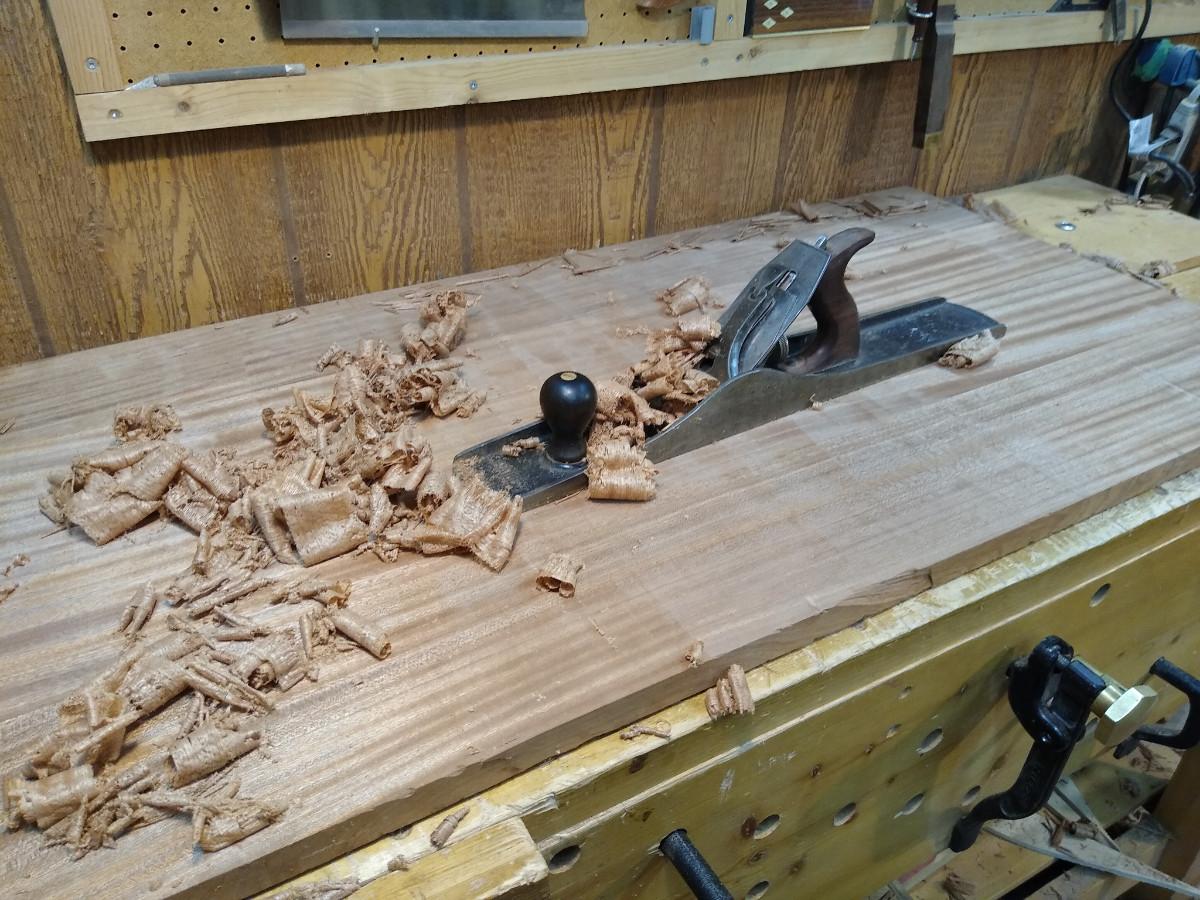
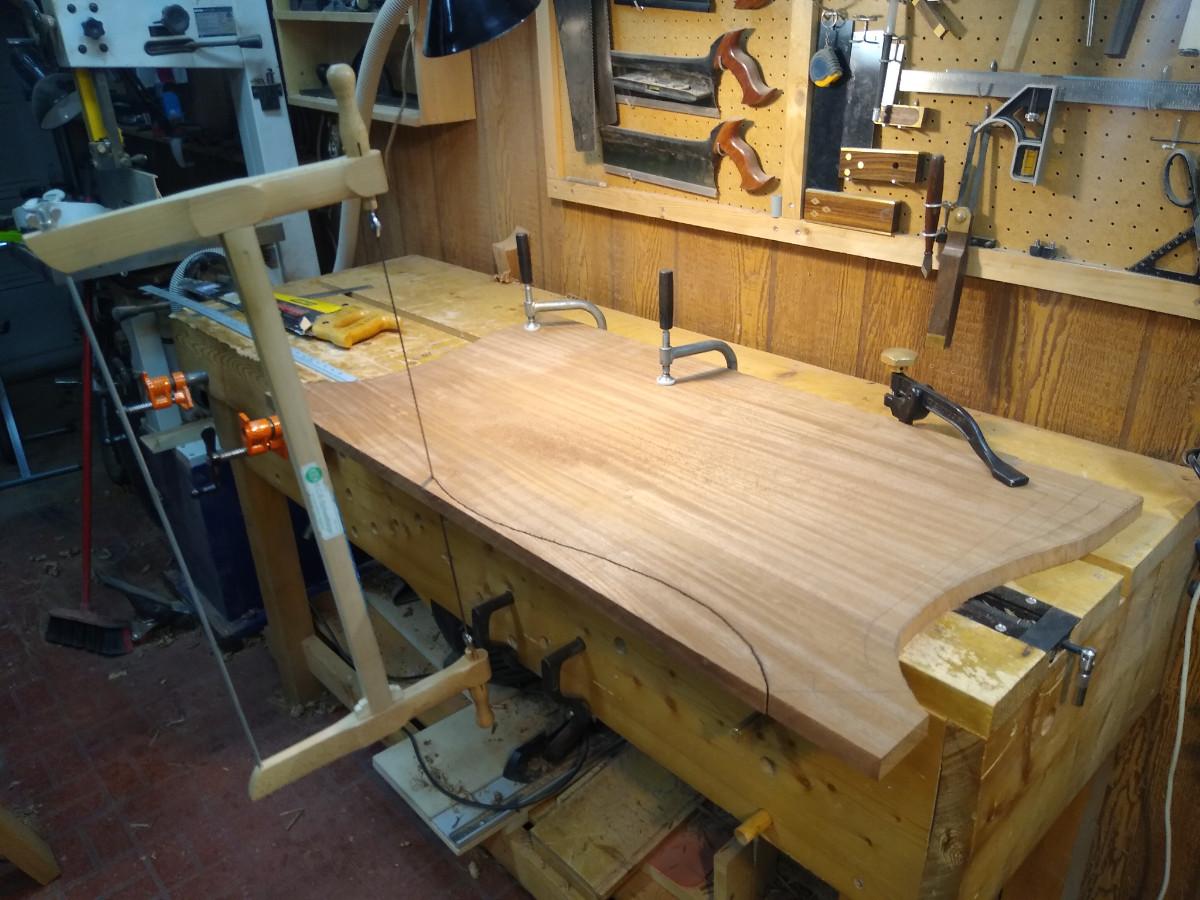
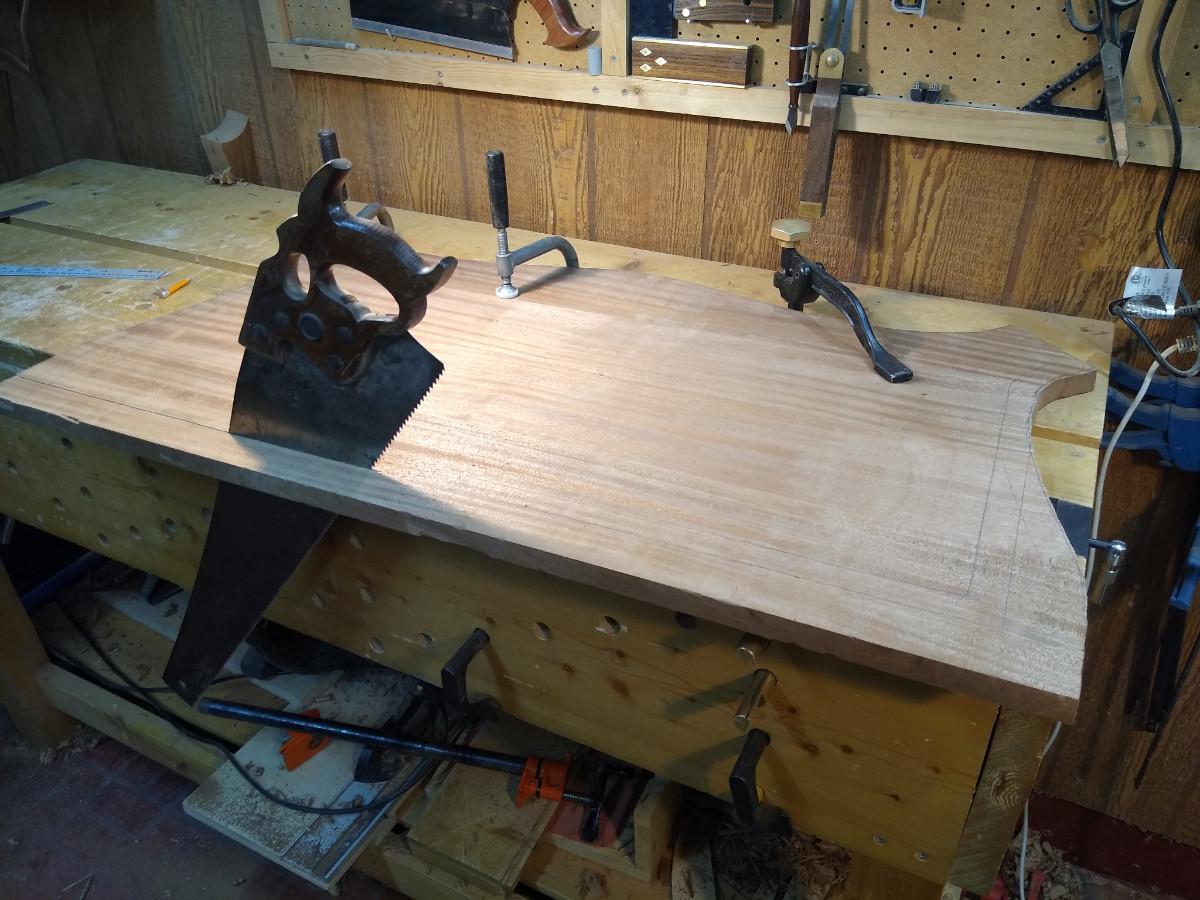
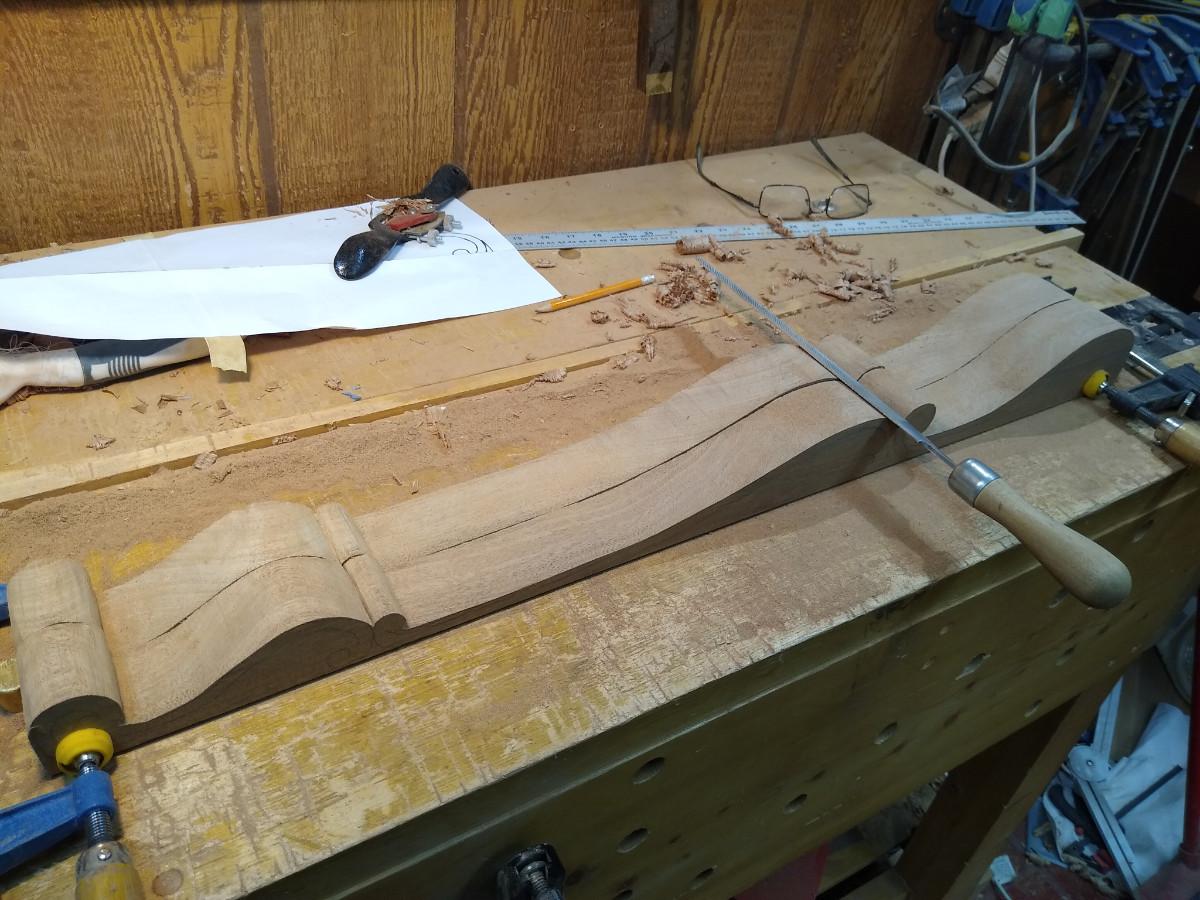
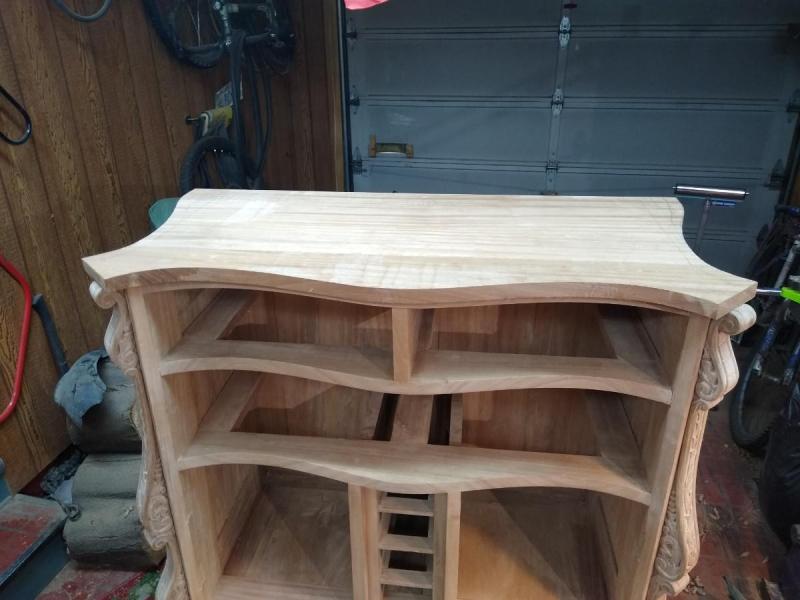
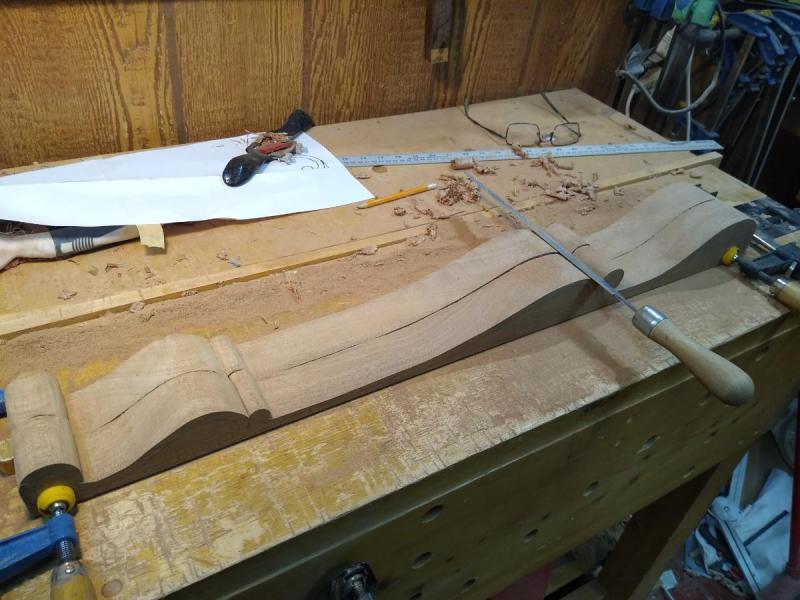
Before making any decisions about what to do with the top ... I need a top. I had the panel in the clamps overnight. It the needed flattening, first across the grain with the #5, then across the grain with the #7, and finally along the grain with the #7 ... on both sides. Then I flipped the cabinet upside down onto the panel, and traced round the top ... offset by 1" all the way round. Then added a bit of curve to the sides, using the template from the front, so that it is approximately the same curve. I decided to forgo the bandsaw, and use my old faithful hand saws for a slower cut, but solid workholding. finally cleaning up the edges with the spokeshave and planes, and I have a top ready for whatever it is I decide to do with it.


-
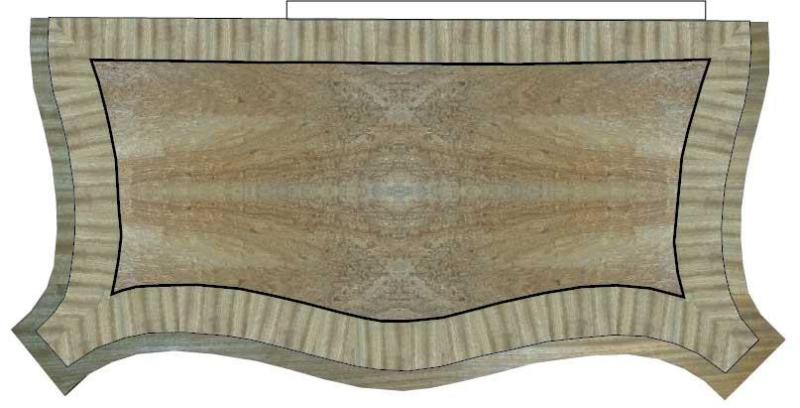
Wait a minute ... I have a bandsaw now! ... If I'm not looking for fancy, I can cut my own veneers ... one of my boards had a little bit of figure in at one end, and I kept that to one side ... If I give it a fairly wide cross-grain edge, I could just make it fit with a quartermatch. Something like this: The next question is ... are my veneering skills good enough to get tight joins at the quartermatch and the curved edges? And will the sawn veneers produce 4 sheets close enough in pattern to give a nice quartermatch?
-
Well. ypu've got me looking at veneers online now ... however it might take longer than I have this Spring, and cause a delay until Autumn to finish ... I still have the feet to carve as well.
-
I'm afraid I was planning on leaving the top quite plain ... just cut to shape and with a profiled edge. There is enough highly figured veneer om the front, I don't want to overdo it with a fancy veneer on the top as well. A low-key veneer with a nice edge banding would certainly look good, but I don't think I'm going to do that unless the top I do make just looks wrong.
-
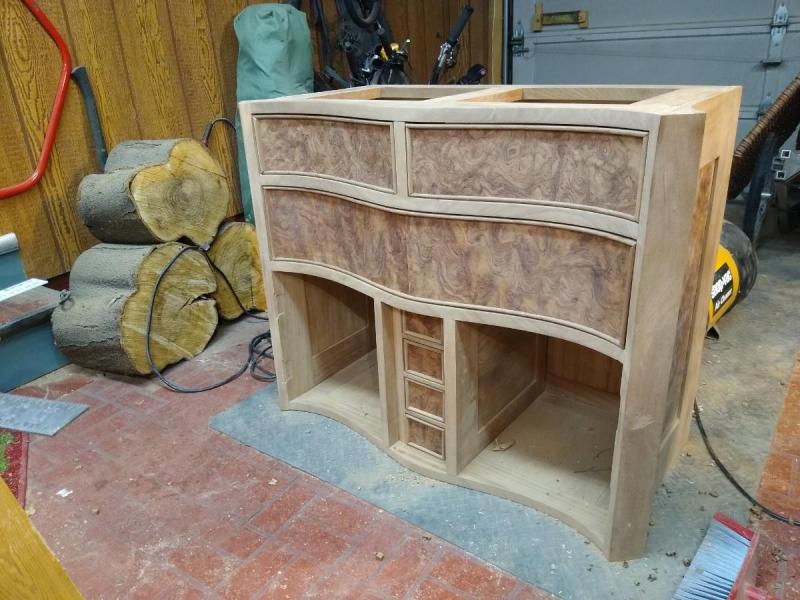
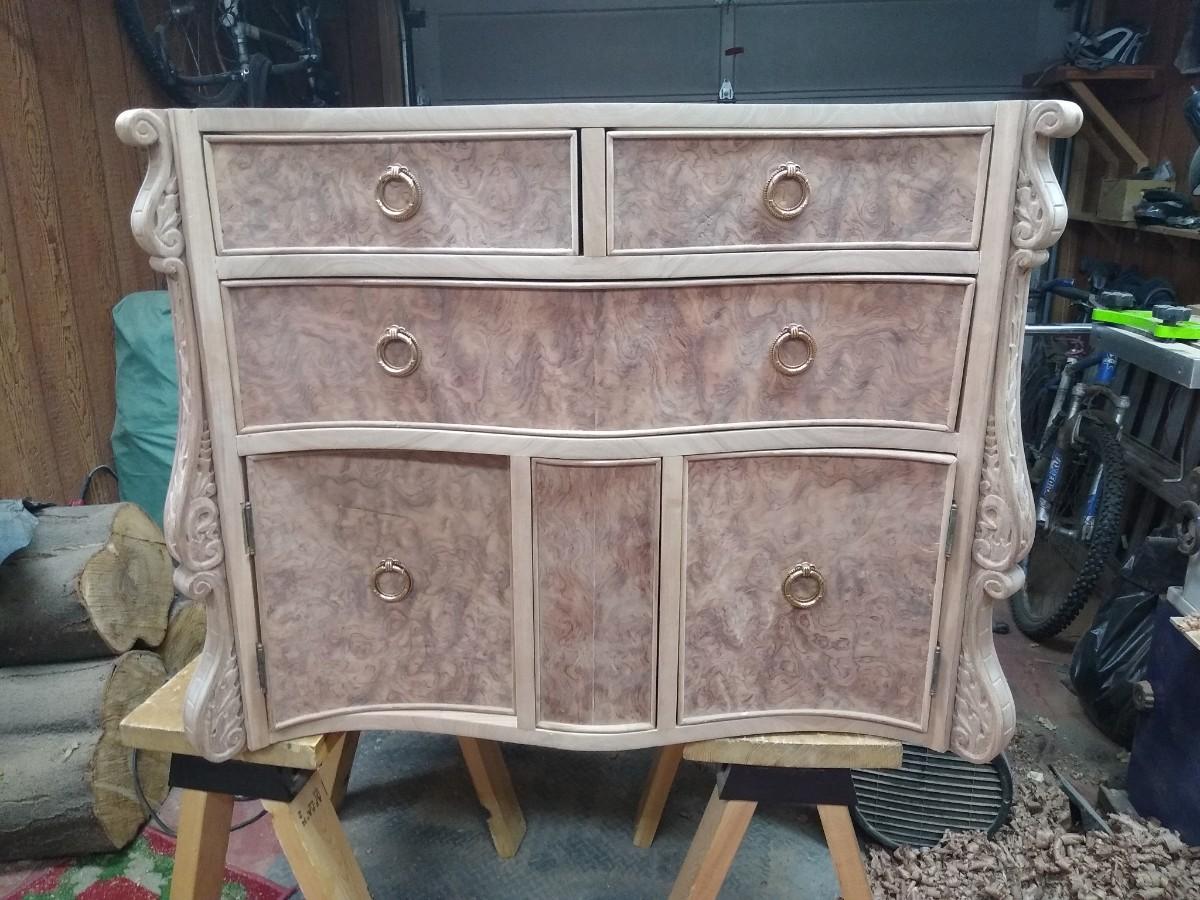
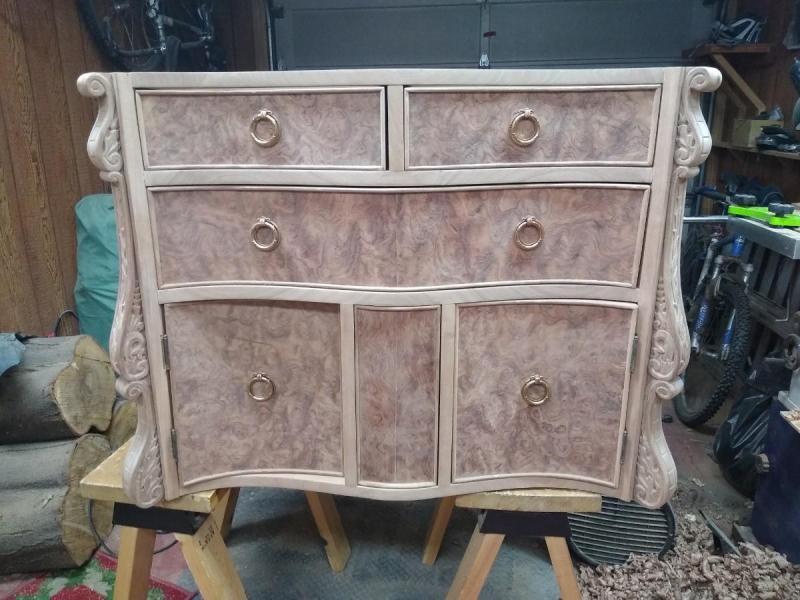
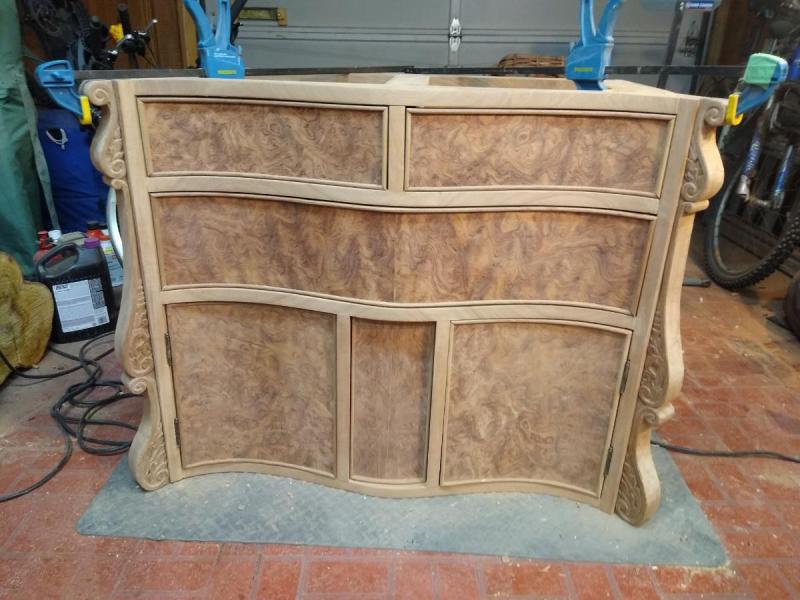
Before gluing up the drawers, I wanted to drill the holes for mounting the drawer pulls. I put the pulls for the upper drawers in the middle of the drawer, and for the doors in the middle if the door However, because they are different widths, that means they don't line up vertically. That means that the pulls for the middle drawer have to lie on the line connecting the middle of the drawer above, and the door below. The three pulls on each side are then on a slight diagonal ... I quite like the look
-
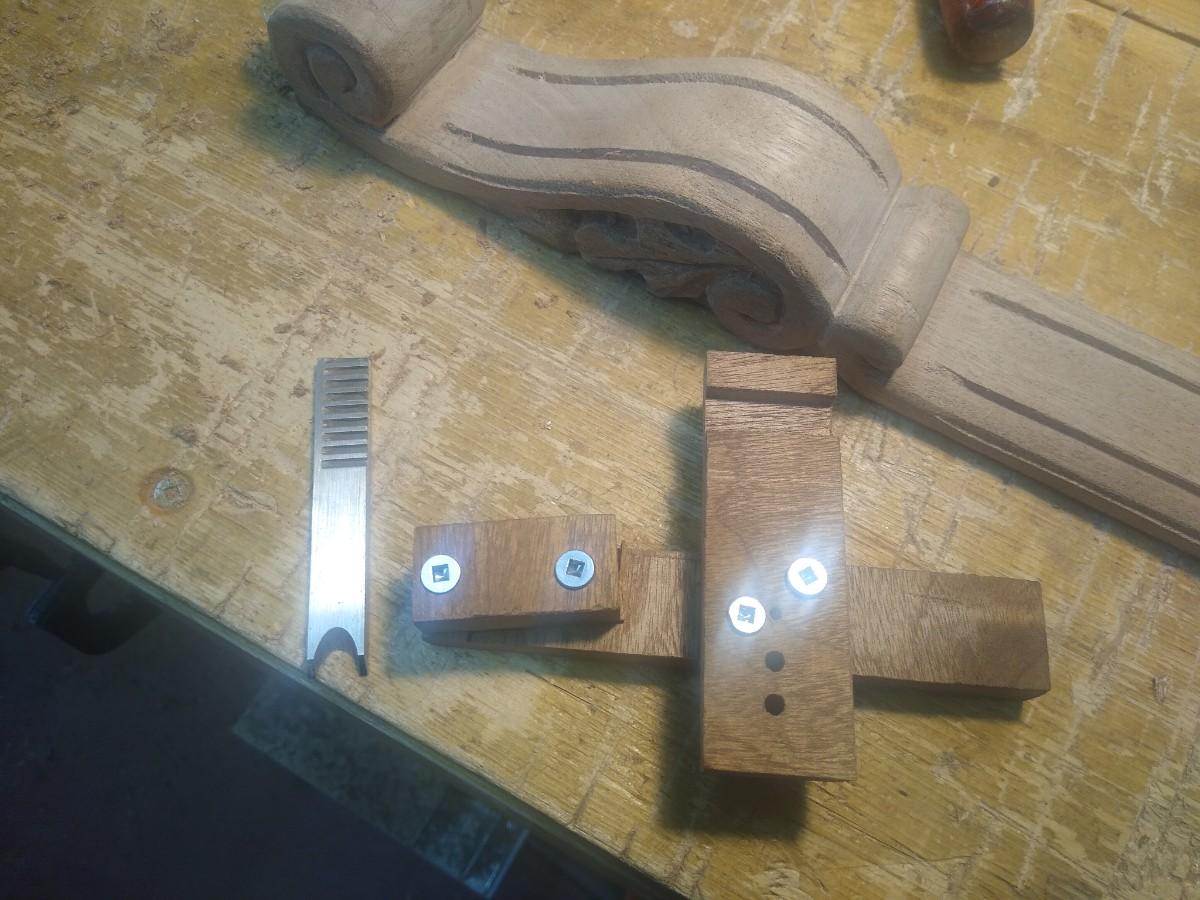
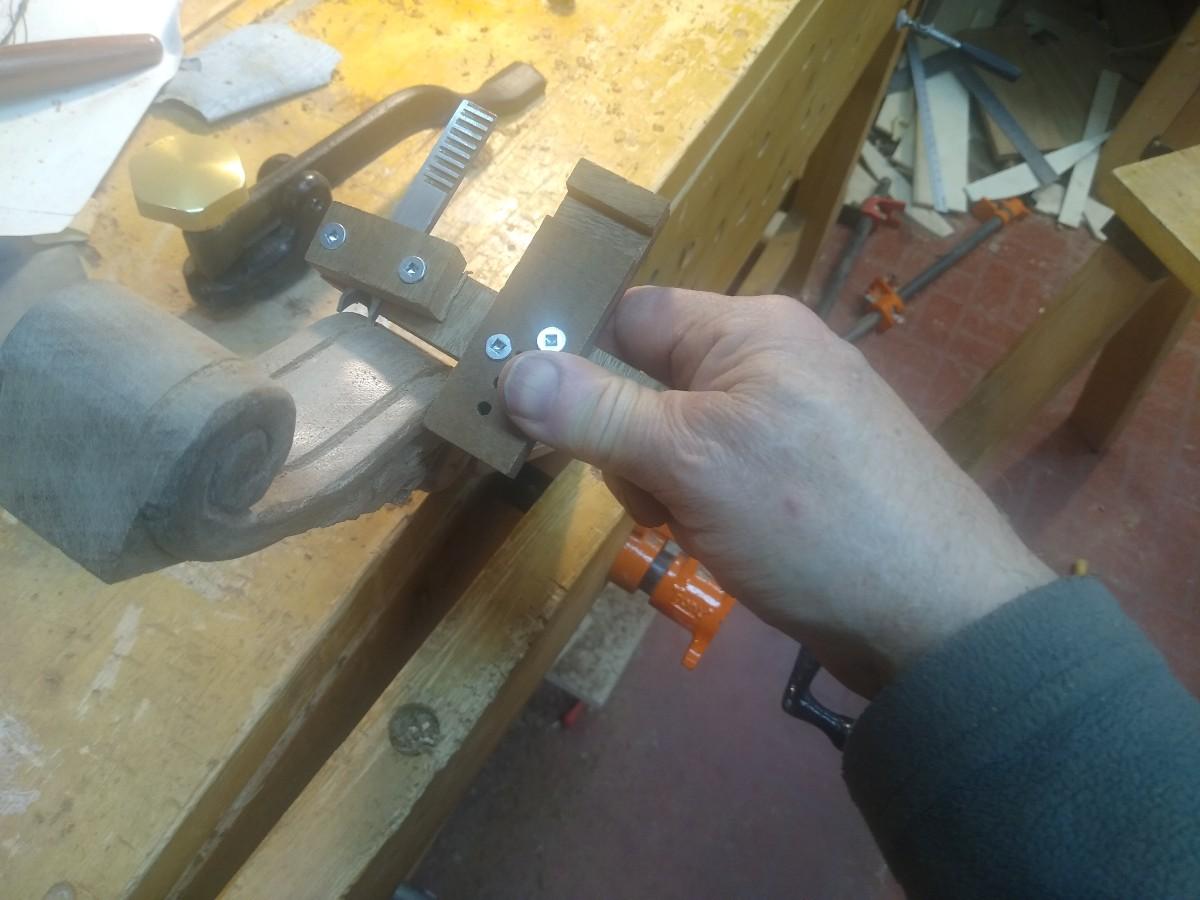
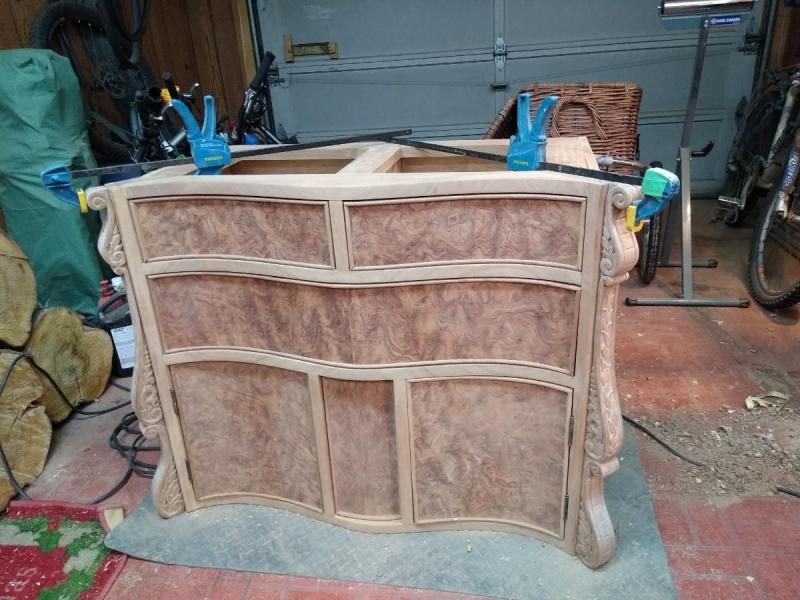
Having carved the edges of the corner posts, next it was time for the faces ... First I wanted to continue the bead from the edge onto the face. Unfortunately the largest scraper I had for my beading tool was too small. However, I did have the perfect size blade for my plough plane. Obviously the plane can't be used on this complex curved edge, so I made a small jig to hold the blade as a scraper. Unfortunately the scraper jig couldn't get into the tight corners, so I ended up using the blade as a chisel, with gentle taps from the small mallet to finish of the grooves. Then with the grooves cut, the bead was rounded over, some pattern carved into the face, and the corner posts are ready. I used a few dowels on the posts to keep them aligned during gluing, since it wasn't an easy geometry to clamp


-
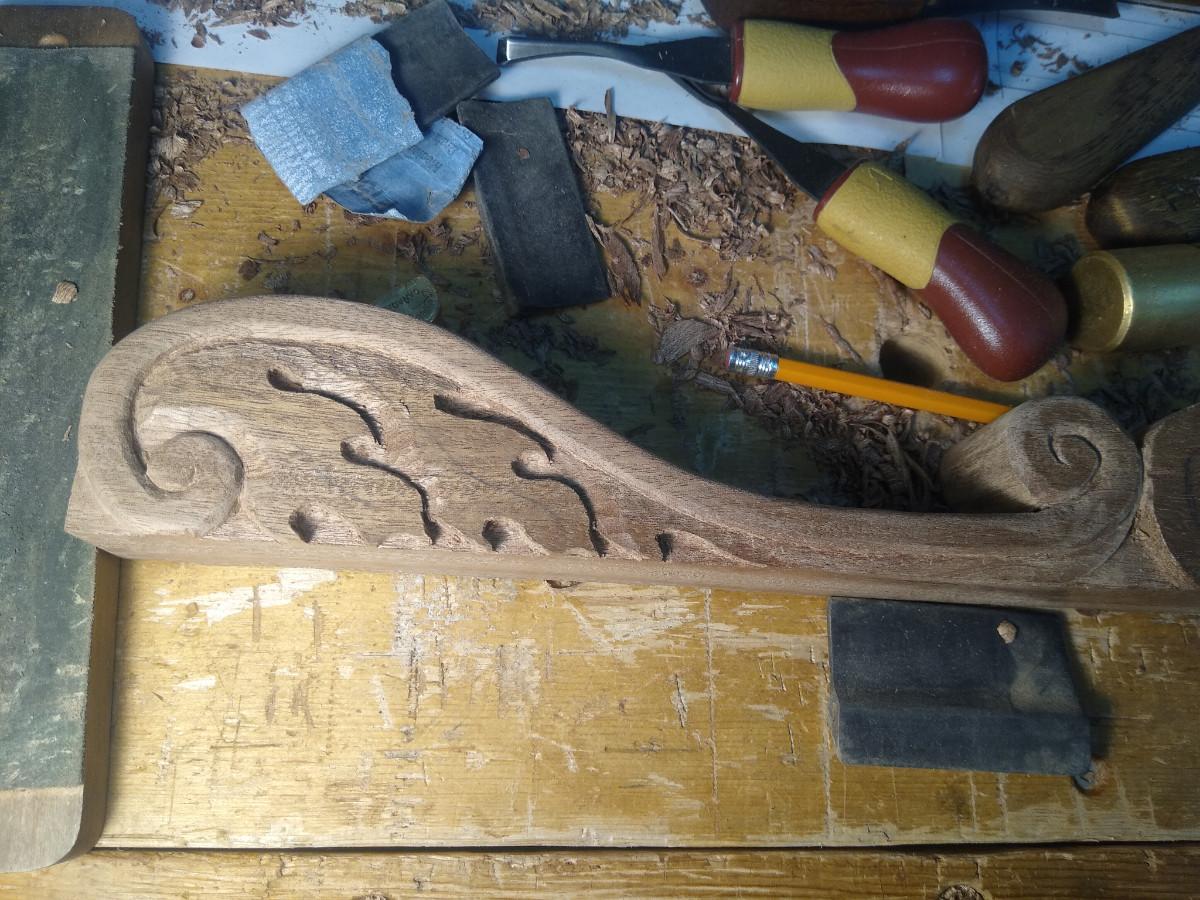
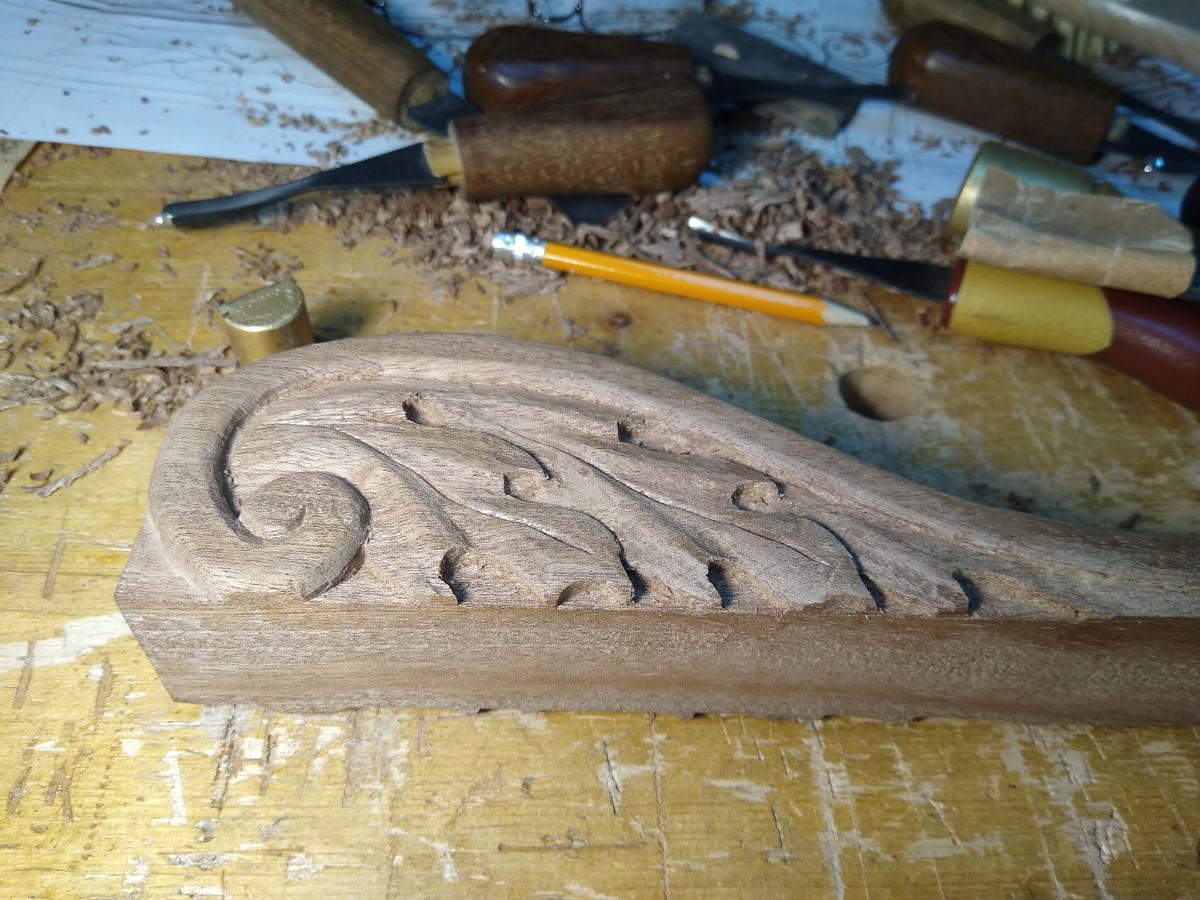
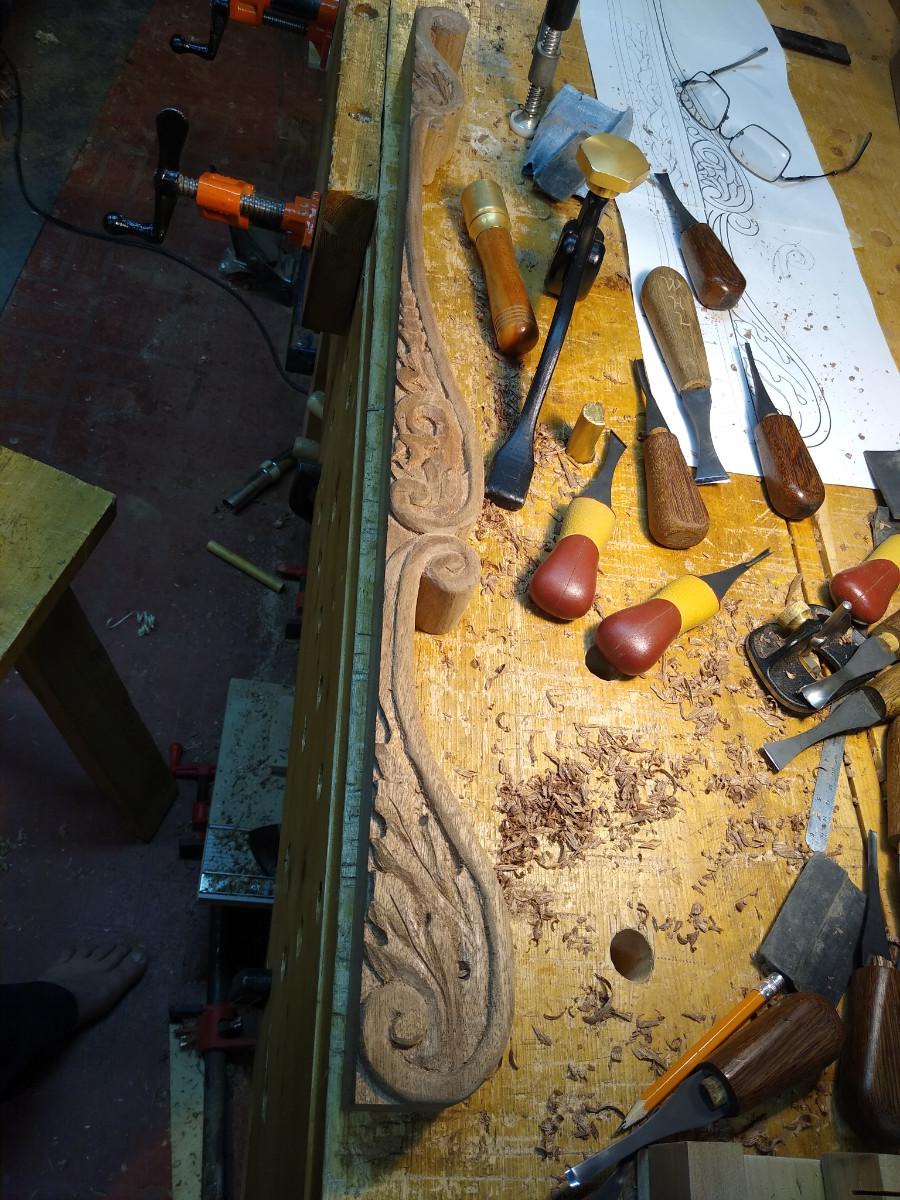
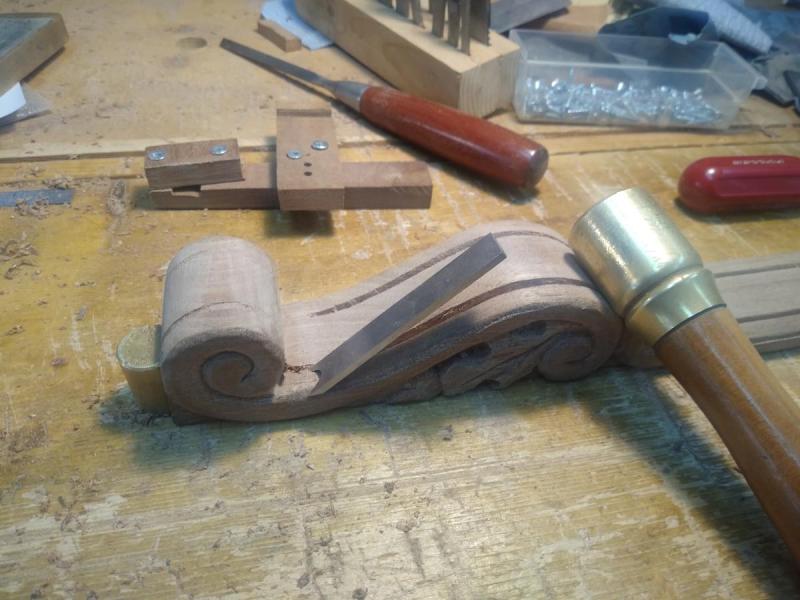
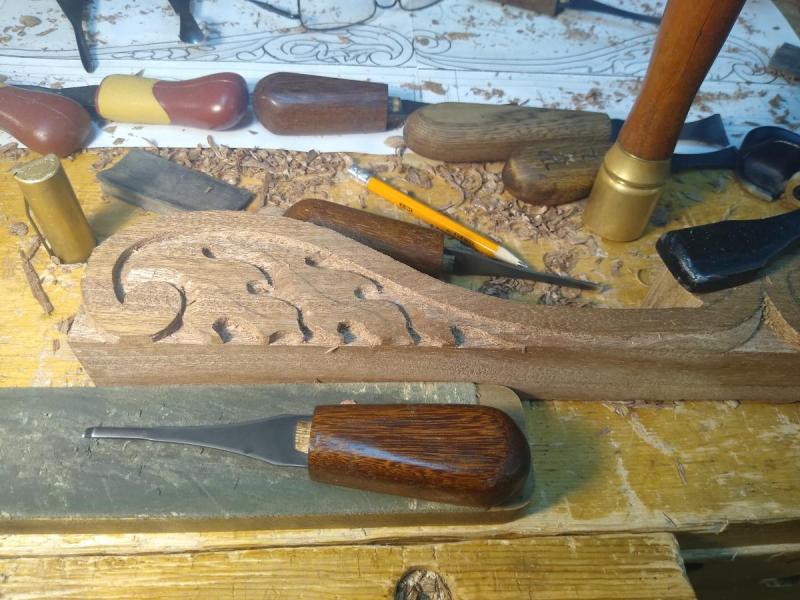
Still working on the carving. My carving techniques leave a lot to be desired, but I took a few photos as I went ... Starting with the design drawn onto the wood So that I don't cut away my pencil marks early, I start by cutting out the deepest parts. There is a background level that the carving is all proud of, so I start by cutting down anywhere on this background. With a larger piece I'd usually use a router, but there is so little to do here, it's probably just as quick and safer with the gouges. WIth a low-relief carving like this, every element is either in front of or behind its neighbour. I then cut back all the boundaries so that the back elements are cut deeper than those in front. So the right leaf is behind the left leaf, so I cut the right leaf down where they meet. And all the leaves have to be lower than the spiral border. Once again I start with the lowest part first, so the higher pencil lines remain until I need them. Once this is done, the basis of the relief is done, and I can start rounding off the elements to final shape. This time I start with the highest elements. I can always cut away at the elements below if I need a bit more relief. SO starting with the spiral ... and I'm not afraid to get a bit of help from some sandpaper if it helps. And finally flesh out the shape of the leaves. This is the first time I've actually carved a design based on the traditional acanthus leaves. I've done leafy designs before but they always ended up more like reeds which have a nuch simpler structure. I think these ended up passable. Three done, one more to go.


-
Got the second face of the corner posts carved ... when put next to the case, we can now see a glimpse of the look it's going to give.
-
No ... one day it would be fun to give it a go ... but lutherie scares me, it's so unforgiving of imperfections. Abd then there's all the soecialised tools and clamps and templates that I don't have. Furthermore, I already have the instruments I want to play ... However it would be pretty darn cool to be playing one I built myself ... one day.
-
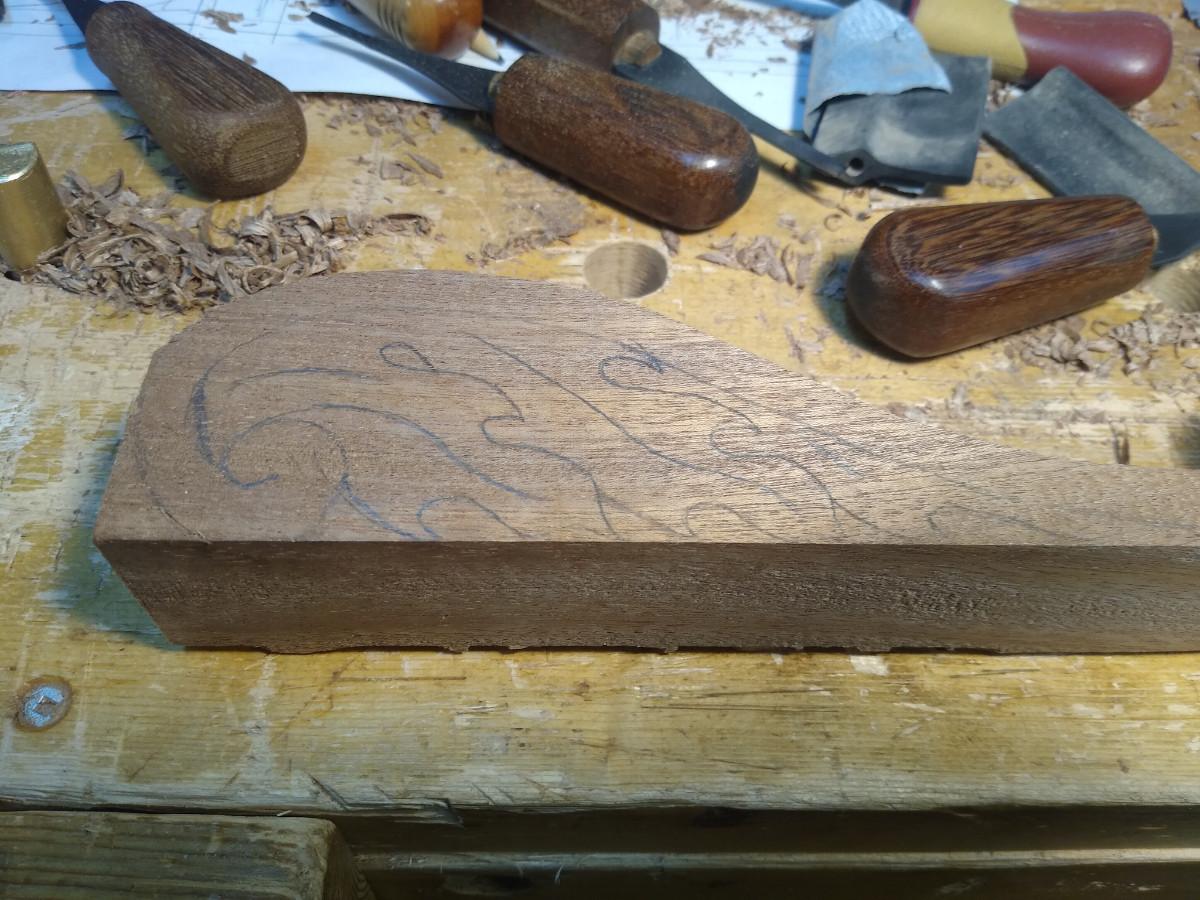
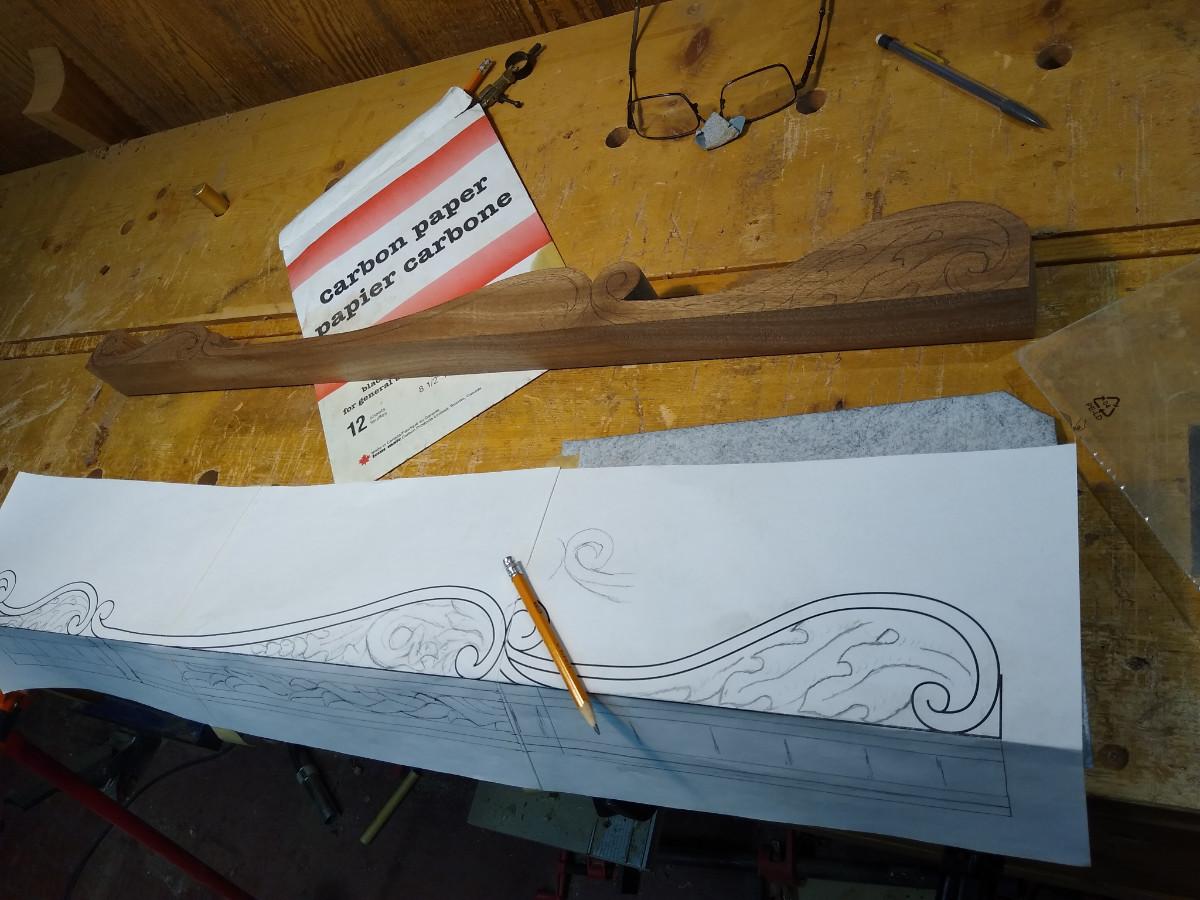
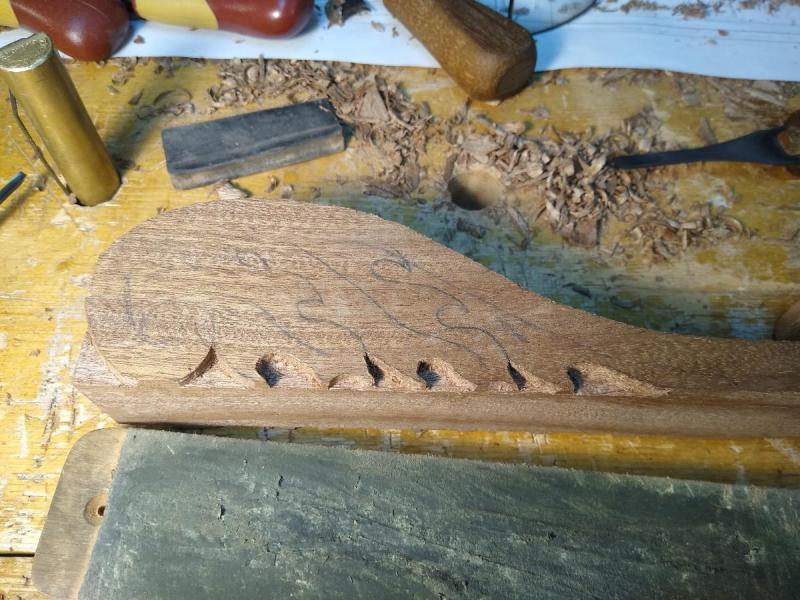
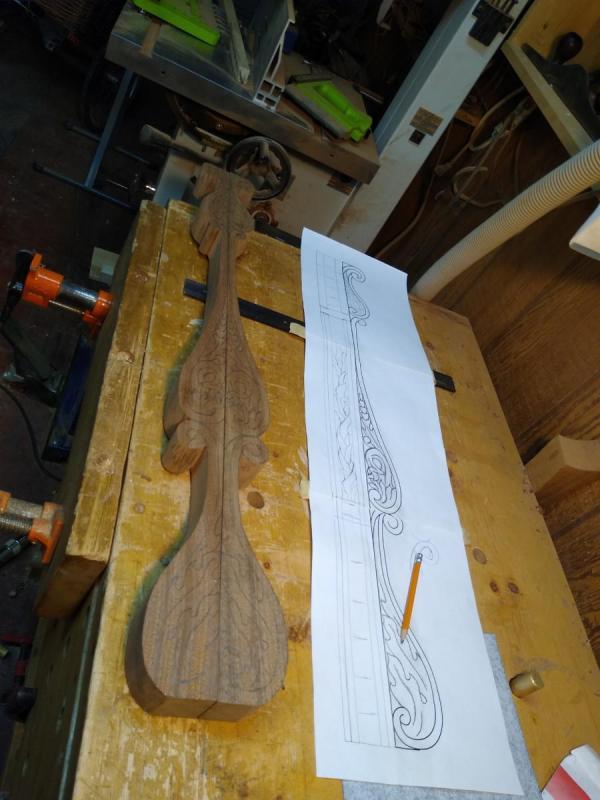
Time for some carving ... a decorative carving is going to be applied to the cirner posts ... Twi blanks cut out at the bandsaw, and brought to final shape with the spokeshave and rasp. Tracing the design onto the blanks ... Ready for carving My carving is pretty poor, and like my veneering it's likely to be a bit rough ... but as long as it ends up "good enough" I don't have to rival Grinling Gibbons. ... one side pretty much done ... no to repeat that 3 more times on the other sides.


- 127 replies
-
- 10
-

-
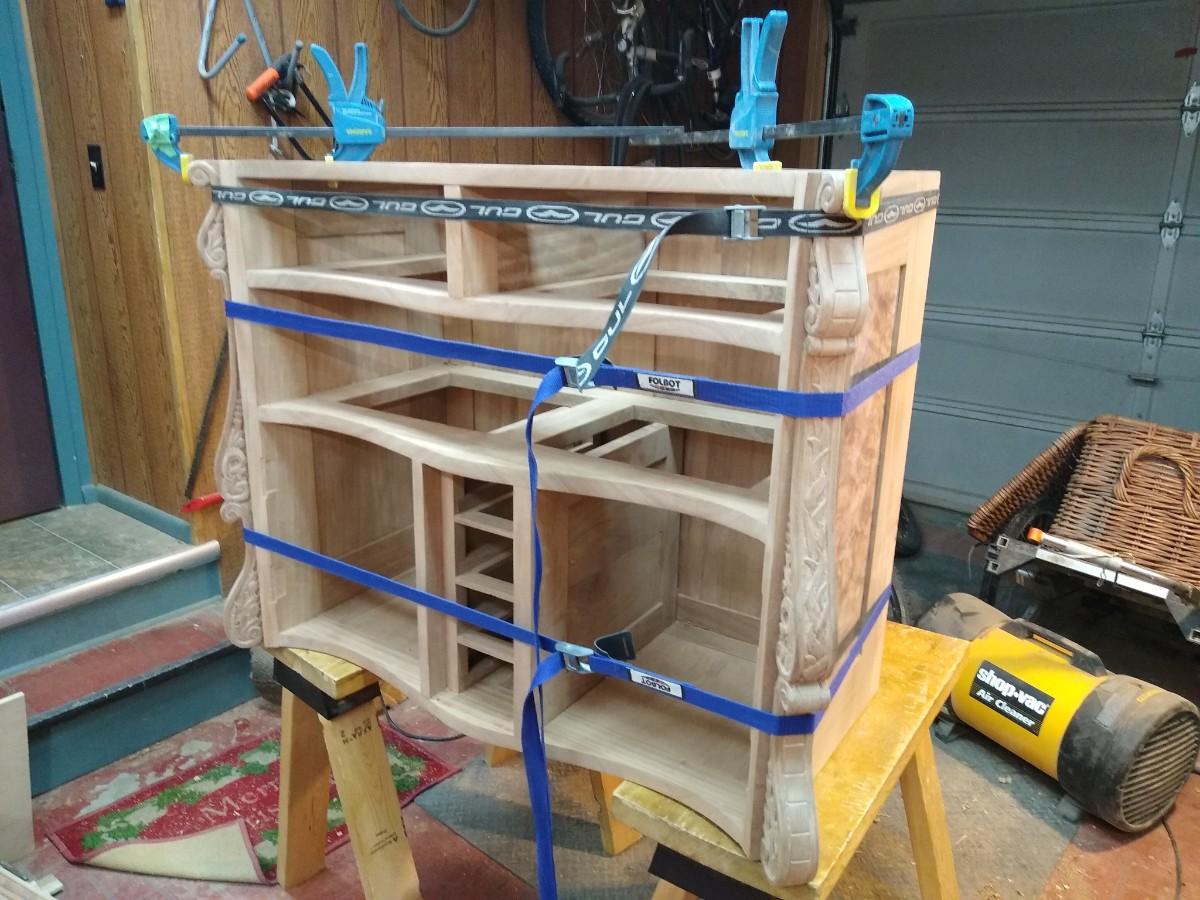
Got the large drawer mostly completed today