woodbutcher Posted May 4, 2018 Author Report Share Posted May 4, 2018 [mention=22137]woodbutcher[/mention], back a few frames, what do you find the advantage to be, cutting the tails first on your dt’? By no means being critical, just asking. And how do you remove the waste on both boards? The reason for asking, I’m working on my third project with dt’s, all guild builds following Marc’s lead and he cuts the pins first. I understand from reading from others that it’s personal thing, whatever floats your boat. Just wondered your opinion. This thing is looking fantastic by the way, resaw was phenomenal. Thanks Coop! I like cutting tails first, because i can cut the tails and remove the waste, and thats all there is to do to them. Then once the transfer to the pin board is made, if any paring is needed to fit the tails, which at this point for me, a little is required on each joint, i have room to get my chisel to the side wall of the pins. Now if i were to cut them pins first, if any paring is needed on the tails to get the fit, theres not much room at all for chisel in the small area between the tails. Of course, this wouldnt be a problem if i made the pins huge, but skinny pins look so much better.Now im sure one could cut the pins, transfer them to the tail board and cut the tails, then pare the pins to get the fit, but that sort of back and forth just doesnt make as much sense to me as tails first, transfer and cut the pins, then pare back what you need. We need a pins first dovetailer to offer it from their perspective. I remove the waste with a coping saw. Nothing fancy just a $10 stanley from the home center. I take my time with it and try to leave less than a 1/16" to chop back to the base line with a chisel. Sent from my SM-G920V using Tapatalk 1 Quote Link to comment Share on other sites More sharing options...
Dknapp34 Posted May 4, 2018 Report Share Posted May 4, 2018 Tails first, ftw! 1 Quote Link to comment Share on other sites More sharing options...
wdwerker Posted May 10, 2018 Report Share Posted May 10, 2018 I cut tails first, using my Keller dovetail jig ! I love to watch y'all discussing & hand cutting dovetails but my jig does all I've ever needed. Quote Link to comment Share on other sites More sharing options...
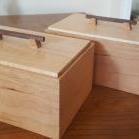
Popular Post woodbutcher Posted May 15, 2018 Author Popular Post Report Share Posted May 15, 2018 So before i could glue up the door, i surface prepped all the parts, and broke the edges with a block plane. The grain on the rails and stiles was pretty straight, so i was able to use my hand plane to do the bulk of the prep, then i did a quick pass with 220 sandpaper and a sanding block. Im a big fan of prefinishing, it helps with glue squeezeout removal, and makes final finishing easier when i finish the spots that can be hard to reach when things are glued up. So i put a couple coats of shellac on the door panel, and the edges of the rails and stiles.Then i glued the door. That was stressful, as most glueups are. Lots of parts, not much time. I should have used Titebond 3 for the door, longer open time than TB1. But it went ok. Once the door was glued and out of clamps, i fit the door to the opening. I did this with handplanes. Im always afraid of taking too much when using the table saw, i feel way more in control with a hand plane. With the door fit to the opening, i mortised the hinges into the hinge strip, then transferred the location to the door. I mortised the hinge leaves flush, which i always thought was the way to do it. But when i hung the door, the gap between the door and hinge strip was huge! At least 1/8", probably more. I didnt take a picture cause i kind of freaked at that point. I recessed the hinges deeper into door and strip, a good 1/32" on each, and finessed the gap with a hand plane. I took a picture of the hinge with the leaves parallel. Those are Horton Brasses by the way. Nice hinges. I would have went Brusso, but they didnt have a real dark finish like these, that was a must for this project. Finally, for this update, is the muntins for the door. I took an offcut from the door panel, and planed it down to a 1/8" thick. Then i ripped the strips out a little heavy of the 7/16" wide that the grooves are. I fit the strips to the right width with a couple hand plane passes. Then i cut to rough length with a saw and saw hook.Then shot the ends to the exact fit. And glued them in. That wraps up the door, and it was quite the challenge. Next up, the drawer. Should be fun. Thanks for reading.Sent from my SM-G920V using Tapatalk 3 Quote Link to comment Share on other sites More sharing options...
wdwerker Posted May 15, 2018 Report Share Posted May 15, 2018 I love the little details that really show your true craftsmanship. Those are some nice thick hinges ! So after the drawer is the kumiko ? I have cut the hinge recess too deep when doing the same thing you did. I just added pieces of paper under the hinge until it was just the right depth. 1 Quote Link to comment Share on other sites More sharing options...
..Kev Posted May 15, 2018 Report Share Posted May 15, 2018 Solid work! Sharp looking cabinet! 1 Quote Link to comment Share on other sites More sharing options...
woodbutcher Posted May 15, 2018 Author Report Share Posted May 15, 2018 1 hour ago, wdwerker said: I love the little details that really show your true craftsmanship. Those are some nice thick hinges ! So after the drawer is the kumiko ? I have cut the hinge recess too deep when doing the same thing you did. I just added pieces of paper under the hinge until it was just the right depth. Thank you! After the drawer im gonna do the back. Ill resaw some ash, then half lap the edges. Im a little nervous about resawing the ash that I have, the boards are 13/16" thick. Im hoping for 1/4 " thick at least, thats gonna be cutting it close i think. 1 hour ago, ..Kev said: Solid work! Sharp looking cabinet! Thanks Kev! Quote Link to comment Share on other sites More sharing options...
Keggers Posted May 17, 2018 Report Share Posted May 17, 2018 I'm really enjoying this build. Thank you for posting! Quote Link to comment Share on other sites More sharing options...
gee-dub Posted May 18, 2018 Report Share Posted May 18, 2018 Looking good. I'm lovin' the ride-a-long. Quote Link to comment Share on other sites More sharing options...
pkinneb Posted May 21, 2018 Report Share Posted May 21, 2018 Coming along nicely! Quote Link to comment Share on other sites More sharing options...
Popular Post woodbutcher Posted May 25, 2018 Author Popular Post Report Share Posted May 25, 2018 Well its update time again. Been working on the drawer for a good while and have been taking care of other details as well. I havent been taking many pictures of late, apologies for that. But heres what i have for the drawer. After planing down some ash to 1/2" thick, i cut the tails for the back. I got a little confuzzled on how to lay out the lower tail to account for the drawer bottom. I almost put the pin too low and would have had to run the groove for the drawer bottom lower than id feel comfortable. I aim to have the groove start 1/4" from the bottom edge of the sides and front. I was still able to acheive that, but only just. So with the back dovetailed to the sides, I laid out and cut the tails for the front. Then i used the good ol' tape trick for the half blinds on the front. Then sawed at a 45* angle to the tape edge. Heres a new to me trick. I think Marc does this i cant remember. I took an old crappy dovetail saw and put it in the saw kerf from before. Then took a hammer and tapped it down through whats left from sawing at an angle. Take small bites with this!! Im glad i tested the theory on scrap, i tried cutting through all the waste at once and it split the board. I cut out only an 1/8" at a time and it goes through much easier. Still stressful though. I used the drill press and a forstner bit to hog out the waste of the half blinds. It really speeds up the process big time. Didnt get a picture of this or anything else for the drawer from here. Next time i do any half blind dovetailing, i think im gonna buy a lie nielsen fishtail chisel. Its alot of money to spend on a single chisel, but getting into the nooks and crannies of a half blind tail socket is a pain with anything else. Even my 1/4" chisel that i ground the sides down. Anyway, heres the already glued up and finished drawer. And the drawer stop in the case. It was hard to bring myself to run screws into the bottom of the case, but i wanted to be able to remove the stop and fine tune it. Thats it for this one. Getting close now! Thanks for reading. Sent from my SM-G920V using Tapatalk 3 Quote Link to comment Share on other sites More sharing options...
pkinneb Posted May 25, 2018 Report Share Posted May 25, 2018 Those DT's look great! 1 Quote Link to comment Share on other sites More sharing options...
Coop Posted May 25, 2018 Report Share Posted May 25, 2018 Great job on the dt’s. Marc used the same technique using a mallet taping on the saw to complete the cuts. 1 Quote Link to comment Share on other sites More sharing options...
wdwerker Posted May 25, 2018 Report Share Posted May 25, 2018 This is where skilled hobby craftsman exceed most if not all the pro's. Quite impressed ! Rock on . 1 Quote Link to comment Share on other sites More sharing options...
woodbutcher Posted May 26, 2018 Author Report Share Posted May 26, 2018 Those DT's look great! Thanks! Yes those are easily the best on the project so far. Very happy with them.Sent from my SM-T350 using Tapatalk Great job on the dt’s. Marc used the same technique using a mallet taping on the saw to complete the cuts. Thanks. I thought I saw him doing it once. Its a great technique, saves alot of work. Sent from my SM-T350 using Tapatalk 1 Quote Link to comment Share on other sites More sharing options...
Popular Post woodbutcher Posted June 5, 2018 Author Popular Post Report Share Posted June 5, 2018 Well its update time again on the Pekovich. Next up was the back panels. I resawed and bookmatched some ash, then rabbeted the edge so they would lap over each other. Is that a rabbet? Half lap? What do they call that? Well whatever, heres the picture. And finished, and nailed into the back of the cabinet. A while before this, and i just hadnt taken pictures, i turned some knobs out of walnut for the door and drawer. The first one turned out ok, and im pretty happy with the second one. They arent close to identical, but thats ok. I made a door stop using a small block and a magnet that i inserted flush. I screwed the block into the underside of the top. I used a screw in the back of the door to keep the door closed. The screw also allows me to precisely control the depth the door closes. Heres the magnet in the case. I will hang the cabinet on the wall with a french cleat. Heres that, just some discolored ash. And finally for this update, the cabinet as it stands now. Next update will be the last. And probably the one everyones been waiting for, the kumiko. And the final product. Almost there! Thanks for reading.Sent from my SM-G920V using Tapatalk 4 Quote Link to comment Share on other sites More sharing options...
Tmize Posted June 5, 2018 Report Share Posted June 5, 2018 1 hour ago, woodbutcher said: I resawed and bookmatched some ash, then rabbeted the edge so they would lap over each other. Is that a rabbet? Half lap? What do they call that? It’s a ship lap joint Quote Link to comment Share on other sites More sharing options...
Mick S Posted June 5, 2018 Report Share Posted June 5, 2018 I mimicked his door style on the dresser I made a few years ago. I like his stuff. 2 Quote Link to comment Share on other sites More sharing options...
woodbutcher Posted June 5, 2018 Author Report Share Posted June 5, 2018 3 hours ago, Tmize said: It’s a ship lap joint Thats what it is! I knew it had a name. Couldnt think of it. Quote Link to comment Share on other sites More sharing options...
woodbutcher Posted June 5, 2018 Author Report Share Posted June 5, 2018 Sweet dresser Mick! Where did you find those door pulls? 1 Quote Link to comment Share on other sites More sharing options...
wdwerker Posted June 6, 2018 Report Share Posted June 6, 2018 I like the slightly mismatched pulls. It's little details like that which lead appraisers to prove the piece is definitely handmade. Celebrate the slight variations it's what separates us from the mass produced . Quote Link to comment Share on other sites More sharing options...
Mick S Posted June 6, 2018 Report Share Posted June 6, 2018 6 hours ago, woodbutcher said: Sweet dresser Mick! Where did you find those door pulls? Thanks! I believe I got them here - https://www.myknobs.com/abddp1202mbp.html Quote Link to comment Share on other sites More sharing options...
Popular Post woodbutcher Posted June 14, 2018 Author Popular Post Report Share Posted June 14, 2018 Well we are in the home stretch now on the Pekovich Cabinet. All thats left to do is make the kumiko, fit it in the door, and hang the door. To start the kumiko, I bought a 12" long piece of 12/4 basswood, and used my bandsaw to rip two 9/16 wide strips, then planed them down to 1/2." I make the grid the way Mike P shows in his Kumiko article in fine woodworking. Its a jig that I clamp to my miter gauge, thats pretty much a box joint jig. The distance between the cross cuts dictates the length and width of the finished kumiko panel. Its important to get this pretty close, test on scrap. I use a flat grind, full kerf blade to cut the grooves for the half laps. I want to mention that its important to use a full kerf blade. My first go around making kumiko, i didnt have one, only a thin kerf blade. The thinner pieces make cutting the angles difficult, and they dont like to hold together. The thicker pieces from the full kerf have more purchase when fit together. Then rip the individual strips out. I really have to flubber with the fence and scrap to get the fit just right. Its the most challenging part of the process, in my opinion. Then I cut the pieces to length with a hand saw and saw hook. I skimmed the ends on my shooting board to get them perfect. Then I can fit the grid together. Then its all about the inner pieces. First do the diagonals. They have 45 degree cuts on both ends. You really have to mess around with your jig to get the stop set just perfect. It is very helpful to have 2 jigs for each angle. Set one to be a little long, then have another jig set to cut the other side of the piece to length. Heres piece in the jig getting chiseled to length. And all the diagonals fit. Then cut a bunch of short little pieces and cut 22.5 degree angles on one end of each, with your 22.5 degree jig. Then on the other end of those pieces, use each of your 67.5 degree jigs to cut the pieces to length. With the 67.5 degree ends, you have to have one side cut deeper so the flat is bigger, its hard to describe ill post a picture of what it looks like. And those pieces fit together like so- I put the bigger flats together, im not sure if thats how Mike does it, but it works either way. I didnt take any pictures of the last pieces of the puzzle, but you get the idea now. They are just little short pieces with 45's on both ends, and they lock everything in place. Then after its all fit, pull it back apart piece by piece, and dab a little glue on all the ends, and the grid half laps, and put it back together. I actually did this as I went along, and not all at once. Heres the kumiko panel, before i fit it to the door opening. I just used a hand plane and shooting board to finesse the kumiko to fit the opening just right. I didnt glue it in, just slip fit it, and called it good. Its not going anywhere. And here we have it, the Pekovich Cabinet. I hope you enjoyed the journal, and once again, thanks for reading. 8 Quote Link to comment Share on other sites More sharing options...
..Kev Posted June 14, 2018 Report Share Posted June 14, 2018 Excellent journal and super nice build! Great job! 2 Quote Link to comment Share on other sites More sharing options...
wdwerker Posted June 14, 2018 Report Share Posted June 14, 2018 That's awesome ! Signed & dated ? Quote Link to comment Share on other sites More sharing options...


Recommended Posts
Join the conversation
You can post now and register later. If you have an account, sign in now to post with your account.