jeff0520
-
Posts
143 -
Joined
-
Last visited
Recent Profile Visitors
1,275 profile views


jeff0520's Achievements
Apprentice Poster (1/3)
0
Reputation
-
 Thanks. Still much to do on it though. I'm looking forward to finishing the interior
 -
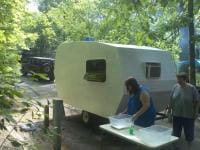
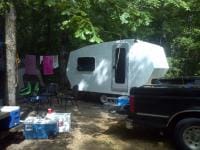
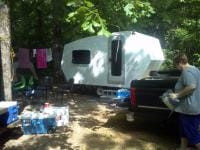
Trip went smoothly. worst problem was that the ticks in Bankhead National Forest seem to have become highly resistant to DEET based repellant It was REALLY nice to have A/C to sleep in
-
Building our tiny travel trailer
-
-
Well, the maiden voyage for the camper begins tomorrow. It's far from done, but it's done enough to use.
-
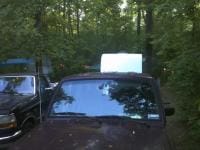
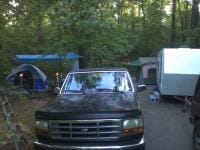
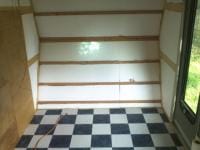
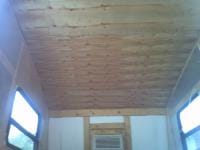
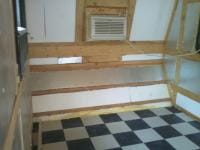
Hello all, Well, the maiden voyage for The Command Post will begin Monday. Last night I left her parked in the driveway overnight in the pouring rain, and no signs of leakage, so she seems weather tight. All the insulation is done, A/C is mounted and sealed in, the interior ceiling is done except for trim on the seams, and there's even a few pieces of interior wall skin put in here and there There is no cabinetry, no bed frame, and no electrical system installed. Our 120v AC power system will consist of an extension cord running up through the port in the floor that will someday connect a conduit to the tongue box, and a multi-outlet plug strip. She will keep us dry and comfortable on this trip despite having to sleep on an air mattress on the floor. Wish us luck
-
Sure, No problem. here's a picture of the factory tongue: As you can see in the picture, the coupler is attached to a piece of raised tubing welded to the triangular plate. The first thing you do is remove the coupler, and set it aside. Then cut that raised piece off the triangular plate with a cutoff wheel or an angle grinder. Once that's done, put the upper plate back on and measure the opening between the upper and lower triangular plates. On my trailer it was exactly 2 1/2 by 2 1/2 inches. I went to my local steel dealer and got a piece of 2 1/2 by 2 1/2 by 3/16 tubing. The length will vary based on how long a tongue you want to add. you'll also need 4 pieces of 2 inch by 2 inch by 3/16 angle iron cut 2 inches long as brackets. Loosen the bolts for the upper and lower triangular plates, and slip your tubing into that space. You want it to extend to the second crossmember on the trailer. Harbor frieght was kind enough to include predrilled holes on the crossmembers that will allow you to drill holes in the little pieces of angle iron and use them to bolt the tubing right in exactly the right place. Then I drilled 3 holes through the upper triangular plate, through the tongue, and bolt it up solidly. If you are a "belt and suspenders" kind of guy, you can weld it up once it's bolted solidly in place. I didn't bother. I just used grade 8 bolts, lockwashers, and a generous helping of locktite threadlocker and didn't worry about it. The technique is covered in a lot more detail in another forum I use. Just go here: http://www.tnttt.com and recearch the topic. Most camper builders extend the HF trailer tongues. The big thing to remember is the more you extend it, the beefier you need to make the tubing you put in there.
-
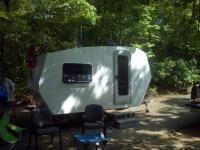
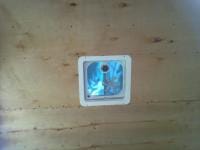
Thanks Mike Frank and Butcherer. Today I got the back bumper painted and permanently installed, mounted tail lights, and wired them. I also installed the roof vent, door, and windows. Tomorrow will be A/C unit install, caulking, and paint touchup. After that, I'll be ready to move inside and get that shaping up.
-
The side to side balance is achieved by putting the really heavy stuff, specifically the A/C, Batteries, and cast iron cookware right on the center line. The only moderately heavy thing that is not planned on the center is the dorm room sized fridge. That's not supposed to be too heavy though, and I'm hoping all the lead and iron right on the center line will pull the center of gravity in towards the middle
-
Thanks, I will I am really looking forward to getting the outer shell completed so I can move on to the interior woodworking. I'm really not very good at automotive paint and body. Some of my fiberglass work was UGLY. I was hoping paint would hide it, but just the opposite happened. Most people don't seem to notice much though, so I guess it's all good
-
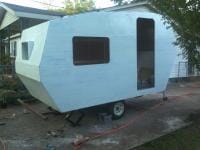
Today's progress, One coat of white enamel, and the long-awaited bumper assembly completed, checked for fit, and waiting to be fitted with temporary tail light brackets and painted. I'm in a rush and a budget crunch to get the camper ready for the trip next week, So I'm going with cheapie tail lights for now, and upgrading to good ones mounted to the place halfway up the back of the camper I designed in for them. When the final tail lights go on, I'll replace the cheapies with some LED clearance lights down there
-
Thanks The A/C on the back will be balanced by the batteries out on the tongue box. That should give enough tongue weight for comfortable towing. The area from the door forward will also be filled with cabinetry where we will be storing the majority of our camping gear, including the cast iron cookware. That should counterbalance the weight of the bed/couch behind the axle. I think I've got it right, but time will tell
-
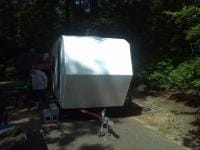
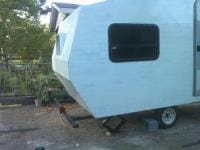
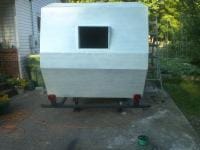
I shot two coats of primer today. I am SO happy that I don't have to worry about UV light degrading the epoxy skin any more. The planned maiden voyage is 8 days from now. I plan to shoot two coats of white enamel tomorrow. Once those are dry, I'll be able to work on installing my door, windows, and roof vent. I have SO much to do. It looks like the first camping trip will see the camper as more of a "hard sided tent" as I am sure I'll have no time to even start on the interior electrical system. If I am lucky I'll have time to get the skeleton of the bed frame done so we don't have to sleep on an air mattress on the floor
-
Thank you very much I had seriously considered mill finish aluminum for that 1960's airstream look, but I decided against using metal of any sort for weight considerations. The chassis under there is a 2000 lb GVWR single axle. I'm estimating that once all the utilities, furniture, and cabinetry is installed, I'm going to be up close to 1400 lbs using a lightweight fiberglass and paint skin. That leaves me only 600 lbs for food and gear. At this point the couple hundred pounds of weight I save by not going with a metal skin are meaningful. I've begun to look for places where I can cut weight on the furniture and cabinetry inside out of worries of getting too close to GVWR. Before I alter my plans too much I think I'm going to get paint, doors, windoes, roof vent, and trailer lights done, then take it to the feed mill for a weight check and see where I've landed.
-
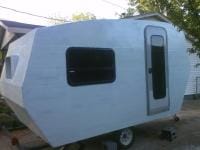
Got the fiberglass skin installed this week Next comes exterior paint, and then installation of doors, windows, and the roof vent. Once that is done, It's watertight!
-
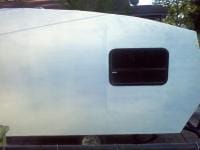
I finally got a day to work on the camper again. Another day of filling and sanding. I can finally see light at the end of the tunnel on stage 1 sanding. A little more to do, then I can go back and fill the tiny voids and cracks that appeared as I sanded. then a light sanding, and it'll be fiberglass time !