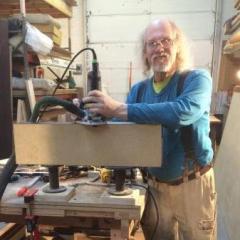
Popular Post wdwerker Posted September 8, 2018 Popular Post Report Share Posted September 8, 2018 A year or so ago I knocked out a prototype out of scrap western red cedar. This morning I decided to build a better version with replaceable sacrificial face boards. A few minutes of math to get the most out of a leftover plank of 5/4 maple and I ended up with this shop accessory plus 7 spare faces. This set up lets me keep shifting the entire assembly over about 2" to get a series of fresh cuts to back up new cuts before I replace the face board. Rear view. I made a hardware store run for acorn nuts to protect my.......... The whole assembly bolts to the fence with a couple " Tee bolts " Hey Mel this should work on your sliding crosscut ! 5 Quote Link to comment Share on other sites More sharing options...
mat60 Posted September 8, 2018 Report Share Posted September 8, 2018 Great idea. Looks like you used some bolts that fit into the slot in fence. No holes drilled in fence. Quote Link to comment Share on other sites More sharing options...
Ronn W Posted September 8, 2018 Report Share Posted September 8, 2018 OK, That's the kick in the ass I neede to do something similar. BTW Why/how do you have 2 slots for the blade in your insert and how did the blade get so farr to one side? 1 Quote Link to comment Share on other sites More sharing options...
wdwerker Posted September 8, 2018 Author Report Share Posted September 8, 2018 I have 2 UniSaws. I use the same replaceable insert throat plates in both. Saw was set up with the blade in that position when I got it. So I only tweaked it slightly as I tuned up the saw. Re-using the inserts from one saw to the other gets more use out of them. Haven't made a batch of inserts in years but I am going to make a large batch soon. All the effort is in getting the cuts set up exactly so a 5' x 5' sheet of 1/4" Baltic should yield a lifetime supply. The entire jig attaches to a lower rear Tee slot in the back of the fence with 2 Tee bolts. As each slot gets worn I just loosen the bolts & slide the jig outwards to cut a new slot. The extra height lets me cut to the full depth(3") of cut possible. 2 Quote Link to comment Share on other sites More sharing options...


Recommended Posts
Join the conversation
You can post now and register later. If you have an account, sign in now to post with your account.