
Skip to content
View in the app

A better way to browse. Learn more.

Wood Talk Online

A full-screen app on your home screen with push notifications, badges and more.

To install this app on iOS and iPadOS
  1. Tap the Share icon in Safari
  2. Scroll the menu and tap Add to Home Screen.
  3. Tap Add in the top-right corner.
To install this app on Android
  1. Tap the 3-dot menu (⋮) in the top-right corner of the browser.
  2. Tap Add to Home screen or Install app.
  3. Confirm by tapping Install.

Matching moldings

Featured Replies

A clients home was burglarized . They smashed a Thermopane french door. About 16" of the plastic frame that held the glass in was broken out. 25 year old doors so parts or an exact match was not available. This was one of 6 doors so one new door would look awful. So I got roped into fixing the plastic frame as best as possible.

I trimmed the damaged plastic with my Fein Multimaster saw to a 45 at each end and saved the pieces as templates to match. Back at the shop I grabbed a scrap of white oak and made 3 blanks . Carefully traced the shape on the ends and started figuring how to cut it.

Ripped 2 slots where the rabbets would be while the blanks were square. Started sorting through my router bits. I've collected at least 200 over the last 35 years. Every time I found a shape that would work the bearing was going to be in the way. Finally found a 35 year old Craftsman steel bit that was in the first set I ever bought. It had never been used.

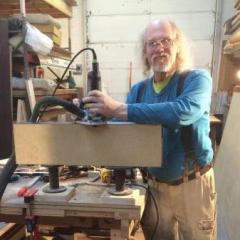
Set it up in the router table, adjust the fence then run each piece. Change the height, set the fence, repeat...

I was only using a small section of the bit for each pass. At some point I had to start clamping a second fence in front so the blanks were being fed through a slot. Push sticks used every time.

post-6363-0-31128700-1429707995_thumb.jp

  • Author

Once I had the shape I used my Grripper push blocks to make the final rips to finish the rabbets . Then I could clamp them in the vise and start sanding. I've got a set of shaped rubber blocks that you wrap with sticky back sandpaper.

post-6363-0-02637900-1429708346_thumb.jp

Awesome! Glad it worked out, and I'm sure the clients are happy.

  • Author

Still waiting on the new thermopane glass. I did remember to take one more picture after I had boarded up the door.

post-6363-0-51893600-1429715301_thumb.jp

Great save - if you are lucky the client will see how much better wood is over plastic and you will get a contract to do all the other doors.

Pretty amazing. And the initial setup was done with an old Craftsman bit!

Good job!

  • Author

It was 5 hours alone to make 3 pieces , each was less than 2 ft long. I made 3 to have room for error when routing and a spare I case the miters were off at the install. It wasn't cheap or easy to do!

The new molding looks great , you saved the day for that client. Just curious how you go about pricing a job like that ?  

  • Author

Long time client( 32 years) who trusts me completely, so I did it time and materials. Otherwise I would have guessed at the time then added 50% , the materials were a scrap of 8/4 white oak I had.

It came to 7 hours total time to measure, make the trim and install, then go back the next day to remove clamps and board up the opening until the glass comes in. It all was done rush on a weekend so they could set the alarm and go to work on Monday. For any other client time and half would have been the starting point of my estimate.

I'm as impressed that you knew how to label the photo!

I would have had to take a Sharpie and write on the Poloroid!

Long time client( 32 years) who trusts me completely, so I did it time and materials.


Long time client ----> best kind.


Who trust me completely ----->earned over 32 years.  Probably earned in year 1 and reaffirmed over 31 years.


Well done...a model for all small business.

  • Author

Thanks for all the kudos !

I just wanted to show that with some time, a router table and a tablesaw you can create or copy almost any molding. Just take it one section at a time, set up the bit, move the fence and use push sticks !

Join the conversation

You can post now and register later. If you have an account, sign in now to post with your account.
Note: Your post will require moderator approval before it will be visible.

Guest
Reply to this topic...

Who's Online (See full list)

  • There are no registered users currently online

Forum Statistics

  • Total Topics 32.1k
  • Total Posts 437.6k

Member Statistics

  • 26,010 Total Members
  • 3,644 Most Online
  • Lolli4 Newest Member ·

Account

Navigation

Search

Search

Configure browser push notifications

Chrome (Android)
  1. Tap the lock icon next to the address bar.
  2. Tap Permissions → Notifications.
  3. Adjust your preference.
Chrome (Desktop)
  1. Click the padlock icon in the address bar.
  2. Select Site settings.
  3. Find Notifications and adjust your preference.