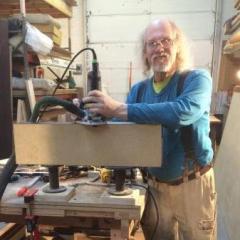
wdwerker Posted May 1, 2017 Report Share Posted May 1, 2017 A interior decorator wanted 12 desktops for some metal adjustable height workstations. She specified maple ply 30 x 72 x 3/4 edgebanded. Finished to match a color sample from the chair manufacturer. I started with 13 sheets of B-2 maple ply. Ripped them to 30 1/4 then re-ripped to 29 15/16 so I had crisp clean cut edges. The manufacturer makes these sheets 48 1/2 by 96 1/2 which allows for several saw kerfs . Then I crosscut to 72 1/2, spun them around and recut to 71 15/16. The edgeband thickness brings the parts to finished dimension. clamp keeps the sheet from wiggling during the crosscut. spacer in place for the second crosscut. We used spacers to keep from scuffing the faces because they had to be handled so many times. 1 Quote Link to comment Share on other sites More sharing options...
Llama Posted May 1, 2017 Report Share Posted May 1, 2017 If only every job was so simple! Only thing you need to worry about is the color match! Easy money bud! Quote Link to comment Share on other sites More sharing options...
wdwerker Posted May 1, 2017 Author Report Share Posted May 1, 2017 I've got a hot air edgebander but the panels were too big to run on it . So we used a household iron and hand trimmed each piece. Had to be meticulous about 100 % adhesion, any loose spot would be hell to fix once finishing started. Sanded 240 grit with the orbital, hand sanded and broke the corners with 320 grit, then resanded the faces 320. We used cotton bar towels as spacers in the stack to prevent scuffs and scratches. My finish supplier was several days late with the color match which cranked my stress up to 11. It was mixed in a spray on dye formula. It took about 6 to 8 passes to build to the desired color level. The dye dries almost instantly and touch ups are a nightmare. Then we shifted each panel down the table to immediately get 2 coats of sanding sealer. Put them in the rack to dry at least 12-24 hours. We tested sanding the top with the orbital but it was so easy to sand through the finish that hand sanding was the only way to get consistent results. Finish sample 1/2 raw dyed ply , 1/2 with sealer coats. Sprayed with 2 coats of sealer. Sanding took around 45 minutes per panel. This is after sanding with 320 foam backed abrasive & a cork block. If you look close you can see a shiny background left after we sanded off the high parts. Then we hit it with a red abrasive pad, followed with a grey pad, then buffed with a grey pad on the orbital. Now they are ready for the finish coat. Each panel was carefully wiped down with microfiber cloths to pick up all the dust right before they are sprayed. 1 Quote Link to comment Share on other sites More sharing options...
mat60 Posted May 1, 2017 Report Share Posted May 1, 2017 Looks great and Im thinking on this job you maybe wishing you had more room in the shop. Quote Link to comment Share on other sites More sharing options...
rodger. Posted May 2, 2017 Report Share Posted May 2, 2017 Looking good as always! I have a Freud double edge trim bander, but I find it tears out the plywood veneer. What do you use to trim the iron on edge banding? 1 Quote Link to comment Share on other sites More sharing options...
Popular Post wdwerker Posted May 2, 2017 Author Popular Post Report Share Posted May 2, 2017 There were a few spots that needed touching up. I made the same flaws in scraps that we finished along with all the tops then practiced the touch up. Couldn't make it invisible so I faked a knot. Had to buy a new touch up gun. After the touch ups were done we sprayed a nice wet coat of satin clear and into the drying rack they went. Finished the last one at 7:30 Saturday night. Clients crew picked up the tops this morning. Just thought y'all might like a look at the reality of doing this for a living. 6 Quote Link to comment Share on other sites More sharing options...
wdwerker Posted May 2, 2017 Author Report Share Posted May 2, 2017 Hey Pug, FastCap pneumatic edgeband trimmer and a guillotine type end trimmer I found years ago at a trade show. Try taking off the bevel trim knives and just sand the flat trimmed corners with hand sanding. 1 Quote Link to comment Share on other sites More sharing options...
mat60 Posted May 2, 2017 Report Share Posted May 2, 2017 I was thinking you may use a small router with a trim bit to cut your edge banding. Quote Link to comment Share on other sites More sharing options...
wdwerker Posted May 2, 2017 Author Report Share Posted May 2, 2017 If I use 1/8 or 1/4" solid wood as banding I do use my MFK 700 trim router . But most iron on edgebanding is a bit too flimsy. 1 Quote Link to comment Share on other sites More sharing options...
wouldwurker Posted July 4, 2017 Report Share Posted July 4, 2017 Always love the 'real world' peak behind the curtain of professional woodworking, Steve. Quote Link to comment Share on other sites More sharing options...
gee-dub Posted July 4, 2017 Report Share Posted July 4, 2017 On 5/1/2017 at 5:42 PM, wdwerker said: Couldn't make it invisible so I faked a knot. That is a great display of seasoned experience at work. 'Faked a knot' . . . awesome . On 5/1/2017 at 5:42 PM, wdwerker said: Just thought y'all might like a look at the reality of doing this for a living. Amen to that and thank you for giving us a glimpse into that world. I always enjoy your posts and your insight. A lot of things seem ideal in our minds when we only imagine a few small snippets of the cool parts. The actual work that leads up to those 'cool parts' can be challenging but, very satisfying I hope. Quote Link to comment Share on other sites More sharing options...


Recommended Posts
Join the conversation
You can post now and register later. If you have an account, sign in now to post with your account.