Coyote Jim Posted December 30, 2017 Report Share Posted December 30, 2017 Hi Everyone, I'm a new here an I'm a bit nervous about posting my first project. I am very much a beginner and I know I have a LOT to learn. Especially on this first project of mine. This was written just under a year ago and the original audience was my friends and family. That is why I explain so much of the basics of what I am doing. I am leaving it as is just in case there is a beginner out there that is starting fresh like I did a year ago. I honestly had no idea what I was doing and new nothing about woodworking at the time. Everything I am writing about is from me learning the basics for the first time. ----------------------------------------------------------------------------------------------------------------------------------------------------------------------------------------------------------------------------- The following is the story about how I started "woodworking". I put the word "woodworking" in quotes because what I am doing is far from "real" woodworking. Most likely what I am doing is making a mockery of not only woodworkers everywhere but also trees, plants, wood, working, photosynthesis AND Arbor Day. I was bored as can be. You see, I took over the family sign company and the business has gotten large enough now that I have to spend most of my days sitting in front of a computer. I no longer get my hands dirty out in the shop or get to work out in the field. So lots of hours at a desk job and just living the suburb life caught up to me and I was just in a bit of a funk. And I needed to get out of it. To fix this funk I decided that I needed a project. Something that I could build. Something that would make me feel manly again. Well I was sitting at my computer desk at home at the time, the desk is just a cheap IKEA desk. Nothing fancy. It was in perfectly fine shape. The desk did not need replaced and was in fine working condition. No real reason to make a new one. But F that! It's all about "coulda", not "shoulda". So I am going to build a new desk, without any experience or know-how what-so-ever. My ideas are awesome! I found some design software online called SketchUp. I downloaded it, watched some Youtube videos on how to use it, and designed the desk. I based this design off of the IKEA desk. As you can see, every piece of the desk is designed to be built out of boards. I chose all boards because all I have is a chop/miter saw, not a table saw. Without a table saw I did not have a great way to cut plywood. Also, I wanted a bit of a rustic feel and making it all boards will give me what I am looking for. I wanted the desktop to be thick and I wanted it to be made out of hardwood, not that cheap pine from home depot. So I went to a local hardwood place near where I work, and I was instantly over my head, had no idea what I was looking at. I told the girl that worked there what I was doing and she recommended the Premium Frame Alderwood. Sounded good to me, mainly because I had no idea what I was doing. So I learned that wood at this place is sold by the board foot (ThicknessxWidthxLength divided by 144). Also, they don't do things like Home Depot where everything is sold in 2x4's or 1x6's. Here the thickness is in quarters (x/4). So a 1" thick board is 4/4 (four quarter), a 2" thick board is 8/4 (eight quarter), a 3" thick board is 12/4 (twelve quarter).....you get it. As for the width of the boards, there is no rhyme or reason to it. They make the boards as wide as the tree they cut them from. As you can see in the picture above, this is 8/4 Premium Frame Alder. I have come to find out that real woodworkers call this "knotty alder". So I picked out some boards. The boards are really really rough. When they cut these trees at the saw mill they are going for speed, not pleasure. Saw blade marks and splinters like crazy. So I had the hardwood place do all the milling for me. I had them cut these boards in half. Surface all 4 sides (make them pretty smooth) and plain them down to 1.5" thick. Before and after shots. I was going for rustic so I hit the boards with a hammer and chains and some huge bolts and stuff to ding it up. Should add to the rustic feel. I sanded the crap out or it. These 4 boards will make up the top of the desk. In the background of this picture is a stack of cheap Home Depot lumber for the rest of the desk. It is mainly 1x4's and 1x6's. I sanded all that as well. So when you take a bunch of boards and connect them together to make one wide board it is called Edge Joining. Edge Joining is traditionally done with biscuits, glue and long clamps or just glue and long clamps with no biscuits. Well I do not have any long clamps and good ones cost about $40 each, I would need a minimum of 4 (6 would be best). Way too much money. So I bought a Kreg Jig! Which I can use to edge join without having to watch the glue dry. A Kreg Jig makes it very easy to make pocket holes. The jig clamps down on the wood and guides your drill (with a special bit) into the wood at very shallow angle. You can then put a screw through one board into the board next to it. Now, a "real" woodworker would never be caught dead using a Kreg Jig and pocket holes, but I am not a real woodworker so those guys can take their mortise & tenon and their dovetails and their dowel joinery and stick them up their high horse. Here is the underside of the desktop with all the pocket holes (left) and the top side of the desktop (right). You can see on the left edge that the boards are not all the same length. This "feature" adds to the rustic look. I had no idea I was going to add this "feature" until after I joined all the boards together and saw that they were not even, that is the exact moment I decided that this would be a "feature". The assembly all went pretty good. I made many pocket holes and used many clamps that I borrowed from work. I will not fasten the top to the base until the end. I want to put a finish on all the wood before I do that. 1 Quote Link to comment Share on other sites More sharing options...
Coyote Jim Posted December 30, 2017 Author Report Share Posted December 30, 2017 Here I am testing different stains on the underside of the desktop to see what color I want it to be. Originally I was convinced I wanted it to be dark like the Mahogany stain but then I was hit with a curve ball. To get a nice even stain instead of a blotchy stain the best thing to do is to pre-treat wood with a wood conditioner. This is very easy. You just wipe the wood conditioner on with a rag, wipe off any extra, wait like 30 minutes, then stain like usual (or so that's what the internet research I did tells me). The conditioner is clear and has about the same consistency as water. The wet wood actually looks a lot like the wood will look if you were NOT going to stain it and you were just going to put a clear finish on it. Well the natural look of the Alder was AWESOME! So I'm torn. Do I really want to cover up the natural beauty of this Alder Wood? This is around the time that I noticed that woodworking is becoming more than just a project to me. I am loving this. I am completely addicted to woodworking videos on Youtube. I have already read two books about woodworking. I could not be more hooked. I'm obsessed actually. I look at craigslist and I just want to buy all the woodworking tools and machines even though I have no place to put any of them. I wish I could retire so that I could spend all day every day in my wood shop (my wood shop looks very suspiciously a lot like my garage by the way). See the new fresh wood in the back of the work truck? That is a new project. But Jim, what about the desk? This new project has a short deadline so the desk will just have to wait. You see, Christmas was just a day or two ago and we got a trampoline for the kids. The trampoline was given to us by my brother who just did not have room in his yard for it after they moved. Free trampoline! Sweet! So in two days we are having a LOT of family over to our house and I want to make some stairs with a small platform at the top to make getting into and out of the trampoline easier. This is something I wanted to do anyway, but making it be done in time for our company was the strategy I used to get my wife on board with me spending the whole weekend in the garage. This is me sporting some of my Christmas presents before I started. I made my daughter take that picture. She didn't get it. This project was a mess. I hastily designed it. Made LOTS of measurement and math errors. The wood I got from Home Depot was extremely wet and swollen and it turns out that the Krag Jig does not work well with wet wood. I ran out of screws. I ran out of wood. What should have only taken me about 5 or so hours to build ended up taking around 8 or 9. But I got it done before company came over. I really "stepped" up!....get it?.....do ya?...."stepped" up!......you get it. I even borrowed a jig saw from work and cut a curve on the back side of the platform so it sits flush against the curve of the trampoline. I added some metal straps (which are hidden) to attach it to the trampoline frame. The kid helped me paint it with cheap deck sealer. This thing was built WAY over kill. I'm pretty sure it could hold a family of rhinoceroses without much of a problem. That was not my intention (you know, because there are no rhinoceroses in Arizona, mainly just scorpions), but that is how it turned out. So my second project is done, and the first one is built and just needs some finish, and it's only taken me about two and a half months. It's difficult owning a business, having kids and trying to have a hobby. In this time I have been looking for a table saw. I am still new to woodworking so I don't really know what I am looking for. So I want one that was used by someone who knows a lot about woodworking. That way I can be pretty sure that I am getting a table saw that is at least pretty decent. 1 Quote Link to comment Share on other sites More sharing options...
Coyote Jim Posted December 30, 2017 Author Report Share Posted December 30, 2017 So my second project is done, and the first one is built and just needs some finish, and it's only taken me about two and a half months. It's difficult owning a business, having kids and trying to have a hobby. In this time I have been looking for a table saw. I am still new to woodworking so I don't really know what I am looking for. So I want one that was used by someone who knows a lot about woodworking. That way I can be pretty sure that I am getting a table saw that is at least pretty decent. One of the neighboring businesses at work is a custom cabinet shop, it's pretty small, mostly a one man operation. The owner/operator approached us because he wants to use our very large paint booth for when he sprays his cabinets with lacquer. I was in his shop working out the legalities of this and I just thought I would ask him if he knew anyone that had an old table saw that was not being used anymore. Couldn't hurt right? He is in the wood business and all so maybe he has a connection. He pointed across the room and said "Well what about that one?" So it's an older machine, it's not made anymore. But "Jet" makes really good machines. Joe (the owner of the cabinet company) said that he paid $100 for it many years ago (I looked it up and from what I can tell this machine cost approx $1200 when it was new). Since then he added a new on/off switch to it which cost about $60. And he also added an aftermarket fence to it which cost about $200. He sold it to me for $200. It was perfect. It was better than I had hoped for. And for only $200. I was so excited and could not wait to get it home. This table saw was not without it's flaws though. The biggest flaw by far was the mechanism that raised and lowered the saw blade. The first picture is what the raising and lowering mechanism SHOULD look like. The second picture is what mine looked like. That whole mechanism is completely missing. So to raise and lower the blade you had to take that wheel (which did not actually belong to this machine) and attach it and try to raise it. It was very clunky. To make it worse, look at the third picture, the rod you attach the wheel to was completely stripped out. Raising and lowering it was a HUGE pain in the butt. Put a damper on my excitement. So what I did (or at least, what I had someone who works for me do) was weld a nut onto the rod. That way a good 'ol ratchet with an extension would be all I would need to raise and lower the blade. If I get in a really big hurry I could also attach the socket to my drill and raise and lower it like that. That would make me the coolest "woodworker" on the block. Back to working on the desk right? Wrong! I am extremely conflicted about the desk. My problem is that the top is made out of sweet, sweet Alder that is extremely beautiful, the rest of the desk is made of cheap, cheap pine that is not beautiful at all. I do not know how to bring the two together and make it look good in the slightest. I also do not like the way I built the door to the front of the desk cabinet and want to figure out a way to do it different. I'm all over the place. I just need to figure out what I am going to do and then do it and live with my decision. So what I chose was......wait hang on! I just saw some thing on Instagram! See this cheesy sign? Well my mother's birthday is just a couple of weeks away, and my mother LOVES cheesy! It's perfect! I will build her one! And it's completely for my mother and not in any way because I do not want to make a decision about the desk! The first step was to buy some wood! So back to the hardwood store. On the wall of the hardwood store they have some samples of the different wood species they carry. I wanted to choose a darker wood and saw on the sample wall Peruvian Mahogany. It was gorgeous. Just perfect for this project. So I went over to where the Peruvian Mahogany was and I looked at the price tag. Wow! Oh my that is expensive. Now that I think about it Peruvian Mahogany is extremely ugly. I hate it. There is no way it will work for this project. Back to the samples. I took a look at some other species and it turns out that wood that is naturally darker in color is very expensive. I ended up settling on Spanish Cedar. It looked dark enough and the price was right. Cedar is not a hardwood. So basically, trees that loose their leaves in the winter are classified as hardwoods and trees that have needles and do not lose their leaves/needles in the winter are softwood (disclaimer: there are a few softwoods that are pretty hard and a few hardwoods that are pretty soft). I figured that since this sign will be hanging on my mother's wall that it is just fine to be made out of softwood. BUT, after a bit of research I learned that Spanish Cedar is not technically a kind of Cedar. It's not a softwood at all. Spanish Cedar is actually closer to a mahogany than anything else. It is called Cedar because it smells just like Cedar, in my opinion it smells better than true Cedar. It smells like I would imagine angels would smell like. When I bought the Spanish Cedar I had the hardwood store finish all 4 sides (make it smooth) and I had them plain the boards down to 3/4". I'm new at this and found out I should also have had them make "one edge strait". You see rough lumber is not strait. The tree they cut it from is not strait. Also the drying process will make all wood warp and twist and go all caddywumpus on you. Well I didn't ask for one edge strait, and I need them strait. To get boards perfect you need a machine called a "Jointer". Jointers are very large and very expensive machines but they make rough lumber perfectly strait. I don't have a jointer. You could also use a hand plain and elbow grease but I don't have a hand plain (or much elbow grease if I'm honest). To build this thing for my mother properly (and not "rustic") I need these boards close to perfect. So here is what I did. I went to www.youtube.com. Ever heard of it? Well it's great. The YouTube showed me how to build a jig. The concept of the jig. I need to make both the skinny sides of the boards strait and parallel. So if I make sure that the blade of my table saw is perfectly aligned with the rip fence of my table saw, then I know that if I have a strait piece of wood riding the fence then the cut it makes will be perfectly strait. I spent quite a bit of time aligning everything up on my table saw and I finally got it (or at least within tolerance). Now I need something that is already perfectly strait (which the boards currently are not) that I can run along the now calibrated fence. Well the factory edge of a piece of plywood is perfectly strait so I got one of those. I also got some clamps that I modified and fastened those to the plywood. Added another thinner piece under the first piece of plywood and shabam! I now have a jig. I can clamp the not so strait pieces of Spanish Cedar to my perfectly strait jig and just shave off 1/8" of the board which will make that side perfectly strait. I can then run the new strait side of the board against the fence to make the other side strait. The crazy thing is that it worked. (I guess it's not that crazy, the all mighty YouTube said it would work, so I guess I should not be surprised.) I did not get too many pictures of this build process. I kind of wish I did. I'll describe what I did here though. Here is a picture of it and I'll explain what I did to get here. While building this jig and subsequently milling and ripping down the boards, it started raining. Here in Arizona it is often that we get rain while the sun is shining. So being able to work with my new table saw, listening to some great music, doing some woodworking, building some thing for someone who I know is going to love it AND having the sun shining while it rained on the thirsty desert, made this a pretty kick-ass day. I cut down one of the wider boards and edge joined the pieces. The wide boards are very wide, like 8 or so inches. I joined them with pocket screws (some day I will buy clamps). These make up the big center piece. I wanted a groove/chamfer around that as well as around the outside. So after I ripped down another board to 3" wide I borrowed a router with a V bit from work, attached it to the underside of a board to make a router table and cut that groove. Now it looks a lot like a cutting board. The wood turned out to be a lot lighter in color than I wanted but I figured when I put a finish on it that would darken it up a bit. I want to finish this with Danish Oil. I have never used it before but from what I can tell it looks nice and is easy to work with. I did have an issue to begin with but that was completely operator error. The first coat of this stuff goes on thick, then you wait about 10 minutes and put more on because the wood will soak it up. Then you wait a day. The bottle says that one coat is all you need but from what I saw online, most people do 3 to 5 coats. After the first coat it looked awesome and it was extremely smooth to the touch. For the second coat I used 600 grit sandpaper and wet sanded it using more danish oil. Then I did a third coat. It looks good but for some reason after the 3rd coat it did not feel as smooth as it did after the first coat. I most likely did something wrong.....like not follow the directions. After giving it a quick once over with some 600 grit sandpaper this thing was smooth as can be. Time to add vinyl lettering. This went very smooth, having worked for a sign company for more than 15 years now. Kind of my wheelhouse. This went very smooth, having worked for a sign company for more than 15 years now. Kind of my wheelhouse. Last step was to print out some pictures. And we're done! Turned out pretty good. Just need to wrap it and give it to my mother. So what did I learn? I learned that I really like Danish Oil, it is extremely easy to use and it looks nice as well. I also learned that Spanish Cedar is one the best smelling things in the world (other than hops of course). I learned that I should take more progress pictures so that I do not have such huge walls of text. I learned that I should break out my good camera because these cell phone pics are just not doing this wood justice. 2 Quote Link to comment Share on other sites More sharing options...
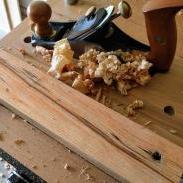
Popular Post Coyote Jim Posted December 30, 2017 Author Popular Post Report Share Posted December 30, 2017 Now to finish that desk. So I think what I will do is just put a clear finish on the top of the desk to make that Alder Wood look just as good as it can. As for the base, I have put a lot of thought into this, agonizing over it. I think I have been way over thinking it, I just need to keep this simple. Because I used such cheap and ugly wood for the base I decided that I just need to cover it up. I'm going to paint it black. Here is the top with a couple of coats of poly. I am using "wipe-on" poly, which is basically diluted brush on poly. Thinning the poly out makes it so you can apply it with a rag or paper towel instead of a brush, much like the Danish Oil I used on my mom's sign. I hate cleaning brushes. So why not just use Danish Oil? Good question. Poly creates a harder outer layer than Danish Oil, so for a desk top which will see a lot of wear and tear, poly should add more protection. Disaster! See all these little white specks? This is lint that is being left behind by the rag I am using to apply the poly. They are everywhere. I'm hoping that the specks are not completely encapsulated in the poly since the layers are so thin. I got some 600 grit sandpaper and gave the thing a once over. That left behind some sanding dust so I wet a rag with mineral spirits and wiped it clean. So with the surface of the wood still wet with the mineral spirits I sanded it again. I let it dry, wiped it clean, vacuumed the surface and took another look. That seemed fix it! It's not perfectly perfect but the specks are very hard to find. For those who care, here are details about putting on the finish. The first coat of poly was a very heavy coat, but the thirsty wood soaked most of it up. Waited 5ish hours for that to dry then added a second coat that was pretty thin. Then I waited 24 hours for that to dry and did a dry sand with 600 grit sandpaper, wiped that clean, then hit it with 3 more coats waiting 4 to 5 hours between coats. This is when I noticed all the lint, did a dry sand, then a wet sand and added a very heavy coat. That makes 6 total coats of poly. And now the top is done! I really like all the knot holes and how the grain of the wood swirls around them. On to the base. Like I said, the wood I used is not all that attractive so I am just going to paint it. The paint guy at Lowes said I would most likely get a smoother/better finish if I used the professional grade spray paint. But before we get to painting I need to modify the cabinet a little bit. It is just an inch or so too deep. You can see in this picture the cabinet is just a bit deeper than the top. Also, this picture makes me realize that this desk would have looked a million times better if I went with a waterfall edge, but at the time I started I had no idea what a waterfall edge even was. I am only a couple months into this but I have learned SO much. Making the cabinet shallower is an easy fix using the table saw. Here are some pictures of me table sawing like a champion. I first trimmed down the sides with the shelves still in it then I removed the shelves and trimmed those. What I should have done at this point is to test fit it to see if I liked how the top and the cabinet looked now that I trimmed it, but I didn't. Hope that does not come back to haunt me. Also, apparently I make a scowly face when I am using the table saw. I don't want to use a knob or a handle for cabinet door. I would rather have a bevel on the inside of the non-hinged side of the door. I could do this on the table saw but the wood is all uneven (really regretting that I went "rustic" on this desk) so the cut would also be uneven. Well my wife got me a block plane for my birthday (Stanley #9.5 if you were curious). They say block planes are fantastic for creating a bevel. I have never used one of these before. After a tiny bit of YouTube on how to actually use one I dove right in. Here I am planing like a champion! It turns out that "they" are right, this block plane is cutting the bevel perfectly. I have a lot of control over the angle of the bevel as well as evening out high and low spots. Oh yeah. That is the back side of the door. I was testing different stains to see if I liked any of them. The answer was no. The hand plane creates all these super cool wood curlies. I don't think that "wood curlies" is the real name for them but that is the name I am giving them. After a minute or two of planing I have a pretty good bevel on the inside edge of the door now. This turned out just how I wanted it to. Almost a shame that I hate this door and will most likely replace it in the near future. On to painting! I started with the underside of shelves and the back side of the door. That way I can get the hang of it on these parts and any mistakes I made will not be seen. I then moved onto the cabinet then the legs. That is when I ran out of paint, because one coat is not going to do it. With only one coat I am leaving behind a lot of streaks. I'm so close I can taste it (and I can also taste a lot of the paint I breathed in). I picked up some more paint and finished painting the base. So the finish is...okay. Actually it's down right terrible. I have no idea if it was the paint or if it was me (probably me) but the spray paint left a VERY rough finish. These boards feel like sandpaper. I kind of hate it. But I'm too close now, there is no turning back. To assemble all the parts of the base and attach it to the top of the desk I put the top upside down and used the underside of the top as a workbench, and assembled the base upside down as well. So lots of measuring and pocket screwing later the base went together pretty well. The cabinet is still a tiny bit deeper than I would like but it does not stick out the front and the back like it did before. The last step of assembly is to put some hinges on the doors, I also put one of those magnet thingies on the inside that keeps it closed. And with that, it was FINELY done. I like the wood on black combination. By far the best part of this desk is the alder wood top. All the knots and swirly grain make it look awesome. It even feels nice to the touch. My dad had told me that I would regret putting all the dents and dings in the top, when he told me that, I was sure that he was wrong, but he wasn't. I hate that he is right all the time. All in all I like it, but it could have been MUCH MUCH better, mainly the finish on the base. Did I mention how terrible it is? Well it's terrible. So what did I learn on this one? A lot, for starters, I don't like "rustic". I think this whole rustic and reclaimed pallet wood fad that is going on right now is just an excuse to do shoddy work. This desk looks good, but it would look a thousand times better if all the boards were strait and all the joints and angles were perfect and clean. One thing about this desk is that it's "rusticness" hides a LOT of the errors I made. I think that I can chalk a lot of these flaws and errors up to this being my first ever real woodworking project and with no know how and without proper tools it was a good idea for me to make this "rustic" instead of "fine". I am a long way away from "fine" woodworking, I still have a lot more to learn. That was kind of the point when I started though, to just jump in and learn something, and I have learned a LOT. I would have to say that that is my favorite thing about this desk, this desk opened my eyes to a whole world that I had no idea I was in love with. Kudos to you if you read this whole thing. I know it is long. I hope my completely noob approach is able to help someone. I have a couple more projects that are not quite so long that I will be posting in the future. Any feedback would be appreciated, even if you just want to make fun of me for being so clueless. Trust me, looking back on this project and seeing how green I was makes me laugh a bit at myself (not that I am much less green now). Anyway, thanks for reading and having a look. 3 Quote Link to comment Share on other sites More sharing options...
wtnhighlander Posted December 30, 2017 Report Share Posted December 30, 2017 A sharp block plane is such a satisfying tool to use! 1 Quote Link to comment Share on other sites More sharing options...
kyokahn Posted January 2, 2018 Report Share Posted January 2, 2018 Well, that was a fun read. Welcome to woodworking, Jim. That's also how I've learned, by messing things up just enough. And that's also how most of us go about acquiring tools, every new tool looks like a need when you have a project for it. I have, however, avoided pocket screws and anything "rustic", I just don't like them. To be fair, the desk isn't bad. You wanted a desk that would work as a desk, and it does, you wanted a rustic look and you got it. Your standards just changed too quickly as you learned more On 12/30/2017 at 10:31 AM, Coyote Jim said: for starters, I don't like "rustic". I think this whole rustic and reclaimed pallet wood fad that is going on right now is just an excuse to do shoddy work Oh man, you'll feel right at home in this forum. On 12/30/2017 at 10:31 AM, Coyote Jim said: I think that I can chalk a lot of these flaws and errors up to this being my first ever real woodworking project No worries, you'll make more, and consequently learn to cover them better. On 12/30/2017 at 10:31 AM, Coyote Jim said: These boards feel like sandpaper. I kind of hate it. Spray paints love a base coat and sanding in between coats, especially when used on wood. Had this happen to me last week, never used spray paint on wood before so yeah... +1 paint experience. 2 Quote Link to comment Share on other sites More sharing options...
drzaius Posted January 2, 2018 Report Share Posted January 2, 2018 You're off to a great start Jim. Those are neat projects & you've obviously learned a ton of important lessons from these, like rustic is crap & most staining of wood is ill advised. Looking forward to more from you. 2 Quote Link to comment Share on other sites More sharing options...
Popular Post RichardA Posted January 3, 2018 Popular Post Report Share Posted January 3, 2018 For the first shot outa the box you didn't do to bad. I hope you have something to put on the desk top that's flat, writing anything on those boards are going to punch holes in the paper. Keep it up, you'll get a lot better as time passes. 3 Quote Link to comment Share on other sites More sharing options...


Recommended Posts
Join the conversation
You can post now and register later. If you have an account, sign in now to post with your account.