Kevmc Posted March 30, 2012 Report Share Posted March 30, 2012 In the end it didn't look to crazy. I made my chop out of pauduk. The two holes drilled from the front of the chop I fillled with pauduk dowels. The four other holes I used hickory dowels. I will say that I am very glad I didn't build the bench out of hickory or hard maple. Even planing the stock to make the dowels was a bit of a workout compared to the soft maple. I am glad I heeded the advice of Jamel and others about soft maple. Quote Link to comment Share on other sites More sharing options...
Barron Posted March 30, 2012 Report Share Posted March 30, 2012 I seem to need a great deal of practice drilling holes in the right location. On this project I have had to plug at least four of my holes and as sawdusty says, plugging an re-drilling works great. For my mis-drills either the 3/8" or 1/4" plugs were fine, and all of the plugs are covered by hardware, so no one outside the guild will ever know. In addition to my drilling problems I have some less than beautiful mortises (although after some careful work on the tenons I have a tight fit), and I had to re-create one long rail after I routed the groove on the wrong side, and when marking for the bolts I had that rail in upside down - which meant the hole in the leg didn't match the hole in the rail. Anyway, the new rail came out great. Its been a great learning experience, and since the shop is detached from the house my wife, dogs and cat didn't have to hear the many, many bad words (some may have been in French) that I screamed out on finding these errors. With all of that, I should have the top on the legs by the end of the day. If I don't have to fix too many more mistakes. Quote Link to comment Share on other sites More sharing options...
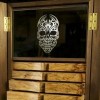
konkers Posted March 31, 2012 Report Share Posted March 31, 2012 Last Sunday I had, what I hope for all of us to be the worst accident of this project. I was planing some twist out of a leg when my bench top (all 8' x 2' x 4" of it) slid off one of the sawhorses and fell on my foot. I iced it and got and xray. Thankfully there were no broken bones and 6 days later my foot's only a little sore. From now on I'll be immobilizing the bench on the saw horses. Quote Link to comment Share on other sites More sharing options...
fransikaner Posted March 31, 2012 Report Share Posted March 31, 2012 WOW. Glad you're ok. I'll bet your mind was racing in Hyperdrive Sensurround as this went down. Quote Link to comment Share on other sites More sharing options...
konkers Posted March 31, 2012 Report Share Posted March 31, 2012 WOW. Glad you're ok. I'll bet your mind was racing in Hyperdrive Sensurround as this went down. It's funny, because if you look at the back of the picture, you can see that I placed my jointer plane that I was using away safely. I don't remember doing that. -Erik Quote Link to comment Share on other sites More sharing options...
TFPtrader Posted March 31, 2012 Report Share Posted March 31, 2012 Yo! - Bonkers Konkers You're one lucky dude. That slab could of mangled you for life. If I were you, I would tac weld that slab to the horses until you get it on it's own leg base. Hope you're not moving that thing around by yourself, that's a perfect recipe for a hernia. Glad you came out of that alright, Whewww! Just goes to show you though, that a mans set of tools is like a child to a mother. And my Dad always told me, don't mess with motherhood, it is more powerful than you can imagine. Your tools are in good hands and that is one happy jointer plane right now, lol . Hope your feeling better and be safe for the rest of your build. A good lesson for all on this one. Art K. Quote Link to comment Share on other sites More sharing options...
allencrane Posted April 3, 2012 Report Share Posted April 3, 2012 Glad you're okay, Konkers. Like my grandfather used to say, "It's all fun and games until someone drops a workbench on their foot." Here's a new one...while drilling the holes for the parallel guide tenon into the leg vise mortise, I set the drawbore offset at 1/8" so it would snug down really tight, like I did the legs. However...when I did the legs, I was using an oak dowel going into soft maple. For my leg vise and parallel guide, I'm using a much harder wood - mesquite (it's about 3-4 times harder on the Janka scale than soft maple or oak). The oak dowels went in okay...for the first inch or so, then since there was no give in the mesquite, the tapping with the hammer began to widen the dowel stock, making it even harder to drive in. Then I hit the drawbore offset, and the dowel had no choice, but to split. Not sure what was harder...the metal hammer head or the mesquite tenon. Both oak dowels split like I was ramming them into concrete. At any rate, it was a full recovery: I drilled out the dowels and will try again tomorrow, this time with slightly more slack and less offset. Quote Link to comment Share on other sites More sharing options...
Vic Posted April 3, 2012 Report Share Posted April 3, 2012 Last Sunday I had, what I hope for all of us to be the worst accident of this project. I was planing some twist out of a leg when my bench top (all 8' x 2' x 4" of it) slid off one of the sawhorses and fell on my foot. I iced it and got and xray. Thankfully there were no broken bones and 6 days later my foot's only a little sore. From now on I'll be immobilizing the bench on the saw horses. Holy Shite, Batman!! I had a few close calls with my slabs, too. Glad nothing was broken. Quote Link to comment Share on other sites More sharing options...
Vic Posted April 3, 2012 Report Share Posted April 3, 2012 Glad you're okay, Konkers. Like my grandfather used to say, "It's all fun and games until someone drops a workbench on their foot." Here's a new one...while drilling the holes for the parallel guide tenon into the leg vise mortise, I set the drawbore offset at 1/8" so it would snug down really tight, like I did the legs. However...when I did the legs, I was using an oak dowel going into soft maple. For my leg vise and parallel guide, I'm using a much harder wood - mesquite (it's about 3-4 times harder on the Janka scale than soft maple or oak). The oak dowels went in okay...for the first inch or so, then since there was no give in the mesquite, the tapping with the hammer began to widen the dowel stock, making it even harder to drive in. Then I hit the drawbore offset, and the dowel had no choice, but to split. Not sure what was harder...the metal hammer head or the mesquite tenon. Both oak dowels split like I was ramming them into concrete. At any rate, it was a full recovery: I drilled out the dowels and will try again tomorrow, this time with slightly more slack and less offset. Yea, I think 1/32" to 1/16" is max for the offset, depending on the hardness of tenon stock. Quote Link to comment Share on other sites More sharing options...
allencrane Posted April 7, 2012 Report Share Posted April 7, 2012 Thanks Vic. I reduced the drawbore distance to 1/32 and it was super snug to hammer in, but at least it didn't split! All is well. Quote Link to comment Share on other sites More sharing options...
allencrane Posted April 7, 2012 Report Share Posted April 7, 2012 So Konkers...how's the foot? Does this mean you're going with the knock-down joinery as well? :-P Quote Link to comment Share on other sites More sharing options...
MikeDunlop Posted May 4, 2012 Report Share Posted May 4, 2012 I made my first big cock up today. I failed to draw the circle around the washer on the tail vise flange before drilling the countersink for the washer. I now have a large countersink in the upper left hole instead of the center hole. Trying to decide how to fix it now. fill it with Epoxy? Resaw 1" off and glue another board on? problem is that my tenon cavity fits perfectly, otherwise I would just make another end cap. Ughhhhh! any ideas???? Mike Quote Link to comment Share on other sites More sharing options...
allencrane Posted May 5, 2012 Report Share Posted May 5, 2012 I made my first big cock up today. I failed to draw the circle around the washer on the tail vise flange before drilling the countersink for the washer. I now have a large countersink in the upper left hole instead of the center hole. Trying to decide how to fix it now. fill it with Epoxy? Resaw 1" off and glue another board on? problem is that my tenon cavity fits perfectly, otherwise I would just make another end cap. Ughhhhh! any ideas???? Mike Hi Mike, any chance you could post some pics of the problem? I'm sure that the guild members would have some good suggestions if they could see the issue visually. Good luck! Allen Quote Link to comment Share on other sites More sharing options...
Kevmc Posted May 5, 2012 Report Share Posted May 5, 2012 I made my first big cock up today. I failed to draw the circle around the washer on the tail vise flange before drilling the countersink for the washer. I now have a large countersink in the upper left hole instead of the center hole. Trying to decide how to fix it now. fill it with Epoxy? Resaw 1" off and glue another board on? problem is that my tenon cavity fits perfectly, otherwise I would just make another end cap. Ughhhhh! any ideas???? Mike If you read earlier posts in this thread I did a similar thing not once but twice except in my situation I drilled the entire hole wrong . If its just the countersink I would square off the countersink and then fill it with a piece of wood that fis in the now square hole. You Can plane it flush with the outside of tail vice Quote Link to comment Share on other sites More sharing options...
Trip Posted May 5, 2012 Report Share Posted May 5, 2012 ==> Resaw 1" off if i understand what you did, the countersink is only supposed to be about 3/16. I would just plane the 3/16 off and have a slightly thinner endcap. You really don't need the full 3 7/8". Quote Link to comment Share on other sites More sharing options...
TFPtrader Posted May 7, 2012 Report Share Posted May 7, 2012 I made my first big cock up today. I failed to draw the circle around the washer on the tail vise flange before drilling the countersink for the washer. I now have a large countersink in the upper left hole instead of the center hole. Trying to decide how to fix it now. fill it with Epoxy? Resaw 1" off and glue another board on? problem is that my tenon cavity fits perfectly, otherwise I would just make another end cap. Ughhhhh! any ideas???? Mike Mmmm, that's a tough one Mike. The end cap is a focal point when your looking at the completed bench. There is also a lot of things going on with this particular piece of the bench. If you look at the "Front Slab" tab in sketchup, you'll see some dimensions referenced off the end cap. These are important, because what you don't see in this tab is the fact that the end of the tail vise rail comes right up to the side of the bench leg. The cavity for the vise screw is a calculated measurement to accommodate the length of the screw. Also the dovetails end up in this piece as well. I wouldn't fool around with the measurements in this area of the bench. It could be more trouble than it's worth. If your concerned about aesthetics and don't want any problems, I would just make another end cap. Chalk this one up to practice. After building this bench myself, that's the decision I would make if I were in your shoes. Sorry about that, it's just an important piece to get right. If the vise is installed right, you'll understand a lot better once you spin the wheel. BenchCrafted hardware is very nice stuff. Good luck Art K. Quote Link to comment Share on other sites More sharing options...
Trip Posted May 7, 2012 Report Share Posted May 7, 2012 The finished milled thickness of the 12/4 stock (width is the same as the bench thickness) of the end cap is not all that critical -- probably up to +-1/2 inch without too much of an issue. Off the top of my head, the thread length of the tail vice install screws (it's only a partial thread) and the length of the screw cavity come into play. You can make the dovetails any size you like within reason. I bet my cap is only 2 1/2" and it’s fine. Quote Link to comment Share on other sites More sharing options...
MikeDunlop Posted May 7, 2012 Report Share Posted May 7, 2012 I appreciate all the advice. Knowing that every time I looked at the endcap in the future I would see the error, I simply did not want to deal with it. I decided that I had plenty of wood to simply make another end cap. while fitting the second end cap to the salb tenon I shaved a little more off the tenon, however the tenon is still better than 1 1/4" thick and fits nicely. Chalk this up to experience and hopeflly it will be a LONG time before I do that again. Quote Link to comment Share on other sites More sharing options...
Trip Posted May 7, 2012 Report Share Posted May 7, 2012 Got to keep telling yourself...It's just a bench... Quote Link to comment Share on other sites More sharing options...
Vic Posted May 7, 2012 Report Share Posted May 7, 2012 One of the first things I did when I finished my bench was put a couple good sings in the top. It's liberating to do that right from the start. Then it becomes a real user. (null) Quote Link to comment Share on other sites More sharing options...
Trip Posted May 7, 2012 Report Share Posted May 7, 2012 sort of like giving a car to a teenager? Quote Link to comment Share on other sites More sharing options...
Barron Posted May 8, 2012 Report Share Posted May 8, 2012 Another advantage of making the new cap is you can use the first one to practice cutting the dovetails. I did about three practice runs using a 'spare' end cap and a short cut off piece milled to the same thickness as the bench. I cut the tails once, and then after each practice pin cut I just trimmed the cap to give me a new surface to practice on. The practice really helped give me a final product I am proud of, and saved having to redo the cap or living with rough fit. Other parts of the construction were more difficult, but its the dovetails that everyone seems to notice - even before the slick vises. Quote Link to comment Share on other sites More sharing options...


Recommended Posts
Join the conversation
You can post now and register later. If you have an account, sign in now to post with your account.