pghmyn Posted March 3, 2014 Report Posted March 3, 2014 Not saying you should have, because this thing is amazing already. But out of curiosity, would a sliding dovetail provide enough strength to skip the block? In your opinion, as you said you want it to just be a backup if the dado works it way loose. Quote
dwacker Posted March 3, 2014 Report Posted March 3, 2014 For liability I would stick with the supports. Im pretty sure you are really supposed to use steel rung supports which are the typical steel rods with threaded ends even if you put plugs over the hardware holes. I've done a few of these over the years all for senior living centers and they all had to have steel rung supports @ 250lbs center load. You can burry the rods and hardware. Quote
wdwerker Posted March 5, 2014 Author Report Posted March 5, 2014 We got the staircase glued up and all the blocks in place today . I only glued the center of each tread so the wood can move if it needs to. Quote
wdwerker Posted March 5, 2014 Author Report Posted March 5, 2014 One spot of glue in the center of each block under the treads, tacked them in place with a 23 gauge pin then screwed them all after we got it clamped up and perfectly square. Quote
wtnhighlander Posted March 5, 2014 Report Posted March 5, 2014 Can't wait to see this come togethet. Might have to swipe your design and build a 'utility' version for my shop. I have a 12' ceiling, and it would be nice to put wall storage up there and still reach it! Quote
wdwerker Posted March 6, 2014 Author Report Posted March 6, 2014 Working on getting all the railings and support posts cut to exact size. Quote
wdwerker Posted March 7, 2014 Author Report Posted March 7, 2014 Got the curved braces on the handrail posts today. Took a few more steps than I had planned but they came out pretty close to perfect. ! The clamping Blokkz I bought wouldn't work in this situation so I used an offcut scrap with the complimentary angle and used some sticky sandpaper to keep it from slipping. Quote
..Kev Posted March 7, 2014 Report Posted March 7, 2014 Thanks for showing those detailed pics Steve! I was a bit curious how you were going to pull that off. Nicely done! Quote
wdwerker Posted March 7, 2014 Author Report Posted March 7, 2014 Kinda tough angle to get a perfect cut with my miter saw. Check for blade clearance with every clamp and proceed with caution. I have used this kind of set up to cut some very long pointed angles. I usually precut the part on the bandsaw so the waste piece is small and doesn't wedge into the fence opening. You can see the cut better with the saw out of the way. Quote
wdwerker Posted March 7, 2014 Author Report Posted March 7, 2014 Saw blade cut wasn't smooth enough for a glue joint so I set up an angled guide for my osselating belt sander . Just a couple seconds sanded it to perfection. Then I had to resand the curved cut outs so all 4 posts matched with the same profile. Used the spindle sander and a 3" drum. Used a 3 1/4" circle template so I had room to grind it into submission. The green tape holds a sample laminate chip in place to prevent accidentally sanding a divot out of the post. Laminate chips are very handy around the shop. Shims, glue scrapers, and now sanding guards. 3 stages, angled part glued on, angle sawed flush with post, and angle sanded ready for the handrail . It sure was a fussy process but 2 matched posts in 2 different lengths was a satisfying result. Quote
Pbmaster11 Posted March 7, 2014 Report Posted March 7, 2014 This is exciting to see come together! keep the updates coming! Quote
wdwerker Posted March 8, 2014 Author Report Posted March 8, 2014 Got one side of the framework and handrail cut and clamped up to mark all the joinery. Lots of work with the domino coming up. Each joint will have at least (2) 8mm dominoes and all the wider joints will have 4 to 6 to handle the weight and stress. I based most of my layout and spacing of the steps on this metal warehouse ladder that I have had for years. Quote
..Kev Posted March 8, 2014 Report Posted March 8, 2014 Looks like lots of head scratching! Looks awesome as usual! Quote
wdwerker Posted March 12, 2014 Author Report Posted March 12, 2014 We all make mistakes. Fixing them is a whole nother level of misery. Put the mortices in the wrong location ! So I glued domino's in place and sawed them off flush after they dried. Cut the proper locations right thru the patch and once it is glued up no one will ever be able to see it. 1 Quote
Warren Hein Posted March 12, 2014 Report Posted March 12, 2014 It's always nice when you make a mistake and it can easily be concealed. Sent from my iPhone using Tapatalk Quote
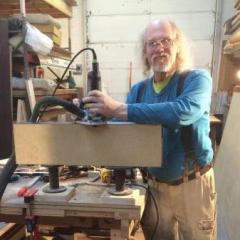
wdwerker Posted March 14, 2014 Author Report Posted March 14, 2014 I was going to route the top of the posts until the reality of how to use a 3/4" radius bit on such a small area on top of an 8' post . So decided to just bevel the top the post at the same angle I cut all the staircase parts. We spent a few hours triple checking all the center lines before cutting the mortices with the Domino. Those Bessey toggle clamps are great for holding parts while you cut all the holes. That's me in the picture. Quote
wdwerker Posted March 14, 2014 Author Report Posted March 14, 2014 Once we had a complete frame cut we dry fitted it to make sure everything would pull up tight and square. The WoodPeckers framing square got a lot of use today. Worked out all the clamping locations on the dry fit pieces and took pictures so I can duplicate it during the glue up. Lots of thought went into the sequence for glue up as well. Once we had 1 side frame clamped up we cut the final parts to build the left side. Quote
chrisphr Posted March 14, 2014 Report Posted March 14, 2014 Dang, that is some intense clamping! Beautiful craftsmanship. Quote
..Kev Posted March 14, 2014 Report Posted March 14, 2014 Absolutely stunning photo documentation! That is pure awesome Steve! Quote
wdwerker Posted March 14, 2014 Author Report Posted March 14, 2014 It is going to be a lot of work with the glue making things slide. Tighten this clamp until the lines match up, then tighten another and they move.... So it's going to be back and forth a lot. But those Blokkz really do the trick ! Every joint pulled up tight and even, no gaps I could see anywhere. Quote


Recommended Posts
Join the conversation
You can post now and register later. If you have an account, sign in now to post with your account.
Note: Your post will require moderator approval before it will be visible.