
Skip to content
View in the app

A better way to browse. Learn more.

Woodworking Forums & Project Advice | Wood Talk Online

A full-screen app on your home screen with push notifications, badges and more.

To install this app on iOS and iPadOS
  1. Tap the Share icon in Safari
  2. Scroll the menu and tap Add to Home Screen.
  3. Tap Add in the top-right corner.
To install this app on Android
  1. Tap the 3-dot menu (⋮) in the top-right corner of the browser.
  2. Tap Add to Home screen or Install app.
  3. Confirm by tapping Install.

Huge Mahogany Coffee Table !
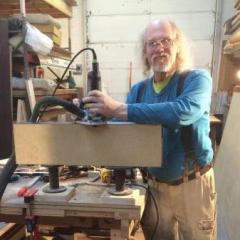
Featured Replies

  • Popular Post

Started a commissioned piece this week and decided to photograph the whole process and post it as a blog on my website. Then figured I could share and practice the post here first.

The table will be 43" x 80" x 17" tall with( 2 ) 31" square glass inserts.

Started out with a big stack of carefully selected 8/4 African Mahogany (Kayaha)

.post-6363-0-30330000-1377960668_thumb.jp

I let it sit in the shop for week before I started work. Sorted out the prettiest and straightest pieces for the long side rails in the top.

Had to work around some twisted pieces and flatten some cupping as well. The table is very contemporary in style and with large boards any twist of cup will show in the joinery.

post-6363-0-13683600-1377960917_thumb.jp

Here is the stack of parts stickered up overnight before I glued up the wider pieces needed for the base.

post-6363-0-19745700-1377961081_thumb.jp

The base of the table has an "I beam shape" made of 2"x 12" planks. Couldn't find any boards that size so I glued them up.

To flatten such large pieces I used my drum sander. Made a carrier board out of 1" MDF put the glued up blank on top and pushed 3 corners down, then filled the gap caused by the twist with playing cards. Split the stack in half and taped them under the high corners. Screwed some "L " shaped blocks at the corners then ran the whole thing through the drum sander to flatten one side. Then flip it over and remove the cards to flatten the other side. You can use this approach with a planer as well, just be careful that your carrier will clear everything before you run it through.

Brilliant!! You and others may have known this method all along but this is the first I have heard it described. I have seen literally dozens of blogs on flattening one side with hand planes to begin powered planing. While I enjoy that method, I see your method to be a tremendous time saver if needed. Thanks!

  • Author

post-6363-0-14216200-1377962036_thumb.jp

This is the flattened parts stickered up ready to be cut to final size. Today we are going to cut the joinery.

The top frame around the 2 glass panels will be 6" wide. Started out with 1 3/4" thick stock. After glue up and flattening I have 1 1/2" to work with. The top will be a big figure 8.

1 1/2" x 6" x 80" rails connected by 3 crosspieces. 6 butt joints with (4) 10mm Domino's.

The legs are 1 1/2 x 12" x 15 1/2. They will get a row of dominoes to attach them to the underside of the top.

Looking forward to this post. My favorite part about the forums is following along builds.

  • Author

Today we started cutting all the parts to exact size. I quickly realized that special care would be needed to keep all the edges square. So I clamped all the matching parts into a set with offcut scraps on the outside. Marked the surface with a pencil, then sanded with 50 , 100, and 120 grit in quick succession.

post-6363-0-75498700-1377998068_thumb.jp

post-6363-0-26052300-1377998574_thumb.jp

Lather , rinse , repeat...... Cleaning up all the edges will save time later but it ate up a couple of hours.

  • Author

After all the edges were cleaned up we trimmed everything to exact size. My energy and focus were slipping so I just clamped up a test fit of the top.

post-6363-0-09439800-1377999045_thumb.jp

Then I set up the parts for the base. A few quick measurements and everything was within a 1/16 !

post-6363-0-08250800-1377999342_thumb.jp

Dripping sweat and afraid of making a mistake I called it a day. It is taking shape nicely I think .

Looking awesome.  I must admit the base has me scratching my head tho without knowing what the final will look like.

  • Author

The legs are standing up in the mock up. They are connected across the floor to each other, with a piece down the middle . The top will be mounted with the legs flush on each corner.

Ok, I think I can see it now..  Looking forward to seeing it in pics!

Looking forward to the finished product! It's gonna be a beauty. I like the idea with the sanding and clamping scraps. I'm gonna try that!

  • Author

160 mortices, (80) 10 mm dominoes and we got it dry fitted together today. I was a little worried the 80" long pieces might sag a little, so I stepped up and stood on the center crosspiece. It only moved 1/8" ! I think once it is all glued up there will be even less flex in all the joints.

post-6363-0-34036400-1378164570_thumb.jp

And only 4 clamps to hold that monstrosity together :)


Looking awesome!

  • Author

I decided to use 4 dominoes on each joint in the top. Simple butt joints have little strength from an end grain glue joint. 4 dominoes gives me 16 square inches of glue surface. If you look closely you can see 2 tenons on each side.

post-6363-0-58246600-1378216062_thumb.jp

Due to the size of this coffee table I wanted the top removable for delivery and easier finishing. I used a row of 4 tenons to attach the legs to the underside of the top. The dominoes will be glued into the legs and loose in the top. I drilled 2 pocket holes for screws to intersect the tenons to lock them in place, clean simple and cheap, no hardware will show through the glass inserts.

post-6363-0-06009600-1378216570_thumb.jp

Interesting!  Pocket screw into a domino, I wouldn't have thought of that.

  • Author

Sanded all the inside faces and places that are hard to get to after its glued up today. Drilled the legs for leveling feet then tackled the big glue up!

post-6363-0-13409000-1378251333_thumb.jp

20 clamps worth about $900 looks something like this. The diagonal ones are to force it to be exactly square. Measure corner to corner, put the clamp across the longer corner , tighten until both measurements are the same.

post-6363-0-31614900-1378251443_thumb.jp

If I were to do a glue-up like that I would have to search out glue with an extra, extra long set time. . . or end up crawling around on the floor babbling.

  • Author

Titebond III which has a slower set and I was on the verge of babbling many times in the couple of hours it took to get the whole thing perfect. Did it in stages got the top clamped up and just right and let it sit 45 minutes while we were assembling the base then the nightmare began, getting the base and top aligned before the glue set.

  • Author

Took the whole thing apart sanded it again to remove clamp marks and scuffs. Stained it once,wipe on and wipe off to get a color base established.

post-6363-0-44704800-1378425509_thumb.jp

Then I sprayed a second coat of stain on to even out the color and make it darker.

post-6363-0-16839200-1378425612_thumb.jp

After wiping the second coat back and drying for an hour or so I sprayed on a couple of coats of sanding sealer.

post-6363-0-88816100-1378425732_thumb.jp

I always make color samples for clients that want a specific color level on their project. Making sure I match the sample is important. The client wanted a pretty dark stain. I made it as dark as possible without completely covering up the grain and losing any variation between the different boards.

post-6363-0-29348200-1378426281_thumb.jp

  • Author

We got more coats of sealer on the table today but we had to build dividers for 2 drawers on the gift shop job. Amazing how much time can be involved in making adjustable dividers for a drawer. Cut multiple parts to a tight accuracy , sand, spray, and sand again. Then assemble and hope for the best fit.

Join the conversation

You can post now and register later. If you have an account, sign in now to post with your account.
Note: Your post will require moderator approval before it will be visible.

Guest
Reply to this topic...

Forum Statistics

  • Total Topics 32.1k
  • Total Posts 437.6k

Member Statistics

  • 26,011 Total Members
  • 3,644 Most Online
  • bobtjanitor Newest Member ·

Account

Navigation

Search

Search

Configure browser push notifications

Chrome (Android)
  1. Tap the lock icon next to the address bar.
  2. Tap Permissions → Notifications.
  3. Adjust your preference.
Chrome (Desktop)
  1. Click the padlock icon in the address bar.
  2. Select Site settings.
  3. Find Notifications and adjust your preference.