Popular Post woodbutcher Posted August 1, 2017 Popular Post Report Posted August 1, 2017 Hey WoodTalkOnline, im starting a new project and wanted to do a journal on it. My girlfriend asked me to make her a jewelry box or keepsake box, somewhere to keep her rings, necklaces, things like that. She approved this one. Heres a picture of the box i am making. Picture from Pinterest. Heres the walnut and curly maple I picked out. Im not a great picture taker so if my photos arent adequate im sorry. The walnut has really nice straight grain. The curly maple doesnt have much curl to it. I searched through all the 4/4 they had and this one seemed to have the most. This end has nice curl, but the rest of the board is not this good. The first thing I did was rip the walnut for the box sides to width. That piece to the right is going to be the box sides and the lid sides. Ill rip the lid sides out later. The piece to the left will become the internal parts of the box. Next up, flattening. I dont own a jointer. Its a huge bummer but im getting by. I will be using my no. 4 smoother that I fixed up to flatten out this board. It has a bow to it. Probably took off more than I needed to, but it was one of my first hand flattenings. Walnut sure planes nice. My plane is not that finely tuned and i still got really nice shavings. I got it pretty close, so I ran it through the planer until the other side was flat. I took off about an 1/8th" and ill do a final milling down to 5/8" when I can get a full day in the shop to cut the miters and glue it up. Next was the curly maple. I picked the best looking part of the board and cut it out. I have to glue two pieces together to get enough width for the field of the lid. The hardwood store didnt have much for curly maple. I cut out a part of the board that has consistent curl, and doesnt have a big dark streak through it. This piece is about 25" long and has quite a bit of twist in it. This is the part that has been worrying me. Ive always heard how tricky curly wood is to plane, but I honed my blade and went after it. I found if i plane across the board at a 45 degree angle, I dont get much tearout. The shavings were short, tightly wound shavings. This maple is hard! Its my first time working with maple and wow is it hard and heavy. Much smaller pile of shavings this time. Thats partly because these shavings are so much smaller than they were with the walnut, but flattening this maple went way faster than it did with the walnut. So I either got lucky or Iearned something haha. I ran the maple through the planer to flatten the other face. Like that nick in my planer blades? I dont. Just havent had a chance to get in there and stagger one of the blades. Anyway, thats all I got for now. When I get a free weekend Ill get to cut some miters and make the box. Hopefully you enjoyed this, let me know what you think so far. 7 Quote
Alan G Posted August 1, 2017 Report Posted August 1, 2017 Looking great so far! If you don't care for hand jointing you can always build a sled and joint the boards with that using your planer. 1 Quote
woodbutcher Posted August 1, 2017 Author Report Posted August 1, 2017 2 hours ago, Alan G said: Looking great so far! If you don't care for hand jointing you can always build a sled and joint the boards with that using your planer. Thanks Alan! I thought about making a sled for my planer, just havent really got any traction on making one. Quote
pkinneb Posted August 1, 2017 Report Posted August 1, 2017 Thanks for sharing I look forward to following along. 1 Quote
woodbutcher Posted August 1, 2017 Author Report Posted August 1, 2017 26 minutes ago, pkinneb said: Thanks for sharing I look forward to following along. Thank you! its gonna be a challenging build for me. I am still new to woodworking and this project will feature alot of new techniques to me. Quote
pkinneb Posted August 1, 2017 Report Posted August 1, 2017 41 minutes ago, woodbutcher said: Thank you! its gonna be a challenging build for me. I am still new to woodworking and this project will feature alot of new techniques to me. That's awesome! One of the things I like most about woodworking is that I can challenge myself on every project I build. Whether its a new species of wood, a new joint, finish, technique, etc, etc ,etc. I have been playing with wood most of my life and I learn something new on almost every project. Quote
Coop Posted August 2, 2017 Report Posted August 2, 2017 Doug Stowe has several books, one in particular is Basic Box Making, that shows how to build something real similiar, in case you're wondering how to do the lid separation, cleats, etc.. Splines was what I was looking for. Thanks 1 Quote
Eric. Posted August 2, 2017 Report Posted August 2, 2017 She'll love that. If it were me I'd lose the feet and contrasting splines. But that's me. 1 Quote
Llama Posted August 2, 2017 Report Posted August 2, 2017 2 minutes ago, Eric. said: She'll love that. If it were me I'd lose the feet and contrasting splines. But that's me. Accurate. Quote
woodbutcher Posted August 2, 2017 Author Report Posted August 2, 2017 11 hours ago, K Cooper said: Doug Stowe has several books, one in particular is Basic Box Making, that shows how to build something real similiar, in case you're wondering how to do the lid separation, cleats, etc.. Splines was what I was looking for. Thanks Ill have to check that out! Quote
woodbutcher Posted August 2, 2017 Author Report Posted August 2, 2017 10 hours ago, Eric. said: She'll love that. If it were me I'd lose the feet and contrasting splines. But that's me. I really like the feet and the splines Quote
Eric. Posted August 2, 2017 Report Posted August 2, 2017 Just now, woodbutcher said: I really like the feet and the splines You won't in five years. Quote
woodbutcher Posted August 2, 2017 Author Report Posted August 2, 2017 1 hour ago, Eric. said: You won't in five years. Maybe by then ill be confident enough to make a box with dovetails! Quote
Eric. Posted August 2, 2017 Report Posted August 2, 2017 3 minutes ago, woodbutcher said: Maybe by then ill be confident enough to make a box with dovetails! I'm just saying there are other ways to reinforce a miter that are either completely hidden or more subtle. I just personally find those splines totally distracting. I would want the contrasting top and the pull to be the focal points of the box. When I look at the one you posted all I see are the feet and the splines...just too busy visually. Too much adornment. IMO Food for thought. 1 Quote
woodbutcher Posted August 2, 2017 Author Report Posted August 2, 2017 22 minutes ago, Eric. said: I'm just saying there are other ways to reinforce a miter that are either completely hidden or more subtle. I just personally find those splines totally distracting. I would want the contrasting top and the pull to be the focal points of the box. When I look at the one you posted all I see are the feet and the splines...just too busy visually. Too much adornment. IMO Food for thought. Well I really appreciate your perspective Eric and ill keep it in mind. Youve got a better trained eye for this sort of thing than I. Tell you what. Ill make the box and the lid first, and have a real life visual of how it looks without the splines and feet. Im going to use splines regardless, but if i agree that it looks better without contrast, ill go ahead and use walnut for the splines so they dont stand out. The feet I can easily go one way or the other. Ultimately though, all the design decisions are with my girlfriend, the recipient of the box. Once she sees the box in front of her, she may agree that it looks best without all the contrast. 1 Quote
pkinneb Posted August 2, 2017 Report Posted August 2, 2017 5 hours ago, woodbutcher said: I really like the feet and the splines I agree I really like the splines...I think the feet if kept need a different profile or something the appear a bit too bulky to me or like they were an after thought. 2 Quote
Popular Post woodbutcher Posted August 7, 2017 Author Popular Post Report Posted August 7, 2017 Well I got some time in the shop today, I actually got more done than I anticipated. How often does that happen? First time ever for me I think. Anyway, I started by reflattening the walnut, but i dont really think i got it real flat the first time. I ran the board through the planer to flatten the other side I take it down to final width, 5/8." Next I cut the walnut to length, 10 1/2" for the front and back, 6 1/2" for the sides. I made a pretty sweet jig for cutting the miters so I dont have to tip the blade. I originally made the jig to do double duty, cut miters, and cut the splines, but I made a design change after a while and screwed my last miter bar to the underside. I feel alot safer using it now. The design is based off of one I saw in Wood magazine. I took the design and put my own touch on it. So here it is. Here it is in action. Heres the first round of miters. I cut the miters on the other ends, then ripped the lid pieces out. I cut a dado for the plywood bottom. I cut the plywood for the bottom, then did a dryfit. I taped off the what will be the inside corners, then spread some glue on and put the box together. Glue ups are intense haha. Even this small one had me sweatin. I have more to post, ill put those up a little later. 5 Quote
shaneymack Posted August 7, 2017 Report Posted August 7, 2017 I agree I really like the splines...I think the feet if kept need a different profile or something the appear a bit too bulky to me or like they were an after thought. I agree as well. I really like the splines. I look forward to seeing this box come together. Keep us up to date. Sent from my SM-N910W8 using Tapatalk 1 Quote
Coop Posted August 7, 2017 Report Posted August 7, 2017 20 minutes ago, bleedinblue said: Splines yes, feet no. I agree. A 30-45* bevel on the bottom edges will look like there's feet somewhere. Quote
wtnhighlander Posted August 7, 2017 Report Posted August 7, 2017 Nice jig! I'm a bit surprised you found 2 of those plastic speed squares that were accurate enough to give such good results, though. I usually have no such luck. 1 Quote
woodbutcher Posted August 7, 2017 Author Report Posted August 7, 2017 1 hour ago, wtnhighlander said: Nice jig! I'm a bit surprised you found 2 of those plastic speed squares that were accurate enough to give such good results, though. I usually have no such luck. Surprised me too! Cheap 4 dollar squares from Home Depot and they are bang on square using my method. Draw a line, flip the square over, draw a line on top of the first. Comes out perfect on both squares. 1 Quote
woodbutcher Posted August 9, 2017 Author Report Posted August 9, 2017 Thanks Lester. Getting quite a bit done on it this week, havent had time to put the pictures up here. Great work on the mission style table by the way. Quote
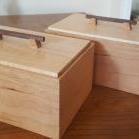
Popular Post woodbutcher Posted August 10, 2017 Author Popular Post Report Posted August 10, 2017 Well im finally getting around to posting the rest of what I got done last Sunday. I had to do a glue up with the maple to get the width i needed. Heres the panel. And I cut it to size. Now comes one of the more daunting tasks of this build for me, doing the grooves in the lid perimeter pieces and the panel. Lots of sneaking up on the fit, and test pieces yielded pretty good results. Oh yeah i ran the cove in the lid perimeter pieces on my homemade router table. Now we can see what this things gonna look like. Should have pulled the tape off, my bad. Thats it for now, more to come in the next few days. 4 Quote


Recommended Posts
Join the conversation
You can post now and register later. If you have an account, sign in now to post with your account.
Note: Your post will require moderator approval before it will be visible.