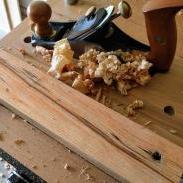
Popular Post Coyote Jim Posted September 9, 2019 Popular Post Report Share Posted September 9, 2019 I absolutely love making small boxes and it had been a while since I last made one. As you guys know, boxes are awesome because you get to practice joinery and do experiments on something small scale so if you screw up a part you will only be wasting a small piece instead of something large like the entire leg of a trestle table. I'm getting close to being done on what I have titled The Up-Side Down Right-Side Up Placebo Box. (The "Up-Side Down Right-Side Up" part I will explain later.) The box will be used to house some essential oils which I like to tease my wife and call them placebo oils. It is beyond the scope of this journal to get into whether essential oils actually work because of the placebo effect, or if they work because of like....science or whatever. Many of them do seem to work for me, though there is a really good chance they are only working because of the placebo effect, but as long as they work I don't care why they are working. I'm not done with this box yet but here are a couple of pictures to start off with of the dry assembly with not handle on the lid. Gives you a sense of the over-all look. I was shooting for a Japanese-ish style look. I think I pulled that off. This design started off with bad drawings. I used the technique that Mike Pekovich wrote about in his book that many of you have recommended. (I recommend it also.) The one where you make lots of small drawings and do them fast with very little detail. That way you can crank out lots of different designs in a small amount of time. Doing this I quickly identified what I did and did not like. Once I had a design concept figured out I measured some placebo bottles to figure out the overall inside dimensions. This concludes the planning part of this project, I'm more of a fly by the seat of your pants kind of guy. And with that, it was time to make saw dust. Here is the board I am making this box out of. This is teak that is approximately 3/4" thick. I did not buy this board because as most of you folks know teak prices are kind of on the high side. I got this board from a local guitar maker. He had come to me because he needed a wrap done on a guitar for some event (for my day job I own a sign company so wrapping vehicles and other things is a big part of what we do) and he needed it in a hurry. Once we were done with the wrap he asked what he owed me, well if you know any guitar makers then you know all of them have a collection wood that they "will make something out of some day", so I told him that he had to pay me in wood. He gave me this piece of teak (which has some kind of oil finish on it in the picture) a smaller highly figured piece of teak and some canary wood. It pays to be friends with guitar makers. I started by just milling up the box sides. I did all this by hand except I used my planer for thicknessing. To get the ends true for the dovetails I needed to use a shooting board. Which was a problem because I don't have a shooting board. I have been meaning to make one for like a year or so, I just had not gotten around to doing it. No time like the present I guess. It went pretty well too. I was very surprised that I was able to get it square of the very first try. Have a look! There is zero light leaking through. Feels good man. Dovetail time. I'm a dirty cheater and am using the Katz-Moses jig. This is only the second time attempting dovetails and I just don't have the hours to dedicate to properly learning hand cut dovetails. So stop judging me jerks! The above is my dovetail gear. What you don't see is any chisels. That is because I don't have dovetail chisels, I know you don't NEED dovetail chisels, but I wanted some, so I made some. I posted this in another thread but for those of you who did not see that post I'm going to post it here as well. I had just read The Joiner and the Cabinet Maker (which I can't recommend enough by the way) and in that book Christopher Schwarz explains how to make dovetail chisels. According to Schwarz you can just get some cheap chisels and file the side bevels to a point. Schwarz also says that you can use a grinder or a belt sander instead of a file as long as you don't let the metal get so hot it looses it's temper. So, equipped with some extremely high quality Harbor Freight chisels I got to grinding with a belt sander. The chisel on the left is the before and the two on the right are the after. Took me maybe 10 minutes tops. Honing and sharpening took longer. They are not pretty, not by a long shot. But they work like a charm! It was hot that day by the way. I had a swamp cooler running in my garage that is why the humidity is so high. Yes, here in Arizona, 30% humidity is high. The coping saw (or maybe that is a fret saw, I always get the two confused) was from Harbor Freight as well. I assumed that it would be worthless and frustrating, but the thing cut like a champ. This teak is extremely easy to work this so I don't know how the saw would have performed in something less forgiving like oak, but I am happy with how well it did. Dry fit of the sides. I did not plan to make these proud dovetails, I wanted the dovetails to be just a tiny bit proud so that I could just plane them flush. I added 1/16" which was way too much. But I love it. So I'm keeping it. With the sides of the box done it's time to make the bottom and the top. These are pretty simple in that both of them are just rectangles with a bevel, but I was having trouble wrapping my head around how to do the bevel. Then I remembered something I heard in a Youtube video at some point. I can't remember who said it (I think it was either the Highland Woodworker or maybe William Ng) but it has stuck with me for years. I'm not going to quote it but it was something to the effect of: If you break woodworking down to it's simplest form, woodworking is just marking a line, and cutting to the line. No matter if you are using a chisel or a table saw or sand paper or a plane, you are just marking a line, and cutting to the line. So that's what I did. I marked the line.... And started cutting. At first I was using just a block plane but that was pretty slow so I switched to the scrub plane and things started really moving fast. I would get close with the scrub plane.... Then finished off with the block plane. Not only did this work very well, it was pretty fun too. It went surprisingly fast. The scrub plane even worked really well on the end grain. Sides, top and bottom are done, all that is left is the internals and the lid handle. I used some of my kids construction paper to mock up some lid handles and finally landed on this one: This is where the "Up-Side Down Right-Side Up" part of the name come in. At some point while figuring out the lid hand I had set the box down up-side down. I stared at this up-side down box for a really really long time. I was stuck, I had no idea which look I preferred. I like both looks so much. In the end I decided to keep this thing the original way I had designed it. I figured that since this was such a simple build it would be no problem for me to build an up-side down version in the future. Dowels were used to attache the lid. We are pretty much caught up to the present. All that's left is to put finish on. My finishing schedule is two coats of boiled linseed oil followed by Danish Oil and finished off with paste wax. I have used this finish before and it is by far my favorite. The only down side is that it takes a really long time. Even in the desert heat I have to wait multiple days between coats. After the finish is all cured and done I'll get some glamour photos and report back. Thanks for sticking with me. 8 Quote Link to comment Share on other sites More sharing options...
pkinneb Posted September 9, 2019 Report Share Posted September 9, 2019 Those are some nice looking dovetails sir!! Love the box too 1 1 Quote Link to comment Share on other sites More sharing options...
Chestnut Posted September 10, 2019 Report Share Posted September 10, 2019 Nice work! I like the idea of the box being upside down. but right side up. My one comment is the edges look sharp, if that's what you are going for that's great. To me it seems like they all could benefit from a quite hit of 220 grit sand paper by hand just to give them a bit more of a soft look. (also not sure if you are completely done it looks like there are still some pencil lines) 1 Quote Link to comment Share on other sites More sharing options...
Coyote Jim Posted September 10, 2019 Author Report Share Posted September 10, 2019 Not done yet. I still need finish prep and finish. So I'll be softening all the edges and the smoothing plane will remove all the pencils. One of the goals on this was no power tools and no sand paper. I did use the thickness planer but that's all. Quote Link to comment Share on other sites More sharing options...
Popular Post Coyote Jim Posted September 15, 2019 Author Popular Post Report Share Posted September 15, 2019 I finally got a chance to take some glamour shots. What do you think. 5 Quote Link to comment Share on other sites More sharing options...
pkinneb Posted September 15, 2019 Report Share Posted September 15, 2019 Very nice!! Great execution on the joints and other details! 1 Quote Link to comment Share on other sites More sharing options...
Ronn W Posted September 15, 2019 Report Share Posted September 15, 2019 Very nice work. I like a box that has a surprise or pint of interest and the round holes in the lid line grabbed me. Nice work. I like it. I know a wood worker that made a dovetail chisel like you did only he took one of his Lie Neilson chisels to the grinder. 1 Quote Link to comment Share on other sites More sharing options...
Tpt life Posted September 15, 2019 Report Share Posted September 15, 2019 I like it! Nicely done! Whats the light patch in the end of the handle? 1 Quote Link to comment Share on other sites More sharing options...
Popular Post Coyote Jim Posted September 15, 2019 Author Popular Post Report Share Posted September 15, 2019 12 minutes ago, Ronn W said: I know a wood worker that made a dovetail chisel like you did only he took one of his Lie Neilson chisels to the grinder. That is a bold man. 6 minutes ago, Tpt life said: Whats the light patch in the end of the handle? It's glue that I did not notice before I finished it. You can only see it if your eyes are open though. My blind friend is none the wiser about it. 1 4 Quote Link to comment Share on other sites More sharing options...
Coop Posted September 16, 2019 Report Share Posted September 16, 2019 I think the box is really cool! I can only be reminded of what Steve’s reply would be, should he still be around, about the essential oils! 1 Quote Link to comment Share on other sites More sharing options...
Chip Sawdust Posted September 16, 2019 Report Share Posted September 16, 2019 It looks good! You’re right boxes can be fun to do and not a lot of material risk. 1 Quote Link to comment Share on other sites More sharing options...
gee-dub Posted September 16, 2019 Report Share Posted September 16, 2019 Well done. That came out very nice. 1 Quote Link to comment Share on other sites More sharing options...


Recommended Posts
Join the conversation
You can post now and register later. If you have an account, sign in now to post with your account.