..Kev Posted August 3, 2015 Report Share Posted August 3, 2015 So, finally home and get a chance to get going on this project. This project will not be going at my normal pace as I get to work on it with my dad. Ultimately, the chair is intended for use with his great grandbaby so, should be a pretty cool experience. Baby isn't expected yet (and I hope they wait a good long while) but, we're going to get a good jump on the game. I showed all the templates and stuff in the guild section so, no need to show it again here. We'll just start with the rough lumber that was ordered from Bell Forest. Here we go! 2 Quote Link to comment Share on other sites More sharing options...
Woodenskye Posted August 3, 2015 Report Share Posted August 3, 2015 Looking forward to following this. That is a nice stack of lumber, hopefully you took advantage of the free shipping! Quote Link to comment Share on other sites More sharing options...
Mick S Posted August 3, 2015 Report Share Posted August 3, 2015 Really looking forward to this build. Like many folks on the forum, it's on my shallow bucket list. Honey do list for the new house has to be whittled down first - Chest of drawers, bookcase(s), kitchen cabs, pantry, closet built-ins... Did I say shallow? Quote Link to comment Share on other sites More sharing options...
shaneymack Posted August 3, 2015 Report Share Posted August 3, 2015 Awesome!!! I've been waiting for this! I bought all the patterns as well. Just gotta get that chest of drawers done then its on to this! I will be watching closely! Quote Link to comment Share on other sites More sharing options...
..Kev Posted August 3, 2015 Author Report Share Posted August 3, 2015 Looking forward to following this. That is a nice stack of lumber, hopefully you took advantage of the free shipping! Unfortunately, no. I actually bought the lumber a couple months ago and it's just been sitting like that in my shop. Quote Link to comment Share on other sites More sharing options...
Llama Posted August 3, 2015 Report Share Posted August 3, 2015 Get to chopping some wood! Quote Link to comment Share on other sites More sharing options...
..Kev Posted August 4, 2015 Author Report Share Posted August 4, 2015 Get to chopping some wood! Started a desk project today.. Will probably get back to the Chair on Wednesday or Thursday when my dad is available.I'll run a separate journal for the desk. Quote Link to comment Share on other sites More sharing options...
TerryMcK Posted August 4, 2015 Report Share Posted August 4, 2015 Watching the chair build with interest Kev. Quote Link to comment Share on other sites More sharing options...
Brendon_t Posted August 5, 2015 Report Share Posted August 5, 2015 I've been waiting for this to kick off. Definately following this one. Quote Link to comment Share on other sites More sharing options...
Strasberry Posted August 5, 2015 Report Share Posted August 5, 2015 I've been waiting for this to kick off. Definately following this one. Same here! Quote Link to comment Share on other sites More sharing options...
..Kev Posted August 5, 2015 Author Report Share Posted August 5, 2015 Roughed out the parts. There were a couple of boards that were cupped to the point they may not be useable. Fortunately, I have a bunch of 8/4 on hand and access to much more. Color match could be the only difficult part. Quote Link to comment Share on other sites More sharing options...
shaneymack Posted August 5, 2015 Report Share Posted August 5, 2015 Roughed out the parts. There were a couple of boards that were cupped to the point they may not be useable. Fortunately, I have a bunch of 8/4 on hand and access to much more. Color match could be the only difficult part. Looking good Kev! Youre shop looks pretty amazing. Have you ever posted pics of the shop or a shop tour video? I love seeing into other peoples shops. Also, is that a trion or carvex you are using? Do you like it? 1 Quote Link to comment Share on other sites More sharing options...
..Kev Posted August 5, 2015 Author Report Share Posted August 5, 2015 It's the Trion.. It's ok.. Could certainly do the same thing with a cheaper jig saw.I think I have a shop tour in the shop section of the forums.. There's been a few additions since the last tour. Maybe I'll update it once these projects are finished up. Quote Link to comment Share on other sites More sharing options...
shaneymack Posted August 5, 2015 Report Share Posted August 5, 2015 It's the Trion.. It's ok.. Could certainly do the same thing with a cheaper jig saw.I think I have a shop tour in the shop section of the forums.. There's been a few additions since the last tour. Maybe I'll update it once these projects are finished up. Awesome i will look for it! Quote Link to comment Share on other sites More sharing options...
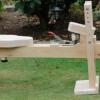
..Kev Posted August 5, 2015 Author Report Share Posted August 5, 2015 Seat material milled, cut, beveled, and dominos cut. Dry fit. That's enough for one day.. Back to the other projects for a bit.. Quote Link to comment Share on other sites More sharing options...
shaneymack Posted August 5, 2015 Report Share Posted August 5, 2015 Sweet. What will you be using to do the sculpting? Quote Link to comment Share on other sites More sharing options...
..Kev Posted August 5, 2015 Author Report Share Posted August 5, 2015 Pretty much the same stuff as Marc. 1 Quote Link to comment Share on other sites More sharing options...
Brendon_t Posted August 6, 2015 Report Share Posted August 6, 2015 Did you blade tilt to do the coopering or use the jointer? I'm planning to try my coopering skills on a little bench before I do a rocker seat Quote Link to comment Share on other sites More sharing options...
..Kev Posted August 6, 2015 Author Report Share Posted August 6, 2015 (edited) Did you blade tilt to do the coopering or use the jointer? I'm planning to try my coopering skills on a little bench before I do a rocker seatI tilted the TS blade and then ran it across the jointerReally not too difficult. Edited August 6, 2015 by TIODS Quote Link to comment Share on other sites More sharing options...
Brendon_t Posted August 6, 2015 Report Share Posted August 6, 2015 You used both? Did you match the jointer fence angle with a bevel Guage? Quote Link to comment Share on other sites More sharing options...
..Kev Posted August 6, 2015 Author Report Share Posted August 6, 2015 (edited) Was pretty clean coming off the saw so, didn't use the jointer fence. I think Marc did it the same way. Came out super clean, no gaps. Edited August 6, 2015 by TIODS Quote Link to comment Share on other sites More sharing options...
Coop Posted August 6, 2015 Report Share Posted August 6, 2015 Kev, I see no burn marks from the ts what so ever. However, there may be some from ripping that are not shown. Do you attribute that to your blade, saw, or both? What blade do you use? Quote Link to comment Share on other sites More sharing options...
..Kev Posted August 6, 2015 Author Report Share Posted August 6, 2015 It's a woodworker 2.. No burning issues at all. Quote Link to comment Share on other sites More sharing options...
shaneymack Posted August 6, 2015 Report Share Posted August 6, 2015 Kev, I see no burn marks from the ts what so ever. However, there may be some from ripping that are not shown. Do you attribute that to your blade, saw, or both? What blade do you use?Ive seen burn marks come off saws with really good blades. I think the fence to blade alignment and feed rate play a bigger role than the blade itself. Quote Link to comment Share on other sites More sharing options...
..Kev Posted August 6, 2015 Author Report Share Posted August 6, 2015 It certainly plays a part in it! I've been super happy with the saw, fence, and blade combination. Quote Link to comment Share on other sites More sharing options...


Recommended Posts
Join the conversation
You can post now and register later. If you have an account, sign in now to post with your account.