
Skip to content
View in the app

A better way to browse. Learn more.

Wood Talk Online

A full-screen app on your home screen with push notifications, badges and more.

To install this app on iOS and iPadOS
  1. Tap the Share icon in Safari
  2. Scroll the menu and tap Add to Home Screen.
  3. Tap Add in the top-right corner.
To install this app on Android
  1. Tap the 3-dot menu (⋮) in the top-right corner of the browser.
  2. Tap Add to Home screen or Install app.
  3. Confirm by tapping Install.

Sculptured Lectern/Music Stand
Featured Replies

  • Author
6 hours ago, wdwerker said:

I hope all of your music stands end up on the same stage in front of musicians who have skills on par with your woodworking !  These all need to be signed and dated !

Thanks Steve, and yes these guys will be signed and dated!

  • Replies 59
  • Views 18.5k
  • Created
  • Last Reply

Top Posters In This Topic

Most Popular Posts

  • Been a busy week with family, work, milling lumber, visiting friends....   Finally had a few minutes today to assemble my first of three music stands. I finished with 3 coats of oil/varnish and 2 coat

  • Made some progress today in the shop, many focused on the legs Each leg is made of 2 pieces joined at a 45 degree angle. The plan calls for 2 dowels but I'll use 1 domino in each. I milled and sized a

  • This project was just what I expected, a definite challenge, and I mean that in a good way. Haven't moved very quickly with this, but I am moving forward. Here's some progress; Some more shaping

Posted Images

  • Author
  • Popular Post

Amazon delivered the 1" bradpt bit I needed and onward I moved with this project. Got the goosenecks cut out and 1" holes drilled in them and shaped them, which was a decent amount of rasp work. With double sided tape I adhered the spline to the back of the top piece of the lectern and got my first look at the assembled project. Since I'm going with a solid top the design of this is completely up to me and I'm enjoying that. Tweaked the top and I think I've developed a clean look. Also did some lathe work to turn the knobs that cover the 1" oak dowel that joins the gooseneck to the top. 

Here are the goosenecks after bandsaw work and 1" holes drilled;

1968926468_musicstand22.jpg.20edb15a58dacb740ce370408077fff4.jpg

Shaping begins, used a 1/2" roundover bit for the outside of the gooseneck but it was all rasp work for inside of the necks;

1058515507_musicstand23.jpg.d277ec55fa4b1282772130dc23f3c39a.jpg

1144922667_musicstand24.jpg.de2192ee92db2de3e48c81df2cc42809.jpg

Next it was on to the support spline for the top, I put it on with doublesided tape and to me my first effort looked clunky and bulky;

2006434287_musicstand25.jpg.deedb6d1cd41572f4af8529f00393e79.jpg

Here it is with my first look at the stand assembled, again the support spline looks out of place;

1849402099_musicstand26.jpg.a2b394e2ec7c432d04038233f83f5206.jpg

After some sculpting I developed a shape I liked better;

1380559844_musicstand27.jpg.886d084e3aff64dad6194b795b235705.jpg

862946505_musicstand28.jpg.237295632e057eb6d0318f1fc167a17e.jpg

Next i shaped and worked the maple knobs that cover the ends of the 1" dowel that holds the top pieces together. At first these looked bulky to me, but again after some sculpting I like the look I was able to develop;

12374442_musicstand29.jpg.d815336082baf5d0530e5490cbd6246a.jpg

Moved to the top next and worked out some design details here. Here's a full view and a few details I decided on where subtle sides, rounded bottom ledge and a slight curved top profile. Another thing you'll notice in this pic is the grain match is not great. I concentrated on matching the grain on the other side of the top, that is the side that I thought was most visible. The grain in thjis view is just the way it worked out by concentrating on the opposite side.

1072888220_musicstand30.jpg.20a01ab2e86058f88620fba78c908041.jpg

In this pic you see the subtle side pieces fade out as your eye moves to the top edge. 

929903636_musicstand31.jpg.de99d8e02e3a1a649289d06e6a69d586.jpg

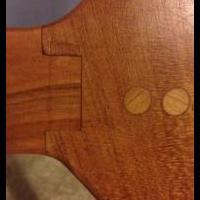
Finally for the top I drove a few 1/8" brass dowels in from the bottom to add a little support to the bottom ledge;

25123206_musicstand32.jpg.f0b1860de9525735fbc42dc847acb46e.jpg

Last thing i did for the day was glue the support spline to the top and glue the gooseneck to the support post;

739757877_musicstand34.jpg.bf330d3f3eb6ea2175f51d51ba75b1eb.jpg

1700759515_musicstand33.jpg.7e1c3bb280c417d30c1ff031fec1cf59.jpg

Shaping and final sanding today and then the same process for the other two stands. 

Thanks for looking.


Bmac you do some amazing work!! One question on the top are the sides and the bottom applied or is that all one piece?

  • Author
5 minutes ago, pkinneb said:

Bmac you do some amazing work!! One question on the top are the sides and the bottom applied or is that all one piece?

Those pieces are actually applied. I saved the post glueup cutoffs from the top piece when I squared/sized it and used those for the bottom ledge. That is why the grain match is so consistent. The side pieces where cutoffs from the top prior to the glueup of the panel.

8 minutes ago, Bmac said:

Those pieces are actually applied. I saved the post glueup cutoffs from the top piece when I squared/sized it and used those for the bottom ledge. That is why the grain match is so consistent. The side pieces where cutoffs from the top prior to the glueup of the panel.

Nice job!! It was hard to tell, I was like dang how did he get that so even LOL

Would you be willing to give me a week long class? this is awesome work!

  • Author
9 hours ago, Chestnut said:

Would you be willing to give me a week long class? this is awesome work!

Thanks Drew, really enjoying this project and it has been challenging. I'm not sure how much I can teach you, sometimes I feel like I'm just figuring out. When it comes to power and hand sculpting I feel like I learn something each time in the shop. Doing the Malloof Rocker with Marc's video instruction really gave me a sound base, and I enjoyed that project so much that I keep picking new projects to build off that.

As for a week long class we should meet at Spanky's for a week, do woodworking, get some nice stock, and you bring Megan's food. In the end I'll likely learn more from you and Spanky than I could ever teach.

Bmac a week long class sounds good. But I may need more than a week on woodworking. I could use the extra help sawmilling, you and chestnut can run the mill. It’s alittle step up from a chainsaw mill.  But I think chestnut needs to chainsaw mill two logs before he can saw on a bandmill. :)

  • Author
  • Popular Post

Been a busy week with family, work, milling lumber, visiting friends....   Finally had a few minutes today to assemble my first of three music stands. I finished with 3 coats of oil/varnish and 2 coats of oil/wax. Once finished I could attach the top to the main post. It's attached with a 1" dowel. The plan calls for it to be glued, but you need to be careful glue doesn't get on the part of the dowel that the top pivots on. 

I used epoxy, put the dowel most of the way through, put glue in the hole one the one side and glue on the dowel on the other side.

377630603_musicstand36.jpg.fc09013caa8f7dd45607be8ba8225353.jpg

Then pushed it through. You don't see any glue on these pics because I took the pics during my dry run.

719662295_musicstand35.jpg.0cbb20215c0f7366f1ce6cb3c1a2c23d.jpg

Then I put epoxy inside the decorative knobs that attach to the 1" support dowel. I also drove 1" long 1/8" diameter  brass dowels into the 1" dowel to further secure the support dowel and as a protection against the unlikely instance the glue bond gives out between the support dowel and the support post;

1178290797_musicstand37.jpg.daf28f68a5894c09efd2e01be6034b93.jpg

Those brass dowels are basically invisible when the support post is lowered into position;

1554530383_musicstand38.jpg.5a48b27916b4bb11fc9f76b17e67885c.jpg

Here's the stand all finished;

1983303170_musicstand39.jpg.175348dd9e2e998bcaaf242377f36e42.jpg

Liked the way the detail ended up with the decorative dowel caps;

559595897_musicstand41.jpg.b9e875fcdb000664a7b2b95eea4b90fb.jpg

Top of the stand, subtle curve at the top outline, subtle side pieces and a blended bottom ledge;

391326634_musicstand43.jpg.24daacde0065d4ce76e28adc958eed3b.jpg

738802426_musicstand44.jpg.4e9412196918f1c8bdb7f6d9425b8eb1.jpg

Vibrant grain and color on the top. This is the part of the stand that is most visible and I was pretty satisfied with the way the grain matched up, but I was even happier with the great figure;

983739056_musicstand45.jpg.fd766291b543a18f86994d5f8e99d973.jpg

1032631318_musicstand46.jpg.fef2281043ae8f0c20d3c5adb9721e4b.jpg

This stand is ready for Church tomorrow. Still working on the other two and doing some fun stuff with those stands. I made the other stands basically out of Maple and the tops will be cherry. I'm excited to see how that combination works.

Thanks for looking.

  • Popular Post

Ok those have exceeded the furniture category . You are into the functional sculpture zone . That's a music stand for someone playing a Stradivarius !   I'm  Thinking signed, dated and a serial number with the appropriate insurance appraisal.......

Bmac you should get to sit on the front row at church in the morning.

  • Author
1 hour ago, wdwerker said:

Ok those have exceeded the furniture category . You are into the functional sculpture zone . That's a music stand for someone playing a Stradivarius !   I'm  Thinking signed, dated and a serial number with the appropriate insurance appraisal.......

Thank you for your high praise. I will say this was the most challenging piece I've done so far. Looking forward to completely the other two I'm working on.

Man that walnut is striking with it's color and grain. I'm assuming that we'll get to see all the stands together at some point?

  • Author
3 hours ago, Spanky said:

Bmac you should get to sit on the front row at church in the morning.

No worries there, my wife makes me sit in the front (second row) every Sunday anyway. 

1 hour ago, Chestnut said:

Man that walnut is striking with it's color and grain. I'm assuming that we'll get to see all the stands together at some point?

I plan to get a photo of all three when finished. 

Yes, the colors in that walnut are pretty sweet. Well worth the wait with air dried wood.

Ditto the comments above.  Super nice work!

Bmac did that walnut come from a farm that had cattle running on the farm? I have seen walnut that was cut on a cattle farm that had the same colors.The mineral salt that they feed cattle will make rainbow poplar over time.

  • Author
7 hours ago, Spanky said:

Bmac did that walnut come from a farm that had cattle running on the farm? I have seen walnut that was cut on a cattle farm that had the same colors.The mineral salt that they feed cattle will make rainbow poplar over time.

You are a man that knows your wood and knows your cows. Yes, this Walnut is from the family farm, it was in a hedgerow along a fence line of a cow pasture field. 

I know the vibrant colors will fade as time goes by but I'll enjoy them while I can.

Old country boy, beef farmer, logger, sawmill guy. Makes a well rounded country boy! 

Most people don’t know that about mineral salt. The limestone rocks we have here in the south will make mineral stain in some trees. I like the mineral stain in some of the lumber, but not any oak it will have black streaks in the lumber. Mineral stain a down grade on all logs to the big boys, but not to the woodworkers. I can look at the end of a log and tell you if it has mineral stain in it. So can the guys that buy the logs and they will pay you alot less for them with mineral stain.

6 hours ago, wtnhighlander said:

So now you know why such wood is popular with us poor hobby guys! :D

Ross the mineral stain wood not cheap to the woodworkers they will pay big money for it. Rainbow poplar has been the best selling lumber I have ever cut and I have cut alot of lumber.  Mineral stained walnut sells like new candy too. They are hard to find.

Join the conversation

You can post now and register later. If you have an account, sign in now to post with your account.
Note: Your post will require moderator approval before it will be visible.

Guest
Reply to this topic...

Forum Statistics

  • Total Topics 32.1k
  • Total Posts 437.6k

Member Statistics

  • 26,009 Total Members
  • 3,644 Most Online
  • Joseph b Newest Member ·

Account

Navigation

Search

Search

Configure browser push notifications

Chrome (Android)
  1. Tap the lock icon next to the address bar.
  2. Tap Permissions → Notifications.
  3. Adjust your preference.
Chrome (Desktop)
  1. Click the padlock icon in the address bar.
  2. Select Site settings.
  3. Find Notifications and adjust your preference.