drzaius Posted July 13, 2016 Report Share Posted July 13, 2016 Getting a painted piece to look great is a LOT of work. I was doing some work in a high end house that was in the finishing stages. The painter was working on the mill work trim & at that point had 7 coats of lacquer down. He still had, he figured, 3 coats to go with spot putty & sanding between each coat. It already looked really good at that point. Quote Link to comment Share on other sites More sharing options...
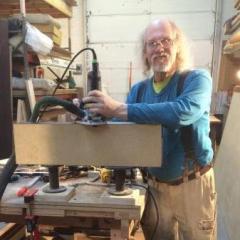
Popular Post wdwerker Posted July 14, 2016 Author Popular Post Report Share Posted July 14, 2016 For most of the final sanding I used 320 Brilliant discs on my ETS-150/3. I went through quite a few discs due to the paper loading up with the primer, even after more than 16 hours since it was sprayed . But careful machine sanding left a beautifully smooth surface. 2 coats of finish left a final finish I am happy with. This shot was taken with all the spotlights off so there is much less glare. We have another project to start and I want this piece to sit for a day or 2 before we wrap it up and deliver & install. Most finishes can be easily damaged if roughly handled too soon after finishing . Wrapped ,loaded, unloaded and delivered to a 4th floor condo for installation creates plenty of chances for a scratch or dent so I am playing it safe. 6 Quote Link to comment Share on other sites More sharing options...
Eric. Posted July 14, 2016 Report Share Posted July 14, 2016 Pro work, as expected. Nice job Steve. 1 Quote Link to comment Share on other sites More sharing options...
..Kev Posted July 14, 2016 Report Share Posted July 14, 2016 Awesome as always Steve! Quote Link to comment Share on other sites More sharing options...
Llama Posted July 14, 2016 Report Share Posted July 14, 2016 Awesome job! Thanks for documenting this along the way! Quote Link to comment Share on other sites More sharing options...
rodger. Posted July 14, 2016 Report Share Posted July 14, 2016 Beauty - thanks for sharing your expertise. Quote Link to comment Share on other sites More sharing options...
shaneymack Posted July 14, 2016 Report Share Posted July 14, 2016 Great job Steve, you're the bomb diggity. Sent from my SM-N910W8 using Tapatalk Quote Link to comment Share on other sites More sharing options...
wtnhighlander Posted July 14, 2016 Report Share Posted July 14, 2016 Steve, this is a very good illustration of how much detail is required to perfectly execute what most lay-people would think is a simple project. I hope your client appreciates it as much as we do! 1 Quote Link to comment Share on other sites More sharing options...
wdwerker Posted July 14, 2016 Author Report Share Posted July 14, 2016 Thanks for the good words ! I explained to the client that the simplicity and effort in the finish were a major portion of the price. They are also getting copies of all these pictures. I will be taking pictures of the install as well. Quote Link to comment Share on other sites More sharing options...
Chet Posted July 14, 2016 Report Share Posted July 14, 2016 Really looking great Steve. Looking forward to see it installed. Quote Link to comment Share on other sites More sharing options...
Chestnut Posted July 14, 2016 Report Share Posted July 14, 2016 Great job Steve. I have a friend that wants me to make them a shelf for their new house in the next couple months. This will be very helpful, thanks! Quote Link to comment Share on other sites More sharing options...
Popular Post wdwerker Posted July 20, 2016 Author Popular Post Report Share Posted July 20, 2016 We got the shelves delivered and installed today. Found the studs with my ball magnets. Marked and drilled the mounting strips for screws. 3 1/2" screw through 1 1/2" strip plus 1/2" of drywall leaves 1 1/2" in the stud. I think 12 screws will hold any load they put on it. We had to cut the top off of the return air grill. You can see the screws we used to mount the shelves to the mounting strips. 1 3/4" screws beside each stud screw. If you hang floating shelves above eye level put the screws in from the top. Client is going to put books and small objects on the lower shelf, vases and sculpture on top and a large piece of art on the wall above. They are going to send me pictures when they get everything in place. 5 Quote Link to comment Share on other sites More sharing options...
Coop Posted July 20, 2016 Report Share Posted July 20, 2016 Looks great Steve! Was the height that critical that you had to shave the air register? Quote Link to comment Share on other sites More sharing options...
wdwerker Posted July 20, 2016 Author Report Share Posted July 20, 2016 We cut about 2 1/2" off the grill. The top ended up at 37" high. The client wanted it at 36" high but that would have required patching part of the return which would show inside the shelves, and I don't do drywall if I can avoid it. Quote Link to comment Share on other sites More sharing options...
..Kev Posted July 20, 2016 Report Share Posted July 20, 2016 Super clean work Steve! Expected nothing less! Quote Link to comment Share on other sites More sharing options...
pkinneb Posted July 20, 2016 Report Share Posted July 20, 2016 Very nice! Quote Link to comment Share on other sites More sharing options...
davewyo Posted July 20, 2016 Report Share Posted July 20, 2016 Beautifully done! Thanks for the step by step. I wouldn't have thought that the finish would be that involved. It's great to see the painstaking attention you take in pulling something like this off. Quote Link to comment Share on other sites More sharing options...
shaneymack Posted July 20, 2016 Report Share Posted July 20, 2016 As usual, perfection, Steve. Thanks for sharing this with us. Sent from my SM-N910W8 using Tapatalk Quote Link to comment Share on other sites More sharing options...
Chet Posted July 20, 2016 Report Share Posted July 20, 2016 Looks great Steve. Do my eyes deceive or will that glass door hit the corner of the shelf? Quote Link to comment Share on other sites More sharing options...
wdwerker Posted July 20, 2016 Author Report Share Posted July 20, 2016 They are going to put on 3 of those hinge pin adjustable door stops to keep the door from whacking into the shelves. Quote Link to comment Share on other sites More sharing options...
wtnhighlander Posted July 20, 2016 Report Share Posted July 20, 2016 Steve, thanks for the finishing details on this. That knowledge will be very helpful in the finishing stages of the cabinet I am currently journaling. Quote Link to comment Share on other sites More sharing options...
drzaius Posted July 20, 2016 Report Share Posted July 20, 2016 10 hours ago, wdwerker said: They are going to put on 3 of those hinge pin adjustable door stops to keep the door from whacking into the shelves. Those things are horrible & almost guaranteed to ruin the door/hinge/jamb. Not a lot of options there though. Maybe if there was one on each of the 4 hinges & they were carefully adjusted and they don't let kids use that door. Quote Link to comment Share on other sites More sharing options...
wdwerker Posted July 20, 2016 Author Report Share Posted July 20, 2016 I hadn't noticed there are 4 hinges. Empty nest couple so no kids. It's not the only door to the porch/balcony either. They could also put a floor mounted stop. I will mention this to them. Thanks to all for bringing this up. Quote Link to comment Share on other sites More sharing options...
Chestnut Posted July 21, 2016 Report Share Posted July 21, 2016 Looks awesome and clean. One question. Did you put screws in from the underside on both shelves or just the bottom or just the top? Quote Link to comment Share on other sites More sharing options...
gee-dub Posted July 21, 2016 Report Share Posted July 21, 2016 A very clean, modern look. With that color the walls could change and the piece would still (or even more so) stand out as a focal point. Very well done. 1 Quote Link to comment Share on other sites More sharing options...


Recommended Posts
Join the conversation
You can post now and register later. If you have an account, sign in now to post with your account.