
Skip to content
View in the app

A better way to browse. Learn more.

Woodworking Forums & Project Advice | Wood Talk Online

A full-screen app on your home screen with push notifications, badges and more.

To install this app on iOS and iPadOS
  1. Tap the Share icon in Safari
  2. Scroll the menu and tap Add to Home Screen.
  3. Tap Add in the top-right corner.
To install this app on Android
  1. Tap the 3-dot menu (⋮) in the top-right corner of the browser.
  2. Tap Add to Home screen or Install app.
  3. Confirm by tapping Install.

Sculptured Maloof Rocker, My Favorite Build
Featured Replies

  • Popular Post

Loving the fact that Coop just posted a great Maloof Low Back Chair. Always happy to see other sculptured pieces on here. Just finished this Walnut Maloof Rocker, as I've stated before, my hands down favorite all time woodworking project. This is my third rocker and my first in walnut. I started this rocker the last week in April, and it was a double build, meaning I am building 2 at the same time. The other rocker is cherry and it's still in the shop waiting for final assembly and final sanding. For those that have done these, you know that final sanding is no small or simple step. My sanding goes to 400 grit before applying finish and I use 0000 steel wool to apply a few coats of the finish. My finish of preference is 3 coats oil/poly mix followed by 2 coats oil/wax mix. Didn't use Osmo for this rocker, but I will likely try that on a rocker in the future. 

This build went very smoothly, minimal issues. I've have some small details I'm learning to refine with this build, I'll try to point out those small details, but for the most part it looks like most other Maloof rockers. Countless times I've looked up this rocker online and through other venues, and it's easy to make this piece look clunky. I've seen it done with flawless woodworking technique, but it didn't look organic, flowing, or inviting. Hopefully you don't think that when you look at this piece.

82710301_WalRocker1.jpg.24eb1ba93733d0c58d88b0cde1f99572.jpg

135796418_WalRocker8.jpg.4c7eb89c0abcfa7d8619beb68d3b6883.jpg

A perfect pose, the rocker next to a Maloof style table with a Maloof book to inspire you.

1597612730_WalRocker5.jpg.d72da335effe18d41a50f5c65d111881.jpg


A few details I like in these rockers. First,  I really like the horns, these are time consuming to develop, but worth it in my opinion. Die grinder does a lot of the work, then a lot of scraping and sanding;

1515381988_WalRocker3.jpg.4cc1f15bb6e6d597ef2da62f5f872103.jpg

The crest of the head rest needs to flow into the front of the horn, you can see the line from the front edge of the horn detail blend into the top edge of the head rest.

1858084474_WalnutRocker4.jpg.12ce99993fea960538a4ae995bbadc13.jpg

Head rest and horn from the front, again a line that needs to flow; 

2020710903_WalRocker11.jpg.0523c2d413bb5f4de551cb87c652cf22.jpg

The underside of the headrest to back leg is also an area that takes a lot of work to blend. A rasp and a lot of hand sanding is the only way to get this done.

436505758_WalRocker6.jpg.6f7f769c1d318b9d23c82e990213ed1e.jpg

I like the middle of the headrest to project down, I like this look much better than the continuous sweep you see in a lot of the rockers;

1475812465_WalRocker10.jpg.9ea86d606e2748b68ae7838d06218455.jpg

This side view of the head rest shows the sweep and contours;

239318178_WalRocker17.jpg.5aed1065298d8291dfacfb918fa6b9b2.jpg

The arm to back leg joint is pretty straight forward and easy to shape. Key is to make it look fluid and continuous.

394322512_WalRocker12.jpg.f15881a7433f17ddea76e550815d6079.jpg

The interesting part of this joint is on the inside. This is a common feature seen in the original chair that is often duplicated. This gives the look as if the arm was carved from the back leg. 

654971218_WalRocker2.jpg.50ebac508251197705e5ebf81ca71c4d.jpg

185008633_WalRocker7.jpg.c6fb4671ac68c0da6487832a433253de.jpg

The arm to front leg joint takes a lot of work, as you have end grain and long grain you are blending together. I don't like the big paddle shaped arms you often see on most of these rockers. I like a more narrow arm and with it converging more as it approaches the back leg. The shaping of the arm is a lot of work also, but Marc does a great job in his build guiding one through the process. 

1433202063_WalRocker9.jpg.29f2e6fb659916b7f19161179fcf4f80.jpg

1068741124_WalRocker19.jpg.2759eb0d3fabae4d98ba099919cefdcb.jpg

542122901_WalRocker20.jpg.70b030150d87dc77cb52317a45b9b719.jpg

So much is made of the leg to seat joint in this piece. I find that to be pretty straight forward when you use the paired router bits. Shaping these joints are harder than doing the joint.

1344310063_WalRocker16.jpg.b1a037211dd63a49ddc412ccd4c4d956.jpg

803491150_WalRocker18.jpg.5b4be18f6d828b3da134ea036fe5e011.jpg

And this by far is the toughest area to shape.

979687176_WalRocker15.jpg.891e2a07e0558f6534a1aeaf4023acc4.jpg


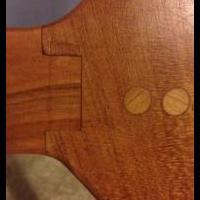
Finally, the leg to rocker joints. The joints that give me the biggest pucker factor. Drilling thru the rocker into the back leg, after you have spent weeks on the chair is the absolute most tense moment of this build. The good thing is after you have shaped the whole chair, shaping the legs to the rocker is one of the easiest areas to shape. 

1623323581_WalRocker14.jpg.133b8fb2de7f2f8f262ce96c93cc0e7e.jpg

The detail I add in the front is from Marc's build and I like it, you leave a little extra in front of the leg to converge that excess into a point, sweeping up from the underside and in from the sides.

633432837_WalRocker13.jpg.96f695a77851a642178c9ff2fa10c1b0.jpg

Thanks for looking.


Rocker looks great! I would like to see one made out curly walnut and tiger hard maple. I have the wood in 8/4 and 9/4. :)


Man, you absolutely nailed it! Great looking chair. Every piece flows into the next like Mr. Maloof intended. 

What Coop said, Sam would be proud, well done sir! post some pictures of the other one when done, i would love to see it

15 hours ago, Bmac said:

Thanks for looking.

Thanks for letting me see.

Have to agree with everyone above.  You have a great eye.

  • Author

Thanks for all the kind words, I've learned a lot after doing so many sculptured pieces, my first attempt was a far cry from where I am now.

13 hours ago, treeslayer said:

What Coop said, Sam would be proud, well done sir! post some pictures of the other one when done, i would love to see it

I'll try to get some photos of that chair also. Taking my time with that one since it's a Christmas present. I will be posting my next rocker build here from start to finish, hopefully sometime in early winter.

15 hours ago, Spanky said:

Rocker looks great! I would like to see one made out curly walnut and tiger hard maple. I have the wood in 8/4 and 9/4. :)


And yes, my next rocker will be made with Rickey's tiger hard maple. He has already delivered it to me and it's waiting patiently in the shop. 

Does making multiples at the same time save significant time, or is all the work in the shaping, sanding, etc, so it's not a big savings?

  • Author
36 minutes ago, bglenden said:

Does making multiples at the same time save significant time, or is all the work in the shaping, sanding, etc, so it's not a big savings?

When doing multiples, cutting the pieces, the dados, routing the joints, fitting the joints, and doing the glue ups, you save a good amt if time.

For the shaping I save some time too since I get into the groove and have the shape I’m shooting for in my mind. Like shaping the arms, it goes much quicker when doing more than one.

But you are correct, doing multiples, you do not really save time when it comes to the sanding

I always enjoy looking at your chair builds! Fantastic work!

What is the comfort level of these chairs? I've sat in many wooden rockers, some are very comfortable some are very uncomfortable. I'm not sure what exactly makes the difference (maybe it is many small things).

  • Author
8 hours ago, JohnG said:

I always enjoy looking at your chair builds! Fantastic work!

What is the comfort level of these chairs? I've sat in many wooden rockers, some are very comfortable some are very uncomfortable. I'm not sure what exactly makes the difference (maybe it is many small things).

With out a doubt, the most comfortable wooden chair I’ve ever sat in. That is not an exaggeration. 

I think the carved/sculptured seat, the backrest angle, and the shape of the back spindles make the chair so comfortable. Maloof got this chair right.

9 hours ago, JohnG said:

I always enjoy looking at your chair builds! Fantastic work!

What is the comfort level of these chairs? I've sat in many wooden rockers, some are very comfortable some are very uncomfortable. I'm not sure what exactly makes the difference (maybe it is many small things).

I will second Bmac's response..  Probably the most comfortable chair in my house.

The difference is continuing to carve and shape until it's right.

  • 4 weeks later...

Thanks for posting the detail shots. That will help me in a couple weeks when i really dig into the carving aspect. Im probably 40-50% of the way there on my first rocker, and already i envision there will be a second. This is so wildly different from anything else ive ever done, that the second one will automatically be considerably easier and better. 


The rear leg joint was a complete PITA for me. I dont know what  happened on my piece, but i couldnt lay the leg flat on a surface without the bottom portion of the leg contacting the same surface before the 6° portion was laying flat on the surface. this made it impossible to use my table saw and dado stack to create the mortise, because the reference would be all jacked up. I had to mock up a router jig that worked pretty well. Somehow one of my joints is a perfectly tight friction fit and the other one is a smidgen loose. So far, the build isnt as complex as it looks. The additional tools and accessories needed have been a little eye opening. I think im in for a grand in random bits and bobs to complete this project. 

  • Author
1 hour ago, Pwk5017 said:

Thanks for posting the detail shots. That will help me in a couple weeks when i really dig into the carving aspect. Im probably 40-50% of the way there on my first rocker, and already i envision there will be a second. This is so wildly different from anything else ive ever done, that the second one will automatically be considerably easier and better. 


The rear leg joint was a complete PITA for me. I dont know what  happened on my piece, but i couldnt lay the leg flat on a surface without the bottom portion of the leg contacting the same surface before the 6° portion was laying flat on the surface. this made it impossible to use my table saw and dado stack to create the mortise, because the reference would be all jacked up. I had to mock up a router jig that worked pretty well. Somehow one of my joints is a perfectly tight friction fit and the other one is a smidgen loose. So far, the build isnt as complex as it looks. The additional tools and accessories needed have been a little eye opening. I think im in for a grand in random bits and bobs to complete this project. 

Agree, it's not as complex as it looks, the leg to seat joint with the right router bits are pretty straight forward. I can't quite envison what went wrong with your back leg, but I can tell you I always get confused when cutting that joint. I use double sided tape on the leg to help hold it against the fence.

To me, the shaping of the spindles is pretty tough, a lot of work. 

I once sat in a Maloof rocker, its comfort is enough to convince you to try and build one!


Join the conversation

You can post now and register later. If you have an account, sign in now to post with your account.
Note: Your post will require moderator approval before it will be visible.

Guest
Reply to this topic...

Forum Statistics

  • Total Topics 32.1k
  • Total Posts 437.6k

Member Statistics

  • 26,012 Total Members
  • 3,644 Most Online
  • JAR Newest Member ·

Account

Navigation

Search

Search

Configure browser push notifications

Chrome (Android)
  1. Tap the lock icon next to the address bar.
  2. Tap Permissions → Notifications.
  3. Adjust your preference.
Chrome (Desktop)
  1. Click the padlock icon in the address bar.
  2. Select Site settings.
  3. Find Notifications and adjust your preference.