

Video and Project Showcase
Project showcase and videos. Post video journals in the Journal section
This space is not intended for spam or to drive traffic to your channel/site. If you post a video, please be sure to include a paragraph of text about the video and make sure the video is embedded. The forum usually embeds the video automatically if you drop in the link.
303 topics in this forum
-
The goal of this puzzle is to make three cubes from the given pieces. Although this puzzle only has three pieces, the solution is pretty challenging - mainly due to magnet polarity. Super easy to build. See Build Instructions here: https://www.instructables.com/id/Three-Cube-Puzzle/ Solution: Drawings: Assembled Cut blocks: 1" x 1" x 1/2" thick Marked Center Drilled hole per drawing Inserted Magnets Glued blocks Made from Poplar, Walnut and 3D Print Thanks for viewing. Please let me know if you have any questions.
-
-
- 2 replies
- 5.1k views
-
-
Our church had a men's Beast Feast tonight where they served rabbit, deer, duck, alligator, white perch, elk, and pig. I didn't go but from the looks of the cars my guess is there were 60-70 men in attendance. So I figured some Walnut trivets would be good door prizes and I made three plus a US flag. The trivets are finished with mineral oil and the flag is sprayed with Nitrocellulose lacquer. I used gloss but probably should have used semi-gloss. The flag is about 5" x 10" and the trivets range from about 6" to 7" x 10" to 12". Enjoy! David
-
-
- 3 replies
- 3.3k views
- 1 follower
-
-
Just before Christmas last year our Pastor showed me a quote for new signage at the church. It was for one logo and two 'Worship' signs over the main entrances to the sanctuary. When I saw what was quoted I volunteered to do the signage. They were going to do the signs in metal and the logo would be 48" and vinyl wrapped, also probably metal. I told Bro Terry that I could do the signs but they would be in 1/2" Baltic Birch. His only request was that no grain show on the logo. I found rattle can enamel that matched close enough and used Hammer Tone finish on the letters so they'd look sort of like metal. To completely fill the grain on the logos I used Bondo on the fa…
-
-
- 4 replies
- 4.5k views
- 1 follower
-
-
My daughter is in competitive gymnastics. She had a pretty good year. These are walnut shelves that I attached using hand cut sliding dove tails..... Just kidding, I just screwed them in from the back. The back is cherry ply.
-
-
- 4 replies
- 3.4k views
- 1 follower
-
-
The wife mentioned she wanted a candle holder. I thought "No sweat, I can make something like that piece of cake." Then I came up with this design. "How hard could it be?" Turns out very hard. For such a small project this took me more hours than I am willing to admit.
-
-
- 5 replies
- 3.5k views
-
-
Here's my completed outdoor table. I started a thread asking some advice but figured I'd chuck the final pictures up here. https://www.woodtalkonline.com/topic/30620-outdoor-table-advice/ The frame went together fairly quickly and easily. I used 10x50mm dominos and batten screws (probably shouldn't admit that) for speed. A couple of stopped housing joins were cut by hand so I did brush up on some hand tool skills. Any screw holes were filled with builders bog and the frame was painted with exterior house paint. The base timber was H3 treated pine that I picked up quite cheap - I kind of forgot how soft pine is. Recycled timber (messmate) was used for the …
-
-
- 10 replies
- 4.9k views
- 1 follower
-
-
serving tray with forks for meat and cheese, childs folding chairs, serving tongs, candy dispensers, credential moon pins, didn’t want you guys to think I wasn’t doing anything
-
-
- 15 replies
- 4.5k views
- 1 follower
-
-
This is a fun little puzzle that goes by the name of Golf, Nine Hole and, my favorite, Gopher Hole Puzzle. The goal is to fit all six pieces into the box. The possible combinations make it pretty challenging. See here for build instructions: https://www.instructables.com/id/Gopher-Hole-Puzzle/ Animated Solution: https://youtu.be/ZYHHGRM18a0 Actual Build: https://youtu.be/kbY3dr0G6fo Made from a cedar 1x6 Holes 1.125" Chamfers Parts Pegs 5 Styles CAD Final Pictures
-
- 4 replies
- 3.9k views
- 1 follower
-
-
I have a set of the Paolini Rules that just never made it into my workflow. I'm paying it forward by giving them away and paying for shipping. US entries only.. Directions for entry in the video.. For the record, these are mine. I paid for them and am giving them away.
-
-
- 5 replies
- 3.9k views
-
-
Not exactly a tough project but proved more challenging than I thought it was going to be. Mainly because of the finish (weakest area for me by far). Was great experience though and I am going to practice finishing rather than just try out whatever on an actual project. The floating shelf hardware was great. I had quite a bit of anxiety about getting the holes lined up but technique I talk about in this video makes it a breeze. Hope you all enjoy it. All feedback welcome and appreciated.
-
-
- 11 replies
- 6.8k views
-
-
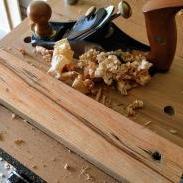
Hello guys, I wanted to show you my last job. I built a mini carpenter workbench. maybe for many it is nothing special but for me that I work in the garage and I have little space it allows me to do carpentry work with more precision but important to be able to use the plane. You can rest it on the bench and fix it with bench vises I hope you like it for the moment I'm satisfied. This the video walktrought https://youtu.be/6Fodk-yAW7M
-
- 2 replies
- 4.6k views
-
-
Hi everyone! I’m an older member who doesn’t post often, but here’s my latest finished piece:
-
-
- 21 replies
- 5.6k views
-
-
Finally home from a long work road trip! Had some catching up to do! A few projects to get done that have been piling up! Only the bathroom vanity was done for YouTube.. 1. Table Lazy Susan and a cutting board for 2 different clients.. 2. A thread storage cabinet for my wife's quilting room 3. Bathroom Vanity for a client. 4. And, a floating picture frame for a family member..
-
-
- 7 replies
- 3.9k views
- 1 follower
-
-
-
I have greatly improved not only the process but the speed at cutting Longworth chucks so I thought I'd do another video. When I first cut these chucks they were taking about 16 minutes per disc followed by 5 minutes or more per disc of hand sanding the edges to clean off the tabs and to round the edge. Occasionally the Baltic Birch would chip where I cut a tab and that was frustrating. Anyway, it's now a fairly refined and efficient process for a small home workshop. It could be improved upon but for now it's working just fine. The tools for the entire process are circular saw to break down the BB, table saw, drill press, CNC, stationary belt sander, drum sander, an…
-
-
- 2 replies
- 3.1k views
- 1 follower
-
-
Been working as a Christmas Elf for the past few weeks, trying to think up some simple gifts. Made some candleholders, a few bigger pieces of furniture, some boxes based on @gee-dub continuous grain boxes, great link here... But @Gary Beasley got me thinking when he was begging for slabs from @Spanky to make some bowls. Well I'm not much of a bowl turner, but with the development of my sculpting skills I thought this might be a great gift idea. Went out to my drying piles where slabs hold down the roofing, lean against the back of a drying shed, and a few extra ones are lying around waiting to be chainsawed into fire wood. I grabbed a w…
-
- 9 replies
- 4.5k views
-
-
I made this bench for my mechanic, in payment for some auotmobile work I needed done. I made a profit from that trade. Curly Cherry and a live edge.
-
-
- 17 replies
- 6.1k views
- 1 follower
-
-
Most all of you saw the Final Gift for my Wife when she passed. She and I agreed that I would build her final resting place. It was a painful and joyous experience. Since then I pondered what was next for me, being alone and old with only a house mouse to share my days. After 4 or 5 months of mourning and praying, and crying, I thought I could help other people with the expense of buying a casket. On average, caskets run about $2500.00 and the sky's the limit from there. We have a local sales site, somewhat like Craigslist, but it's just for Middle Tennessee. You can find anything you want on that site, and it's mostly nice local country folk, for the most par…
-
-
- 43 replies
- 9.2k views
- 1 follower
-
-
Hi Guys, I had some free time and so for my wife I built a new kneading board because the old board was still from her mom and it was now worn out. I used beech scrapwood glue Titebond 3 and oenological vaseline oil. I insert the link for the video.
-
- 1 reply
- 3.6k views
-
-
Our client had a very large family, entertained guests often and had just built a substantial sized home for himself… so he wanted a custom made dining table that was 16 feet long by 48” wide. He wanted it made from oak and be well aged in appearance. I had built a number of large trestle tables before but nothing of this size. I had to calculate the table top’s weight to see how difficult it would be to manipulate in our shop. At 2” thick it was already approaching 900 lbs which would stop my son & I from even turning the table top over (safely). So… I designed it such that the outside edge boards and the bread board ends would be over 2” thick and the great maj…
-
-
- 8 replies
- 4.2k views
-
-
I made a couple of floating shelves for the flag cases I recently completed. I was going to use some brakets that Kev had recommended but saw the article in the recent Fine Woodworking Magazine (issue 277) about making a floating shelf and thought I would try it. I spent $16 dollars on four "L" brackets and $6 dollars on rattle can paint. The wood was 1/4 birch ply and poplar from previous projects.
-
-
- 4 replies
- 3.7k views
-
-
I started this a good while back but chose not to do a build on it as I figured it might go into the fire pit at anytime during the build and it came close several times. My daughter asked for a chair for her desk and I have always wanted to try it so I gave it a go. Initially it was going to be built from some walnut I cut and dried and I figured I would do a prototype from some cherry. After several months of wrestling with it, I don’t foresee a walnut chair in the future. Plans were ordered from Charles Brock and I picked up several pointers from Marc’s rocking chair build. Three coats of ARS glossy and three coats of GF top coat. The only places I’m not real pleased w…
-
-
- 18 replies
- 5.2k views
- 1 follower
-
-
I made this for my niece's new baby boy. Just a small box from Wenge and Oak. I was trying to come up with something a little different for a handle on the lid... his name is Noah.
-
-
- 15 replies
- 4.4k views
- 1 follower
-
-
Had some short pieces of butternut and needed a piece for the church auction, box joints, butternut and walnut, Spanish Cedar interior with a lift out tray, Vertex 90 degree stop hinges, 3 coats ARS satin, thanks for looking and comments and questions are welcome as usual
-
-
- 24 replies
- 6.5k views
- 1 follower
-
-
Just completed this table/bookcase. Made from white oak. Was my first adventure in through tenons. Think they turned out pretty good. Finish was a challenge, tried some tinted shellac, and then bailed out on that. Went with just a oil based stain then some wipe on poly. This will go to the entry way at church to hold bulletins, hand outs and some books.
-
- 14 replies
- 4.8k views
- 1 follower
-















Who's Online (See full list)
Forum Statistics
- Total Topics 32.1k
- Total Posts 437.6k
Member Statistics
- 26,009 Total Members
- 3,644 Most Online
-
Joseph b Newest Member ·
